Tag

egg

Browsing

These gluten-free oatmeal chocolate chip cookies will actually change your life. Crispy on the outside, perfectly soft on the inside, and loaded with melty chocolate. One bowl, simple ingredients, and roughly 20 minutes is all you’ll need to bake up a batch of these healthier melt-in-your-mouth cookies!

a stack of gluten-free oatmeal cookies on an upside down cookie sheet.

What You’ll Need To Make Gluten-Free Oatmeal Chocolate Chip Cookies

  • ONE Bowl – Don’t we just love a one bowl cookie recipe? The one bowl is to baking what the one pan is to cooking. It simply doesn’t get any quicker and easier than these one bowl oatmeal cookies.

  • Oat Flour – We swap regular flour for gluten-free oat flour in this healthier cookie recipe. I especially love baking with oat flour because it’s so cheap and easy to make! You can also of course buy a bag of already made oat flour from the store, but I always recommend saving your money and quickly making your own. To make oat flour, simply blend rolled oats in a blender or food processor until ground into a flour. Then …that’s it! It actually couldn’t get any easier.

  • Rolled Oats – Most, but not all oats are gluten-free, so make sure the ones you buy definitely are! I used these Nature’s Path Gluten-Free Oats in my cookies, but really any brand of rolled oats will work. Old-fashioned, quick cooking, or instant rolled oats will all bake up the same here. However, steel cut or Irish oats are entirely different and won’t work in these gluten-free oatmeal cookies.

  • Chocolate Chips – I used the Enjoy Life Mini Semi-Sweet Chocolate Chips in my cookies, but any chocolate chips would taste delicious. I like Enjoy Life because they’re guaranteed gluten-free, nut-free, and vegan, making them a super safe option when baking for a crowd. Though if you can’t get your hands on any chocolate chips, one cup of a chopped chocolate bar would work just as great!

Tips and Tricks

  • Leave these cookies to rest on their baking sheet once baked. They have a tendency to be super soft and delicate straight out of the oven. Therefore, leave them be for at least 5 minutes before attempting to move them.

  • Swap out the chocolate chips for raisins and you’ve got yourself gluten-free oatmeal raisin cookies! Also, if taking this option, I recommend adding in one teaspoon of cinnamon to your cookie dough for a hint of spice.

  • Store these cookies in an airtight container at room temperate for up to seven days! Also, if after your cookies have cooled you’re still yearning for that fresh-out-of-the-oven cookie experience, simply pop them in the microwave for 10-15 seconds. This’ll give you that irresistibly warm, soft, and gooey-ness you crave!
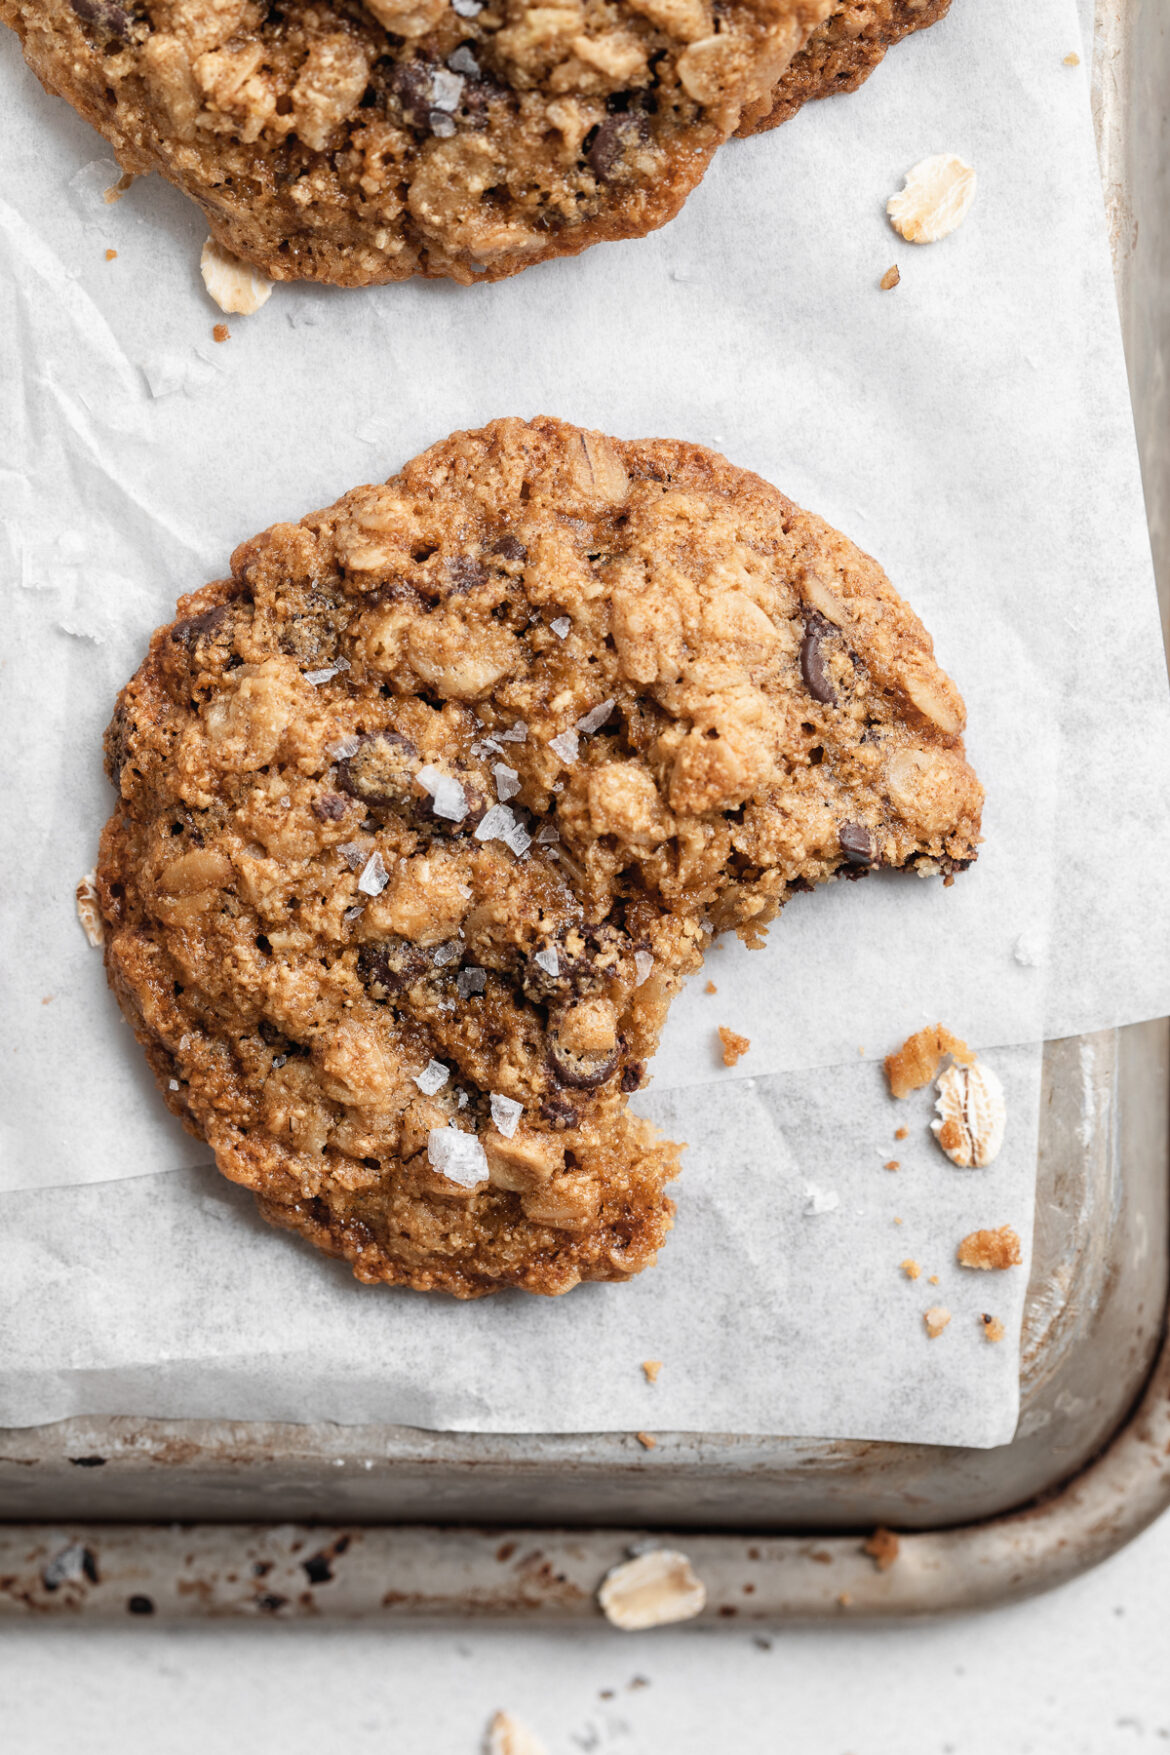
close-up image of a gluten-free oatmeal cookie with a bite taken out

Adjust This Recipe To Your Dietary Needs

  • Make it Dairy-Free: If you know me, you know I always take the dairy-free option! So I made my oatmeal chocolate chip cookies dairy-free by simply replacing the butter in this recipe with non-dairy butter. I use and love the Earth Balance Vegan Buttery sticks for all my dairy-free baking/cooking needs.

  • Make it Vegan: To make these cookies vegan, take the dairy-free option above and use your favorite egg substitute in place of the egg in this easy cookie recipe. While I haven’t tested this version myself just yet, a flax egg might work. Also, this Bob’s Red Mill Egg Replacer may also do the trick!
5 from 1 vote

Gluten-Free Oatmeal Chocolate Chip Cookies

These gluten-free oatmeal chocolate chip cookies will actually change your life. Crispy on the outside, perfectly soft on the inside, and loaded with melty chocolate. One bowl, simple ingredients, and roughly 20 minutes is all you’ll need to bake up a batch of these healthier melt-in-your-mouth cookies!
Print Rate
Prep Time: 10 minutes
Cook Time: 10 minutes
Total Time: 20 minutes
Servings: 24 cookies

Ingredients

  • 1/2 cup butter, softened (I used non-dairy butter)
  • 1/2 cup brown sugar
  • 1/4 cup sugar
  • 1 egg, at room temperature
  • 1 teaspoon vanilla extract
  • 1 cup oat flour
  • 1/2 teaspoon baking soda
  • 1/4 teaspoon salt
  • 1 1/2 cups rolled oats
  • 1 cup chocolate chips, optional (but recommended!)

Instructions

  • Preheat oven to 350° Fahrenheit and line a large baking sheet with parchment paper.
  • Beat together the butter, brown sugar, and sugar in a large bowl with either a hand or stand mixer until light and fluffy. Add in the egg and vanilla extract, beat to combine.
  • Add oat flour, baking soda, and salt into butter mixture and beat until a dough forms. Then, fold in rolled oats and chocolate chips until evenly distributed throughout.
  • Drop tablespoon-sized balls of dough about 2-inches apart on prepared baking sheet and bake for 10 minutes, or until lightly golden brown. Let cookies cool on baking sheet for 5-10 minute, then transfer to a wire rack to cool completely.

Video

Nutrition

Calories: 300kcal

This popular Baked Oats recipe is a healthy, easy-to-make breakfast option that requires only a couple of key ingredients. Have it plain or mix it up with chocolate chips, peanut butter or protein powder – there are so many versatile ways to make this baked oats recipe to your liking!

Baked Oats Recipe

I guess we should thank TikTok for this popular baked oats recipe! I never would have thought to blend oats and turn it into a type of oatmeal breakfast cake ’til now. These bake nicely in ramekins (which is what I use) or a muffin pan for individual servings, but you can bake it in a larger batch in a casserole dish if you want to serve to the whole fam!

Main Ingredients & Substitutions For Baked Oats

  • Rolled Oats – This is the main ingredient needed for this recipe, but you can use quick oats or oat flour instead. 

  • Mashed Banana – This adds flavor, sweetness and moisture to the recipe. 

  • Egg – Or you can make it vegan by using a flax egg!

  • Honey or Maple Syrup – Adds an extra touch of sweetness to the baked oats.

  • Baking Powder – This helps the baked oats rise while baking.

  • Pinch of Salt

Optional Add Ins

  • Chocolate Chips

  • Cocoa Powder

  • Peanut Butter

  • Protein Powder

  • Vanilla Extract
Baked Oats Recipe
5 from 1 vote

Baked Oats

This popular Baked Oats recipe is a healthy, easy-to-make breakfast option that requires only a couple of key ingredients. Have it plain or mix it up with chocolate chips, peanut butter or protein powder – there are so many versatile ways to make this baked oats recipe to your liking!
Print Pin Rate
Prep Time: 5 minutes
Cook Time: 20 minutes
Total Time: 25 minutes
Servings: 1 servings

Ingredients

  • 1/2 Cup Rolled Oats
  • 1 Banana (mashed)
  • 1 Egg
  • 1 Tablespoon Honey or Maple Syrup
  • 1/2 Teaspoon Baking Powder
  • 1 Pinch of Salt

Optional Add-Ins:

  • 2 Tablespoons Chocolate Chips
  • 1 Tablespoon Cocoa Powder
  • 1 Tablespoon Peanut Butter
  • 1 Tablespoon Protein Powder
  • 1 Teaspoon Vanilla Extract

Instructions

  • Preheat oven to 350° Fahrenheit and lightly grease an oven-safe ramekin.
  • Place all ingredients (except chocolate chips, if using) in a blender and blend until smooth.
  • Pour batter into prepared ramekin and bake for 20-25 minutes, let cool for about 10 minutes before eating.

Notes

  • To Store: Keep well in an airtight container for 2 days at room temperature and up to a week in the fridge.
  • To Freeze: You can freeze the baked oats before or after baking and it will keep for up to 3 months.
  • Nutrition

    Calories: 300kcal
    More Breakfast Recipes

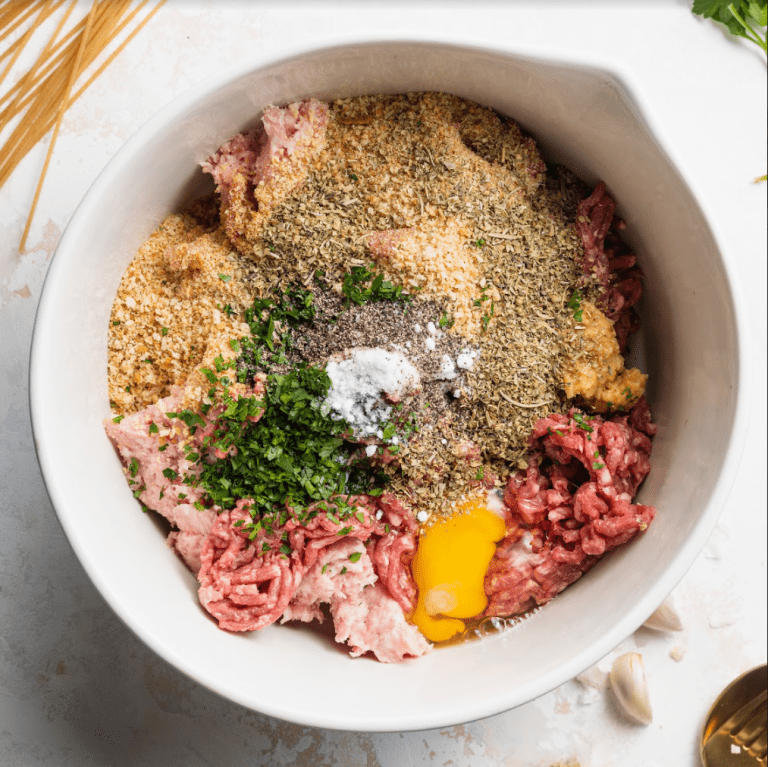
    This gluten-free meatballs recipe is perfectly spiced with Italian seasoning and is made with ground beef, pork, garlic and gluten-free breadcrumbs. It’s so easy, and takes less than 30 minutes to make. Dairy-free and paleo options are included!

    Gluten-Free Meatballs

    Main Ingredients Needed to Make These Italian GF Meatballs

    • Ground Beef & Ground Pork

    • Breadcrumbs – gluten-free

    • Italian Seasoning

    • Garlic Cloves

    • Egg

    • Parsley

    • Milk – I used almond milk

    • Salt & Black Pepper

    Tips When Making These Baked Gluten-Free Meatballs

    • Make it Paleo: For a grain-free/paleo version, simply leave out the gluten-free breadcrumbs!

    • Pasta: I used Jovial Brown Rice Spaghetti to keep my entire meal gluten-free. I highly recommend any Jovial pastas. They’re truly the best gluten-free pasta I’ve tried on the market!

    • Cheese: To keep this dish dairy-free, I grated a block of Violife’s Vegan Parmesan Cheese over my spaghetti and meatballs. 

    • Meat: I used beef, but you can use chicken, or turkey to make these meatballs. 

    • Note: You can use oatmeal, potato flakes or breadcrumbs as a binder. My favorite way to make meatballs is with gluten-free breadcrumbs.

    The BEST Gluten-Free Meatballs

    0 from 0 votes
    Recipe by Samantha Course: Main, DinnerCuisine: ItalianDifficulty: Easy
    Servings

    4

    servings
    Prep time

    10

    minutes
    Cooking time

    20

    minutes
    Total time

    30

    minutes

    This gluten-free meatballs recipe is perfectly spiced with Italian seasoning and is made with ground beef, pork, garlic and gluten-free breadcrumbs. It’s so easy, and takes less than 30 minutes to make. Dairy-free and paleo options are included!

    Ingredients

    • 1 Pound Ground Beef

    • 1 Pound Ground Pork

    • 1 Cup Gluten-Free Breadcrumbs

    • 2 Tablespoons Italian Seasoning

    • 2 Whole Garlic Cloves, minced

    • 1 Whole Egg

    • 2 Tablespoons Fresh Parsley (finely chopped)

    • 1/4 Cup Regular or Non-Dairy Milk

    • 1 Teaspoon Salt

    • 1/2 Teaspoon Black Pepper

    Directions

    • Preheat oven to 375° Fahrenheit and line a large baking sheet with parchment paper.
    • Mix together all ingredients in a large bowl.
    • Using a cookie scoop, scoop about 1 tablespoon of mixture into the palms of your hands and roll into a meatball. Place rolled meatball onto prepared baking sheet and continue until no mixture remains.
    • Bake meatballs for 18-20 minutes or until a meat thermometer inserted in the center of one reads 160° Fahrenheit.

    Did you make this recipe?

    Share it and tag @samdoesherbest on Instagram!

    Like this recipe?

    Follow us @samdoesherbest on Pinterest

    More Healthy Recipes

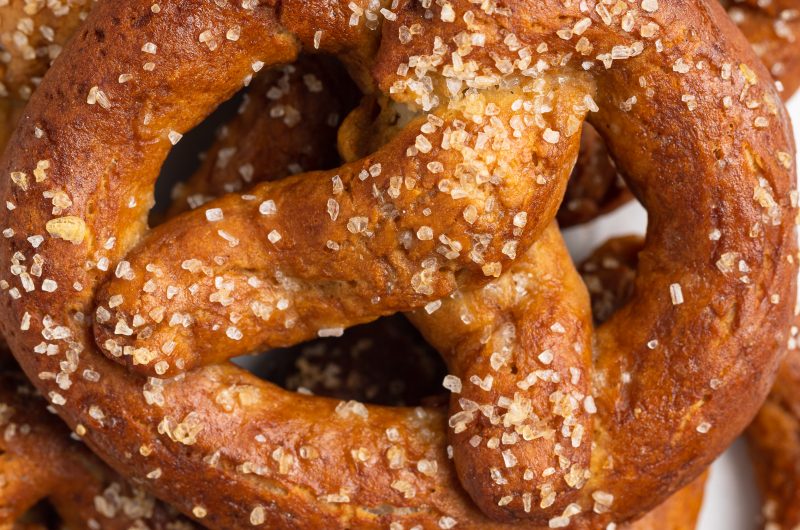
    These homemade gluten-free soft pretzels are chewy, soft, flavorful, and so delicious! It’s a fun and easy snack recipe you can make for the whole family. Dip it in cheese sauce, sprinkle it with salt, or drizzle chocolate right on top, the choice is yours. Either way, you won’t be able to eat just one!

    Soft pretzels are a classic snack that might seem hard to make, but they’re not hard at all! With simple, healthy ingredients, this gluten-free soft pretzels recipe is fun to make and doesn’t take long. For people with gluten sensitivities, these pretzels are the perfect way to enjoy a classic snack.

    MAIN INGREDIENTS NEEDED TO MAKE THESE Gluten-Free Soft Pretzels

    • All-Purpose Flour – (I’ve used Bob’s Red Mill All-purpose gluten-free flour with great success!)

    • Active Dry Yeast

    • Brown Sugar

    • Salt

    • Xanthan Gum

    • Baking Powder

    • Water

    • Butter (non-dairy)

    • Egg & Egg Yolk

    TIPS ON MAKING Gluten-Free Soft Pretzels

    Salt is the usual go-to when it comes to pretzel toppings. However, you can use all different kinds of toppings to make it sweeter or more to your liking.

    • For an almond toppinguse Honey Roasted Almonds. Chop roasted almonds into small bits, brush freshly baked pretzels with melted butter, then roll or sprinkle in almonds.

    • For a cinnamon sugar topping, mix 1/2 tsp of cinnamon with 1/4 cup granulated sugar and melt 1 Tbsp of butter in a small bowl. Brush the freshly baked pretzels with melted butter, then roll in cinnamon sugar. 

    • For an extra burst of savory flavors, you can use King Arthur Flour’s Everything Bagel Topping, which is a combination of salt, poppy seeds, sesame seeds, dried onion, and garlic. 

    Gluten-Free Soft Pretzels

    1 from 2 votes
    Recipe by Samantha Course: SnacksCuisine: AmericanDifficulty: Easy, Medium
    Servings

    10

    servings
    Prep time

    30

    minutes
    Cooking time

    30

    minutes
    Calories

    300

    kcal
    Total time

    1

    hour 

    These homemade gluten-free soft pretzels are chewy, soft, flavorful, and so delicious! It’s a fun and easy snack recipe you can make for the whole family. Dip it in cheese sauce, sprinkle it with salt, or drizzle chocolate right on top, the choice is yours. Either way, you won’t be able to eat just one!

    Ingredients

    • For the dough:
    • 3 cups all purpose gluten-free flour

    • 2 ¼ teaspoons active dry yeast

    • ¼ cup brown sugar

    • 2 teaspoons salt

    • 1 teaspoon xanthan gum

    • ½ teaspoon baking powder

    • 1 cup warm water

    • ¼ cup non-dairy butter, melted

    • 1 egg, at room temperature

    • For cooking:
    • 10 cups water

    • 2/3 cup baking soda

    • For egg wash:
    • 1 egg yolk

    • 1 tablespoon water

    • For topping:
    • Salt

    Directions

    • Mix together the gluten-free flour, yeast, brown sugar, salt, xanthan gum, and baking powder in a large bowl. 
    • Form a well in the center of the flour mixture then pour the warm water, melted butter, and egg into the well. Whisk to combine while slowly incorporating the dry ingredients into the wet ingredients. 
    • Transfer dough to a floured surface and knead until smooth, then shape into a ball and transfer to a lightly greased bowl. Cover bowl with towel, leave to proof in a warm place for an hour or until doubled in size.
    • Preheat oven to 450° Fahrenheit and line a baking sheet with parchment paper.
    • Place dough on a floured surface and separate into 10 equal balls. Warm each ball between the palm of your hands for a few seconds, then roll into an 18-inch rope before shaping each rope into a pretzel. For help shaping, follow this tutorial.
    • Cover pretzels with a towel while you bring 10 cups water to a boil in a large pot. Once boiling, add in the baking soda.
    • Once foam subsides, carefully drop one pretzel at a time into the boiling water for just 30 seconds. Remove from water and arrange on a baking sheet. 
    • Whisk together the egg yolk and one tablespoon of water then brush egg wash over top of each pretzel before sprinkling with salt if you’d like.
    • Bake pretzels for 20-25 minutes or until lightly golden brown, then leave to cool on baking sheet for 10 minutes before transferring to a wire cooling rack to cool rest of the way.

    Recipe Video

    Notes

    • Xanthan gum provides a pleasant chewiness to the pretzels. If omitted or substituted, it may affect the softness and texture of the pretzels.
    • Storage: These taste best when eaten the same day, but if you want to store them, wrap them individually in plastic wrap and keep in the fridge for up to 2 days or in the freezer for 1 month.

    Did you make this recipe?

    Share it and tag @samdoesherbest on Instagram!

    Like this recipe?

    Follow us @samdoesherbest on Pinterest

    OTHER HEALTHY SNACK RECIPES

    These paleo chicken pot pies are equal parts delicious and adorable! Extremely cozy, rich, and satisfying – this recipe will quickly become one of your favorites. These individual paleo chicken pot pies contain all of the flavor of traditional chicken pot pie, but are much lighter and healthier.

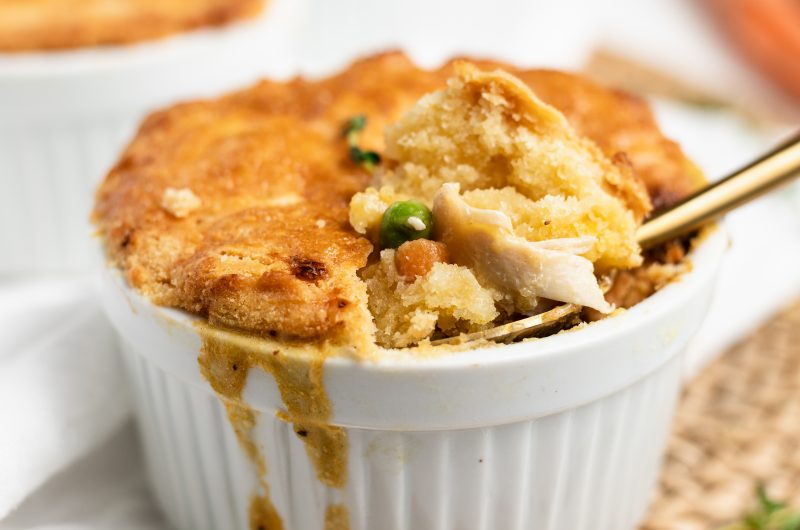
    Overhead shot of three mini paleo chicken pot pies with a scoop taken out.

    I was super worried about this recipe. It seemed like a bit of a stretch and I just wasn’t too confident that it would work. You guys, not only did it work, but it turned out INCREDIBLE! These paleo chicken pot pies quickly moved to my #1 favorite recipes I’ve ever made, knocking my healthy hot chocolate out of its spot. The crust on these pies is incredibly buttery, without actually containing any butter. The filling is super rich and creamy, without actually containing any cream. I honestly just can’t believe the sorcery of these paleo chicken pot pies! I had heard that miracles exist, but didn’t truly believe it until now.

    What You Need To Make Paleo Chicken Pot Pies

    Almond Flour – Almond flour creates the base of this paleo chicken pot pie crust. If you don’t already have almond flour and plan on doing more paleo baking, I definitely recommend you buy some. Though be sure to use almond flour, and not almond meal.

    Palm Oil Shortening – This is the paleo equivalent to vegetable shortening. Therefore, if you’re not paleo you can use vegetable shortening instead. In my experience, shortening makes the BEST pie crusts – better than butter. Though if you’d like, you can use cold butter instead of shortening.

    Arrowroot Starch – This is the paleo equivalent of corn starch! Since we don’t use heavy cream in this recipe, we rely on a thickener, such as arrowroot starch, to thicken up the filling. If you’re not paleo, you can use corn starch instead.

    Coconut Milk – I promise your pot pies won’t taste like coconut! This is another ingredient that will help thicken the filling. Coconut milk also makes these paleo chicken pot pies taste super rich and comforting.

    Adjust This Recipe To Your Dietary Needs

    • Add Dairy: Use 1/3 cup cold unsalted butter instead of palm shortening and 1/2 cup of whole milk instead of coconut milk.
    • Make it Vegetarian: Use vegetable broth instead of chicken broth and about 8 ounces of white button mushrooms in place of the chicken in this recipe. If using mushrooms, chop and then add them in with the vegetables in step 5.

    Paleo Chicken Pot Pies

    0 from 0 votes
    Recipe by Samantha Russo Course: MainCuisine: AmericanDifficulty: Intermediate
    Servings

    4

    servings
    Prep time

    10

    minutes
    Cooking time

    30

    minutes
    Total time

    40

    minutes

    These paleo chicken pot pies are equal parts delicious and adorable! Extremely cozy, rich, and satisfying – this recipe will quickly become one of your favorites. These individual paleo chicken pot pies contain all of the flavor of traditional chicken pot pie, but are much lighter and healthier.

    Ingredients

    • For the pie crust:
    • 1 Cup Almond Flour

    • 1/2 Cup Tapioca Starch

    • 1/4 Teaspoon Baking Powder

    • 1 Teaspoon Salt

    • 1/3 Cup Palm Shortening, see Notes

    • 1 Egg

    • Cold Water, as needed

    • For the filling:
    • 1 Tablespoon Olive oil

    • 1/2 Yellow Onion, chopped

    • 3 Garlic Cloves, minced

    • 1/2 Cup Carrots, chopped

    • 1/2 Cup Celery, chopped

    • 1 Teaspoon Fresh Thyme, see Notes

    • 1 Teaspoon Salt

    • 1/2 Teaspoon Black Pepper

    • 2 Tablespoons Arrowroot Starch, see Notes

    • 1 Cup Chicken Broth

    • 1/2 Cup Full-Fat Coconut Milk, unsweetened

    • 2 Cups Cooked Chicken, cubed

    • 1/2 Cup Peas (fresh or frozen)

    • For the egg wash:
    • 1 Egg, whisked

    Directions

    • Preheat your oven to 400° Fahrenheit.
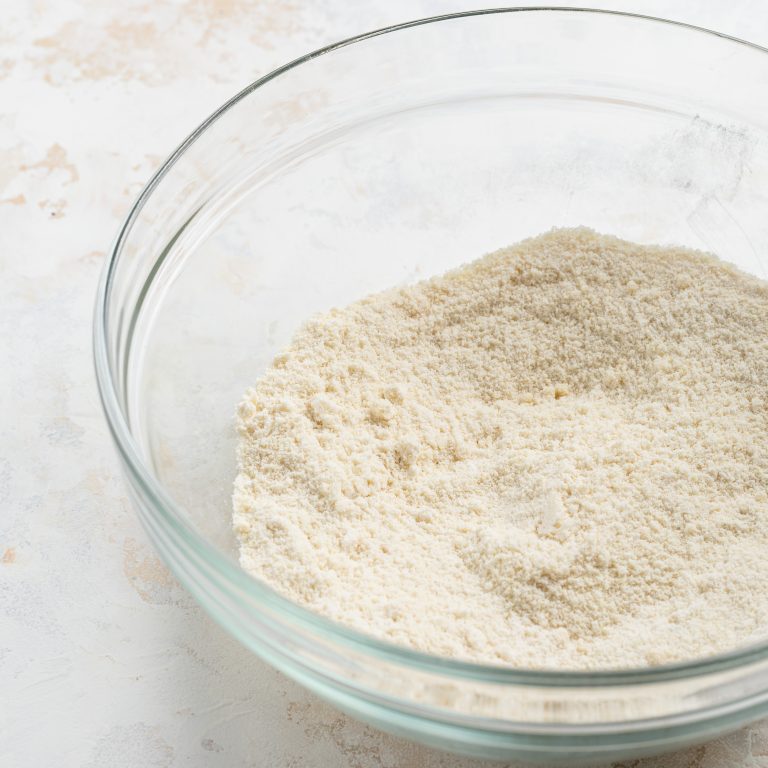
    • Mix together the almond flour, tapioca starch, baking powder, and salt in a bowl.Paleo-Pot-Pie-Process-Photo-Low-Res-01
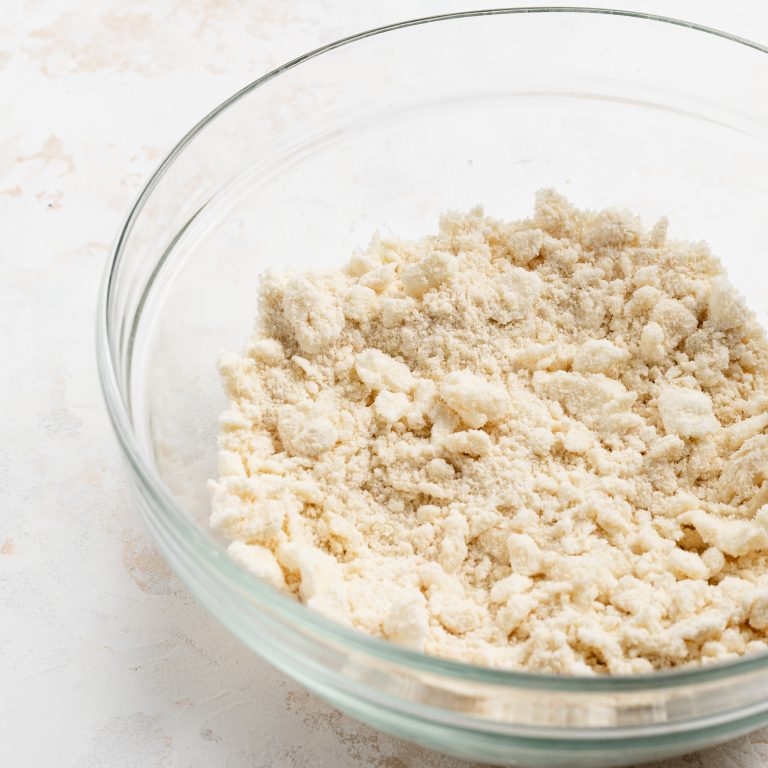
    • Add palm shortening and gently break apart with a fork until mixture is crumbly.Paleo-Pot-Pie-Process-Photo-Low-Res-02
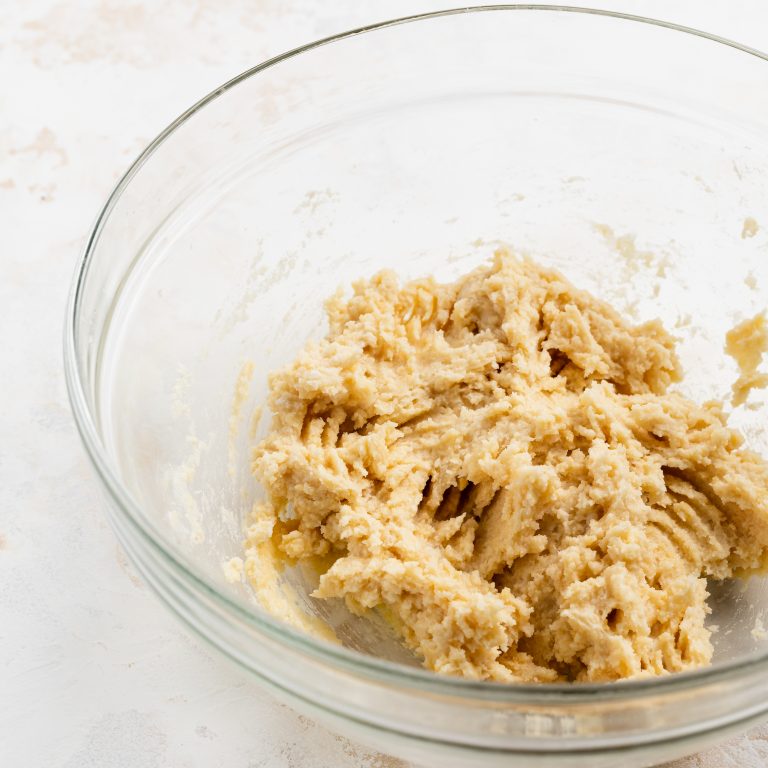
    • Fold in the egg and gently mix until a dough forms. If mixture is too dry, add 1 tablespoon of cold water at a time until it forms into a ball. Paleo-Pot-Pie-Process-Photo-Low-Res-03
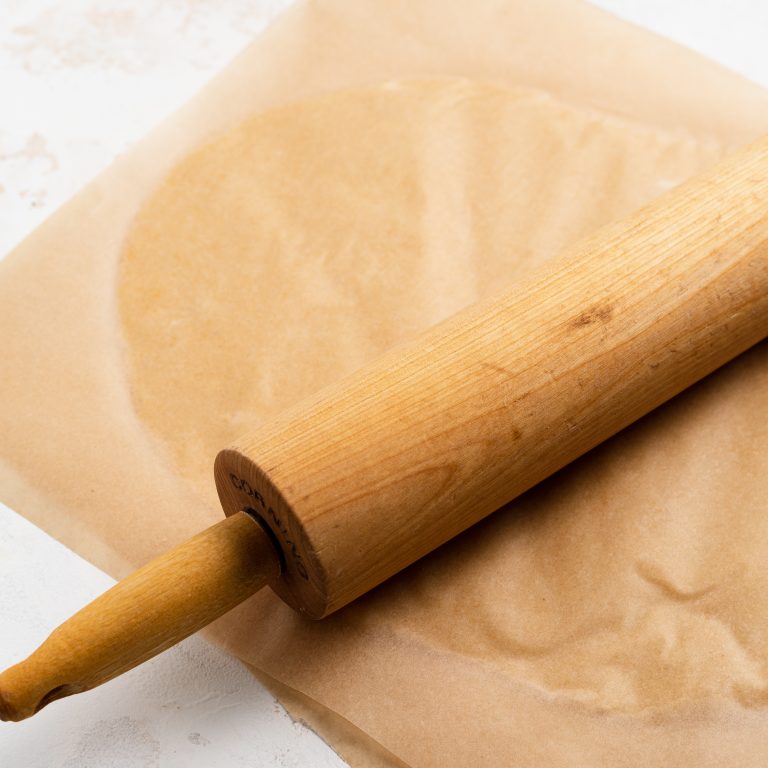
    • Roll dough between two sheets of parchment paper to about 1/4-inch thick, then place in the freezer.Paleo-Pot-Pie-Process-Photo-Low-Res-04
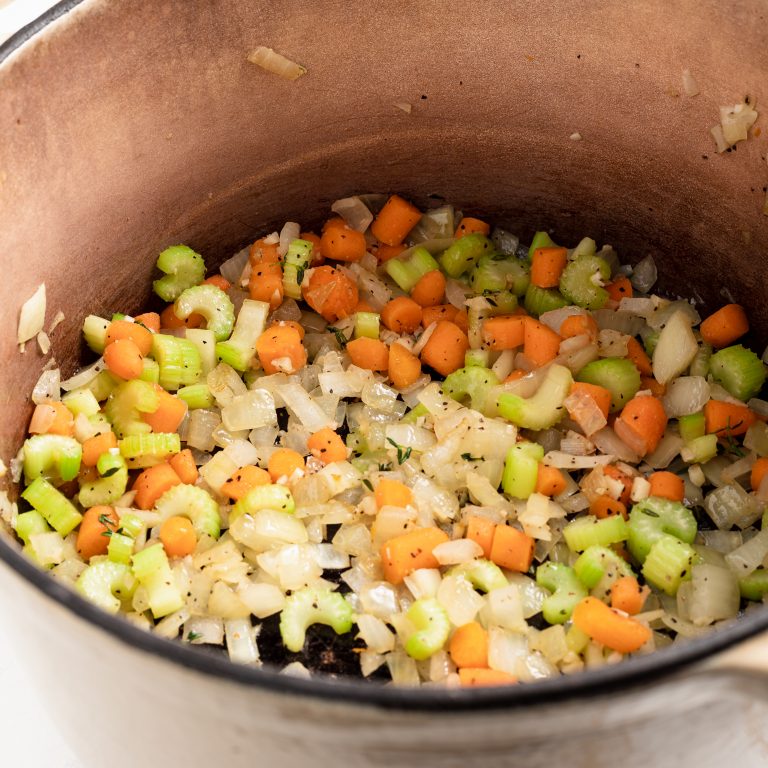
    • Heat the olive oil in a large pot or skillet over medium heat. Add the onion, garlic, carrots, celery, thyme, salt, and black pepper. Cook for 5-7 minutes or until vegetables are just barely tender.Paleo-Pot-Pie-Process-Photo-Low-Res-05
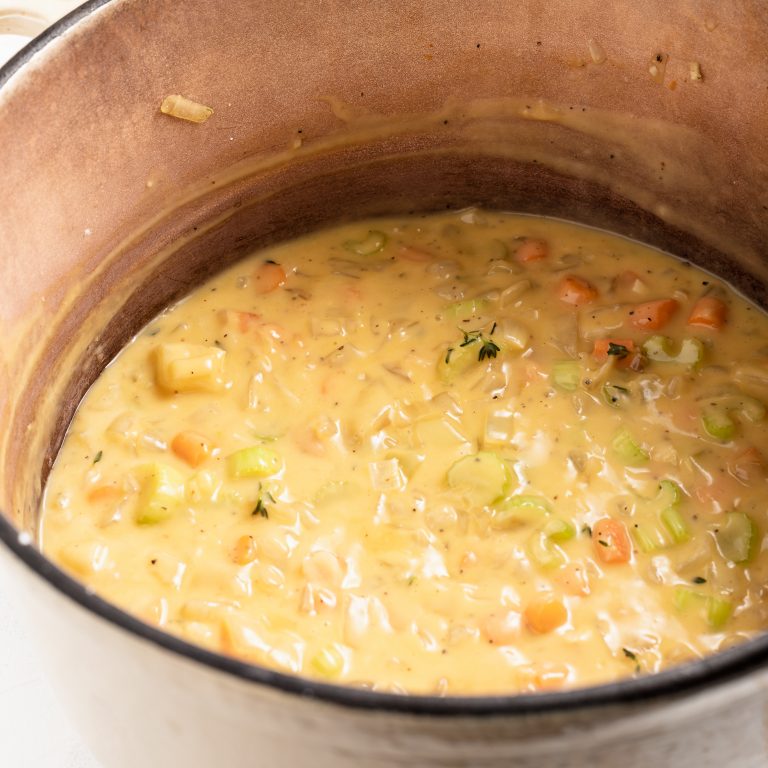
    • Add in arrowroot starch and cook for 1 minute before adding in the chicken broth and coconut milk. Simmer for 3-4 minutes or until sauce starts to thicken.Paleo-Pot-Pie-Process-Photo-Low-Res-06
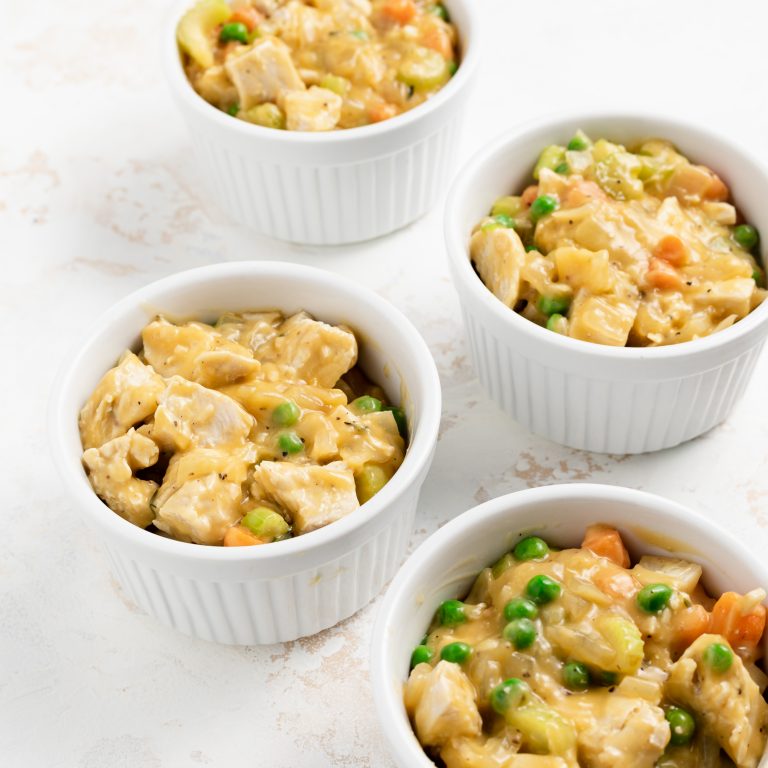
    • Add in the cooked chicken and frozen peas, mix to combine. Transfer filling to 4 ramekins.Paleo-Pot-Pie-Process-Photo-Low-Res-08
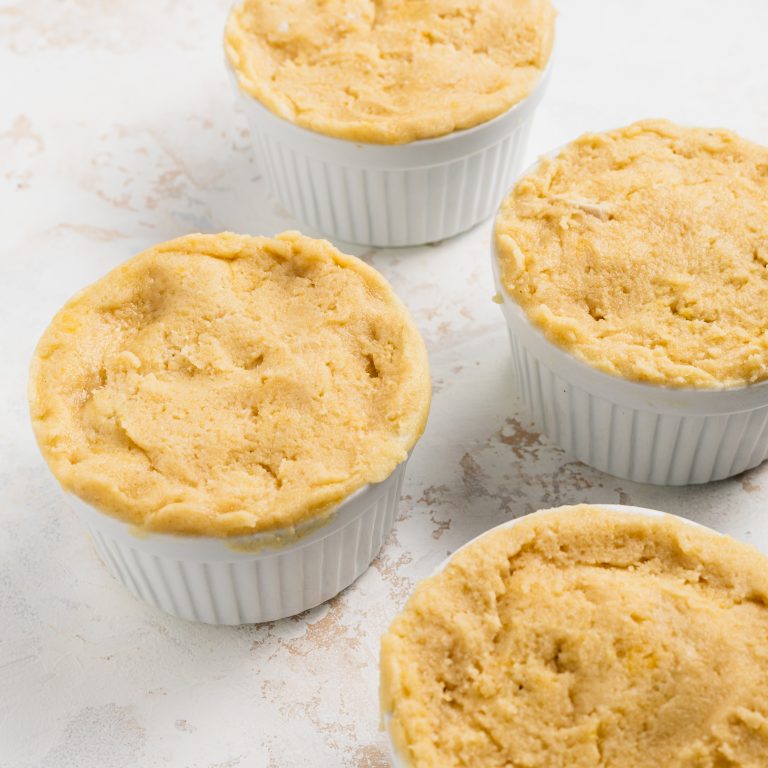
    • Remove pie crust from freezer and remove one side of parchment paper. Carefully cut into circles large enough to cover each ramekin. Gently transfer each circle to each ramekin, patching the dough as needed.Paleo-Pot-Pie-Process-Photo-Low-Res-09
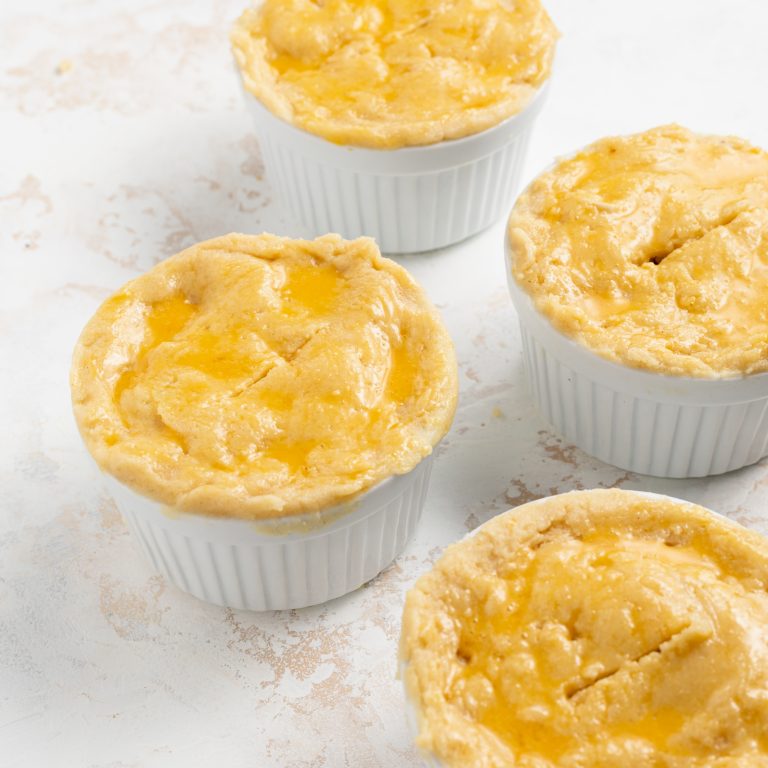
    • Brush each pot pie with egg wash and cut a 2-inch slit in the center of the crust.Paleo-Pot-Pie-Process-Photo-Low-Res-10
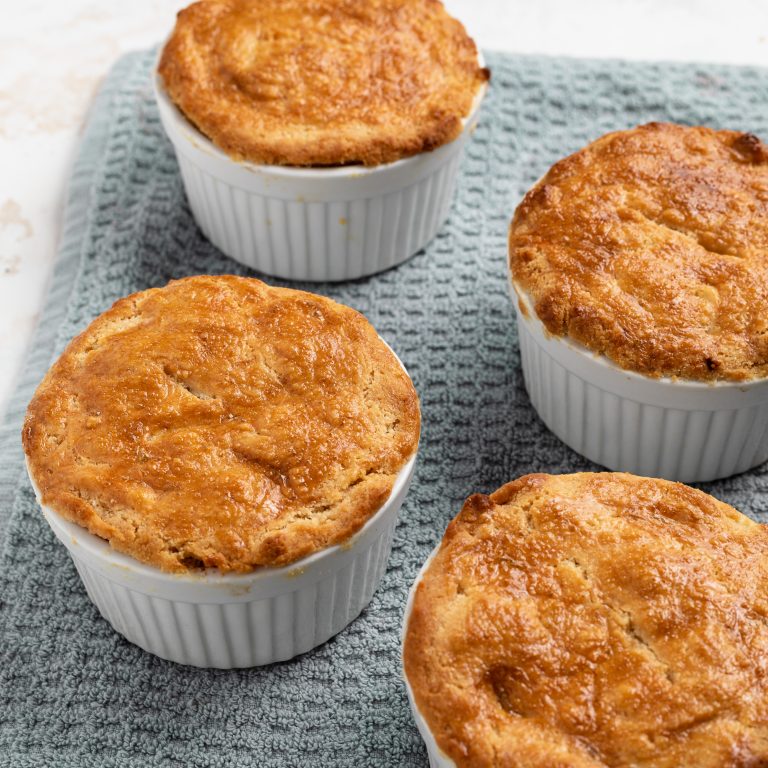
    • Place on a baking tray and bake for 20 minutes or until golden brown. Remove from oven and let cool slightly before serving.Paleo-Pot-Pie-Process-Photo-Low-Res-11

    Notes

    • Palm Shortening: You can use vegetable shortening or cold unsalted butter in place of the palm shortening in this recipe.
    • Fresh Thyme: If you can’t get your hands on any fresh thyme, use 1 teaspoon of dried thyme instead.
    • Arrowroot Starch: You can use corn starch instead or arrowroot starch in this recipe.

    Did you make this recipe?

    Share it and tag @samdoesherbest on Instagram!

    Like this recipe?

    Follow us @samdoesherbest on Pinterest

    More Incredible Paleo Recipes