Tag

healthy

Browsing

These almond flour pancakes are extra fluffy, delicious, and super easy to make! One bowl, a handful of ingredients, and 15 minutes is all you need to throw this simple gluten-free breakfast together. These almond flour pancakes are also the perfect blank canvas to any toppings you’d like (I went with blueberries – yum!).

stacked almond flour pancakes with blueberries, butter, and powdered sugar on top

What You’ll Need

Almond Flour – The star of our show – almond flour! It’s naturally gluten-free, grain-free, and paleo friendly. Almond flour is actually the only flour you’ll need for this healthy breakfast recipe. The most common misconception when it comes to almond flour is that it can be used as a 1:1 substitution for regular all purpose flour. However, that’s definitely not the case! Almond flour is much more dense and creates a heavier bake than regular flour. Though in this recipe we lighten the pancakes up with two whole eggs and a touch of milk.

Eggs – Eggs are crucial to keeping these almond flour pancakes held together! They are our binding agent, and without them the pancakes would simply fall apart. I highly recommend using large or extra large eggs for this recipe, though really any size will work.

Coconut Oil or Butter – Whether you’re using a non-stick pan or not, a touch or butter or oil is very useful to prevent sticking. For a non-stick pan, you may be able to get away with using less oil or butter than the recipe calls for. But for either a stainless steel or cast-iron pan, you’ll need the full tablespoon. And if you ever begin to notice sticking throughout the cooking process, then go ahead and add a bit more butter or oil to your pan!

How to Make Almond Flour Pancakes

Making homemade almond flour pancakes is super easy! Start by adding the almond flour and baking powder to a large bowl. Whisk those dry ingredients together before adding in the eggs, milk, maple syrup, and vanilla extract. Once your pancake batter is completely combined, then you can add in any fillings/toppings you’d like – fresh blueberries and chocolate chips are my personal favorite!

Now that your batter is all prepped, heat a tablespoon of either butter, coconut oil, or any other neutral-tasting oil in a large skillet over medium heat. Once hot, scoop about 1/4 cup of batter into the skillet. The batter will disperse out and form that signature circular pancake shape.

Cook each pancake in the skillet for about 3-5 minutes, or until the bottom is nicely golden brown. Then, use a spatula to carefully flip the pancake and cook the other side. Repeat this cooking process with your remaining better then serve your almond flour pancakes! I recommend finishing them off with a dusting of powdered sugar and a drizzle of maple syrup.

Adjust This Recipe to Your Dietary Needs

Make it Vegan – Make this a vegan almond flour pancake recipe by substituting the two eggs for one flax egg (1 tablespoon of ground flax meal + 3 tablespoons water) and one mashed banana. The flax egg and banana will work together to bind your pancakes and prevent them from falling apart. Also, use your favorite vegan milk in place of the regular milk this recipe calls for.

Make it Dairy-Free – To make this a dairy-free breakfast, simply use almond milk or your favorite non-dairy milk in place of the regular milk in this recipe. Also, be sure to use coconut oil for cooking, instead of butter.

Perfect Almond Flour Pancakes

0 from 0 votes
Recipe by Samantha Course: BreakfastDifficulty: Easy
Servings

2

servings
Prep time

5

minutes
Cooking time

10

minutes
Total time

15

minutes

These almond flour pancakes are extra fluffy, delicious, and super easy to make! One bowl, a handful of ingredients, and 15 minutes is all you need to throw this simple gluten-free breakfast together. These almond flour pancakes are also the perfect blank canvas to any toppings you’d like (I went with blueberries – yum!).

Ingredients

  • 1 cup almond flour, see Notes

  • 1 teaspoon baking powder

  • 2 eggs

  • 1/4 cup milk, I used non-dairy milk

  • 1 tablespoon maple syrup

  • 1 teaspoon vanilla extract

  • 1 tablespoon coconut oil or butter

Directions

  • Whisk together the almond flour and baking powder in a large bowl.
  • Add in eggs, milk, maple syrup, and vanilla extract, whisk to combine.
  • Melt coconut oil or butter in a large skillet over medium low-medium heat and spoon ¼ cup batter into skillet.
  • Cook pancakes for 2-3 minutes per side or until edges are slightly golden brown. Repeat until no more batter remains.

Recipe Video

Notes

  • Almond Flour: Be sure to use blanched almond flour, not almond meal in this recipe.

Did you make this recipe?

Share it and tag @samdoesherbest on Instagram!

Like this recipe?

Follow us @samdoesherbest on Pinterest

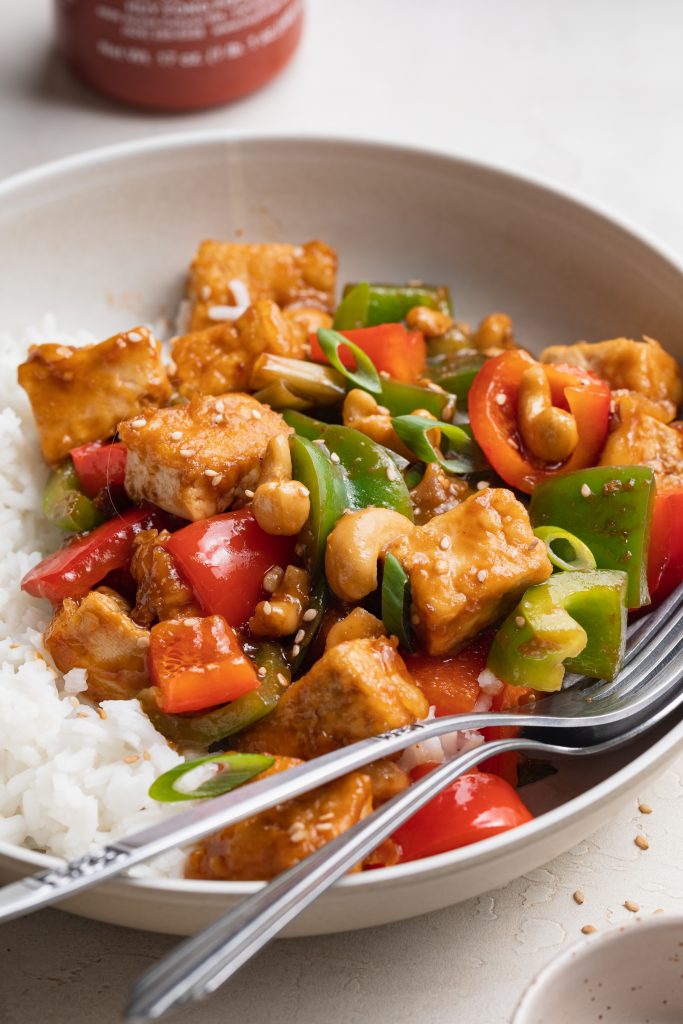
This kung pao tofu will quickly become one of your favorite dinner recipes! One pan and 15 minutes is all you need for this intensely flavorful meal. This kung pao tofu is also entirely vegan, plant-based, and gluten-free!

kung pao tofu on a plate over rice, with sesame seeds on top

What You’ll Need

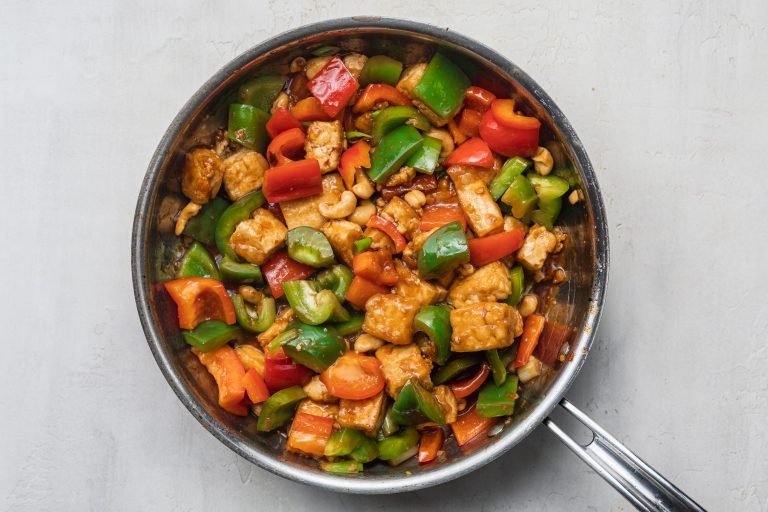
Extra Firm Tofu – Extra firm tofu is the key to getting it super crispy! It will hold its shapes once cut and cooked, forming these little golden brown nuggets of perfection. Tofu is also the perfect blank canvas to really any recipe! It has very little flavor on its own, but absorbs all the flavors it’s paired with. The tofu in this recipe soaks up all of our delicious kung pao sauce, making it just incredible!

Red and Green Bell Peppers – Two bell peppers give this dish incredible color and brightness! Start by removing the core and any seeds from each pepper. Then, chop them into similarly-sized pieces. Stir fry the bell peppers for only a couple of minutes in the fourth step of this recipe. The goal is to get them tender, while still maintaining their bite.

Unsalted Cashews or Peanuts – You’ll find either cashews or peanuts in most kung pao recipes. They, too, give this overall dish the perfect crunchy texture that pairs beautifully with our smooth and tangy sauce. However, if you don’t like nuts, you can simply leave them out of your kung pao tofu.

kung pao tofu in a pan

Top Tips

  • Oil your pan well before frying up the tofu. If not enough oil is used, your tofu might stick to the pan – losing that delicious outer, crisp coating!
  • For an even saucier vegetable stir fry, double the sauce recipe! This kung pao tofu sauce is seriously so good, you’ll practically want to drink it. So don’t skimp on the sauce, and make as much as you’d like!
  • Feel free to turn this into a kung pao chicken recipe instead! To do this, simply replace the tofu with 2-inch cubes of chicken and cook them in the second step until fully cooked through. Then, use your chicken just as you would the tofu in the remainder of the recipe.
close-up image of kung pao tofu on a plate over rice

Adjust This Recipe To Your Dietary Needs

  • Make it Gluten-Free: To ensure this recipe is completely gluten-free, use tamari instead of soy sauce. Tamari is the gluten-free equivalent to soy sauce and tastes exactly the same!
  • Make it Nut-Free: For a nut-free version, simple leave out the cashews or peanuts in this recipe. But if you’d still like that nutty flavor, you can add in a couple tablespoons of sesame seeds instead.

One-Pan Kung Pao Tofu

4 from 6 votes
Recipe by Samantha Course: MainDifficulty: Easy
Servings

4

servings
Prep time

5

minutes
Cooking time

10

minutes
Total time

15

minutes

This kung pao tofu will quickly become one of your favorite dinner recipes! One pan and 15 minutes is all you need for this intensely flavorful meal. This kung pao tofu is also entirely vegan, plant-based, and gluten-free!

Ingredients

  • For the tofu:
  • 14 ounces extra firm tofu, cut into cubes

  • 2 tablespoons cornstarch

  • 2 tablespoons sesame oil or avocado oil

  • For the veggies:
  • 3 garlic cloves, minced

  • 2-inch piece ginger, grated

  • 3 scallions, sliced (white and green parts separated)

  • 1 red bell pepper, chopped

  • 1 green bell pepper, chopped

  • 1 cup raw unsalted cashews or peanuts

  • For the sauce:
  • 1/4 cup vegetable broth

  • 3 tablespoons soy sauce, use Tamari for gluten-free

  • 1 tablespoon rice vinegar, or white wine vinegar

  • 1 tablespoon brown sugar

  • 2 teaspoons corn starch

  • 1 teaspoon sriracha

  • 1 teaspoon sesame oil

Directions

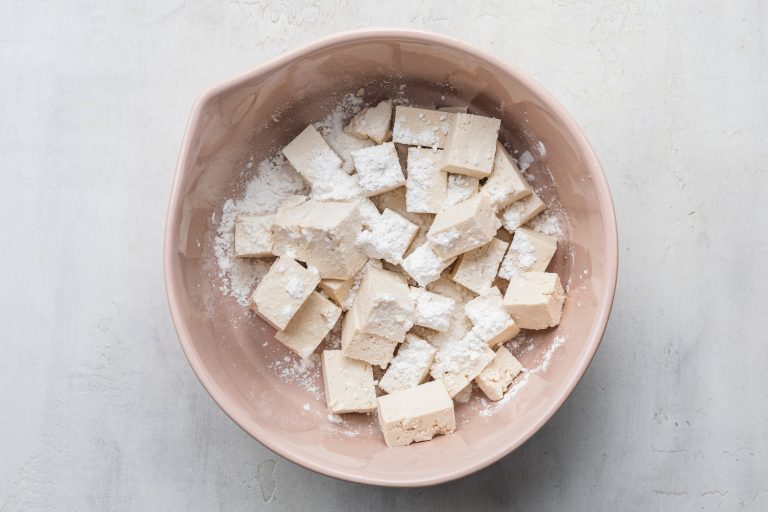
  • Place cubed tofu in a bowl with cornstarch and toss to evenly coat.
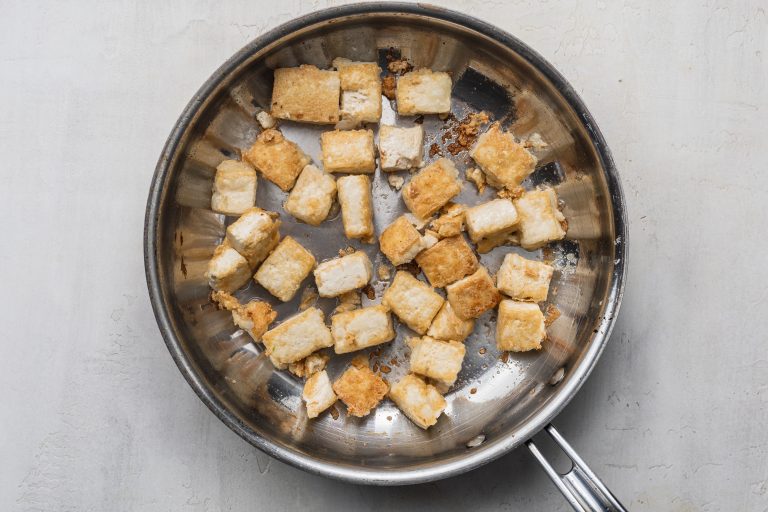
  • Heat sesame oil in a large pan over medium-high heat, then fry tofu in a single layer for 2-3 minutes per side or until golden brown. Remove cooked tofu and set aside.
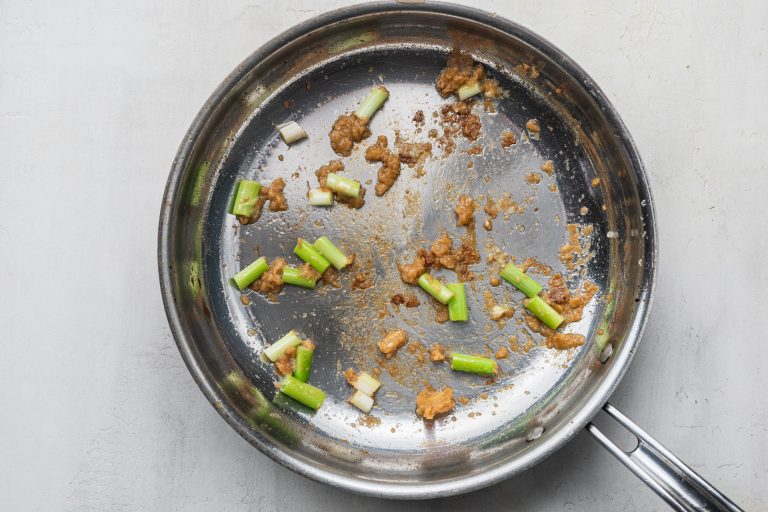
  • Add garlic, ginger, and white parts of scallions to pan and cook for 2-3 minutes or until fragrant.
  • Add in red and green bell peppers, sauté for 2-3 minutes then place tofu back into pan along with green parts of scallions and cashews or peanuts.
  • Whisk together all sauce ingredients in a bowl, then pour into pan and reduce heat to a simmer. Simmer until sauce has thickened then serve over rice.

Did you make this recipe?

Share it and tag @samdoesherbest on Instagram!

Like this recipe?

Follow us @samdoesherbest on Pinterest

A flawless vegan charcuterie board, perfect for any occasion! An assortment of fresh fruits, veggies, crackers, bread, and vegan cheeses create the perfect spread. Have fun with this vegan charcuterie board, feel free to switch things up and make it your own!

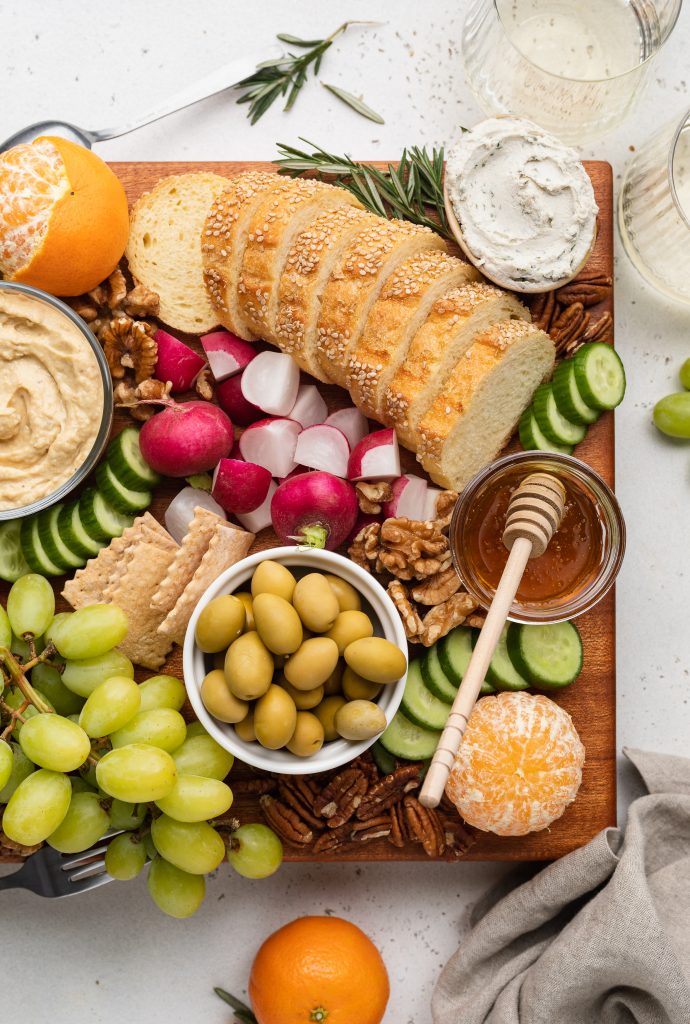
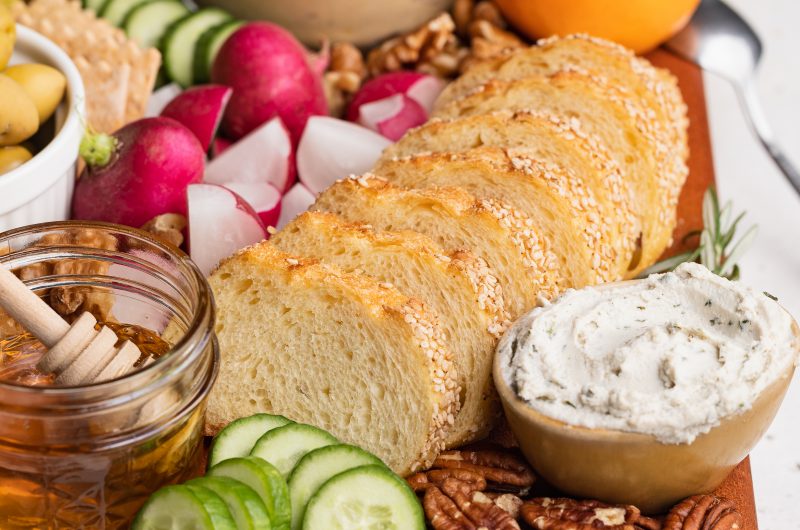
half a vegan charcuterie board with glasses of white wine on the side

What You’ll Need

  • Hummus – Either homemade or store bought hummus will work on your charcuterie board! As much as I love a homemade hummus, I usually prefer to save myself a bit of time by buying pre-packaged hummus from the store. Whole Foods make a delicious hummus, as does Trader Joe’s and Hope Hummus!

  • Crackers – Any and all crackers are welcome on this snack board! I typically use gluten-free crackers to keep my spread gluten-free friendly. Though feel free to use whatever crackers you like best.

  • Nuts – Nuts are always an exciting, crunchy addition! You can get fancy here and purchase marcona almonds or flavored nuts for your board. Though I kept things simple with raw walnuts and pecans. I love using nuts on any charcuterie board, as they’re the perfect item to fill any empty space. Nuts are especially amazing on this vegan charcuterie board thanks to their high protein content and nutritional value, keeping things hearty yet healthy!

  • Vegan Cheese – This is a totally optional addition, but I have a few vegan cheese brands I love featuring on my charcuterie board! I’m pretty picky when it comes to non-dairy cheese though, and avoid any that taste too fake and/or are overly processed. Spero Foods make some of my all-time favorite vegan soft cheeses. Their herb cream cheese and goat cheese are perfect for this recipe! They’re all deliciously tangy, smooth, and incredible on crackers or toast. Though my runner-ups for this charcuterie board are Kite Hill vegan cheeses, and a handful of Myoko vegan cheese flavors.

How to Make a Vegan Charcuterie Board

  1. Begin every charcuterie board by prepping the ingredients you’ll be placing on your board. This includes washing fresh fruit, cutting bread, slicing cheese, etc. Once prepped, you’ll be able to see every element of your board and decide in which order you’d like to place them.


  2. Pick a large board or surface to lay everything on, then place small bowls around the board. These bowls don’t have to be in any particular pattern or order, so simply evenly space them around your board.


  3. Fill those small bowl with things like hummus, soft cheese, dips, olives, or really anything that would make a mess if placed directly on your board/surface.


  4. Now that your bowls are all filled, go in with remaining larger items such as crackers, sliced bread, and fruit – working with one ingredient at a time.


  5. Once the vegan charcuterie board looks mostly complete, then fill in any gaps with your small items (in this case, I used nuts). Continue doing this until your board is fully loaded and ready to be served!

Optional Add-Ons

There really is no wrong way to jazz up a charcuterie board, so any of the following would make delicious additions to your vegan board:

  • Pickles
  • Strawberries
  • Chocolate Squares
  • Dried Fruit
  • Jelly/Jam
  • Mustard
  • Sweet Peppers
  • Cherry Tomatoes
  • Apple Slices
  • Carrots

Vegan Charcuterie Board

5 from 1 vote
Recipe by Samantha Course: AppetizersDifficulty: Easy
Servings

12

servings
Prep time

10

minutes
Cooking time

0

minutes
Total time

10

minutes

A flawless vegan charcuterie board, perfect for any occasion! An assortment of fresh fruits, veggies, crackers, bread, and vegan cheeses create the perfect spread. Have fun with this vegan charcuterie board, feel free to switch things up and make it your own!

Ingredients

  • cucumber, sliced

  • olives

  • hummus

  • baguette, sliced

  • grapes

  • mandarin oranges, partially peeled

  • nuts (almonds, cashews, pecans, or walnuts)

  • radishes, sliced

  • vegan cheese, see Notes

Directions

  • Prep all ingredients – wash fruits and veggies, slice or chop items, etc.
  • Lay down the surface you’ll be arranging your items on, then start by placing small bowls evenly throughout the surface. You’ll need about 3-4 bowls for your olives, hummus, and vegan cheese.
  • Fill the bowls, then begin arranging items on your surface, leaving smaller items like nuts for the end. Finish by filling any gaps on your charcuterie boards with nuts or any other ingredients that may fit.

Recipe Video

Notes

  • Vegan Cheese: Vegan cheese brands I love are Spero Foods, Myoko, and Kite Hill!

Did you make this recipe?

Share it and tag @samdoesherbest on Instagram!

Like this recipe?

Follow us @samdoesherbest on Pinterest

More Vegan Recipes

One pan and a few simple ingredients is all you’ll need for the best EVER breakfast tacos! Smoky chorizo, creamy refried beans, fluffy eggs, and fresh avocado piled high atop warm tortillas. And did I mention they take just 15 minutes to make?! There truly is no better way to start the day.

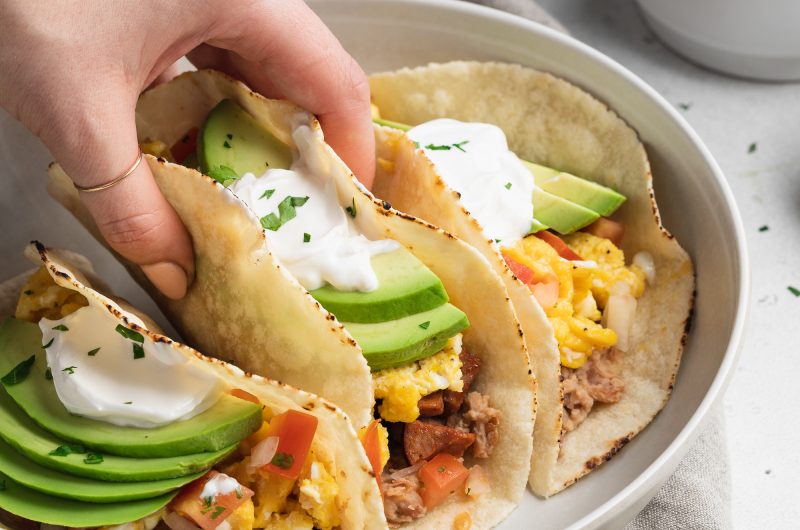
breakfast tacos with sliced avocado and vegan sour cream on top, and coffee on the side

What You’ll Need

Tortillas – Either corn or flour tortillas will work for these breakfast tacos! I actually used Siete’s grain-free tortillas to keep my tacos a little lighter and healthier. Whatever tortillas you use, be sure to heat them up slightly in your pan to make them pliable and crispy around the edges.

Chorizo – The two most common types of chorizo are semi-cooked chorizo and dried chorizo. For this recipe, we’re looking for either semi-cooked chorizo or fresh chorizo. While uncommon, fresh chorizo works best in this recipe, so if you can find it definitely use it! Though I used semi-cooked chorizo and my breakfast tacos still turned out perfect. For semi-cooked, chop the chorizo into half or quarter moons then quickly cook in a hot skillet. For fresh chorizo, remove the meat from its casing and cook in a hot skillet until completely cooked through, crumbling the sausage as it cooks.

Eggs – They wouldn’t be breakfast tacos without some scrambled eggs! Luckily, scrambled eggs are super easy to throw together. Use as many or as few eggs as you’d like, I sometimes add a couple more into my scramble for extra protein.

Refried Beans – Either canned or homemade refried beans will taste delicious in this easy breakfast recipe. For homemade, I recommend this recipe, and for store bought, I prefer the Amy’s Organic Refried Beans.

Adjust This Recipe To Your Dietary Needs

  • Make it Vegan: Making vegan breakfast tacos is surprisingly easy with a few simple swaps. Cook up some scrambled tofu and double up on refried beans to make up for the lack of chorizo. The end result will be a delicious vegan breakfast with plenty of protein!
  • Make it Paleo: Use Siete Almond Flour Tortillas in place of regular tortillas to turn this into a paleo meal.
  • Make it Whole30: Ditch the tortillas and wrap these breakfast tacos in butter lettuce leaves instead! Also, make sure your refried beans and chorizo are Whole30 compliant. If you can’t find Whole30 compliant chorizo, use Whole30 compliant bacon instead.

How to Freeze Breakfast Tacos

  1. Wrap tortilla completely around filling, then wrap each individual taco in aluminum foil.
  2. Store in the freezer for up to 1 month.
  3. To reheat, place tacos still in foil in the oven at 350° Fahrenheit for 15-20 minutes or until heated through.

Easy Breakfast Tacos (Freezer Friendly)

0 from 0 votes
Recipe by Samantha Course: BreakfastDifficulty: Easy
Servings

4

servings
Prep time

5

minutes
Cooking time

10

minutes
Total time

15

minutes

One pan and a few simple ingredients is all you’ll need for the best EVER breakfast tacos! Smoky chorizo, creamy refried beans, fluffy eggs, and fresh avocado piled high atop warm tortillas. And did I mention they take just 15 minutes to make?! There truly is no better way to start the day.

Ingredients

  • 8 small corn or flour tortillas

  • 4 ounces chorizo sausage, removed from casing or chopped

  • 8 large eggs, whisked

  • salt and pepper, to taste

  • 1 cup refried beans

  • 2 avocados, peeled and sliced

  • Optional toppings:
  • salsa

  • fresh cilantro, chopped

  • cheese

  • sour cream

  • hot sauce

Directions

  • Heat tortillas in a skillet over medium-low heat, one at a time, until soft and pliable then set aside.
  • Add olive oil to skillet and cook chorizo sausage until browned and cooked through, then remove and set aside.
  • Add whisked eggs to skillet, season with salt and pepper, and scramble until full cooked.
  • Warm refried beans in either the microwave or a small saucepan over low heat.
  • Assemble tacos by spooning some refried beans, then chorizo, then scrambled eggs into each tortilla. Top with sliced avocado and any other toppings you’d like.

Did you make this recipe?

Share it and tag @samdoesherbest on Instagram!

Like this recipe?

Follow us @samdoesherbest on Pinterest

More Quick and Delicious Breakfast Recipes

Incredibly zesty lemon pepper chicken wings are super quick and easy to make in the comfort of your own home! Bake ’em in the oven or air fryer, then finish off with a simple 4-ingredient lemon pepper sauce. These wings are irresistibly crispy and loaded with delicious flavor!

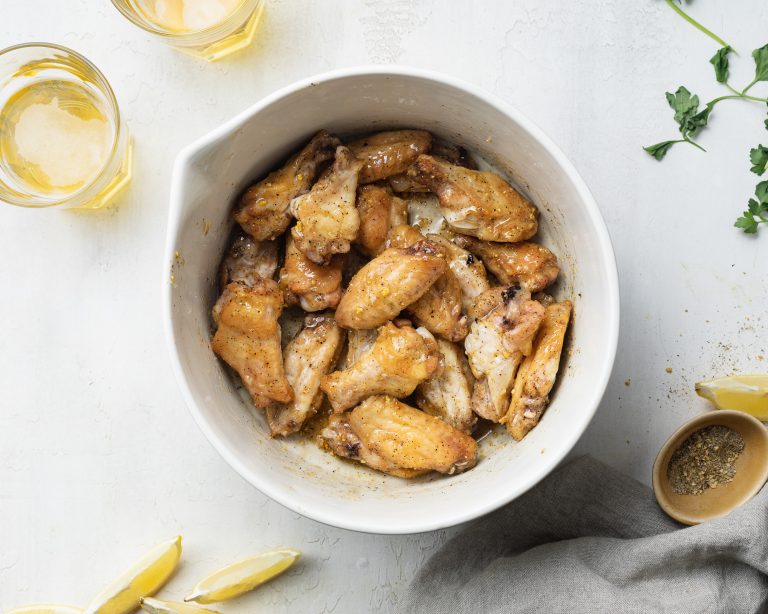
lemon pepper chicken wings in a bowl with beer and lemon slices on the side

What You’ll Need

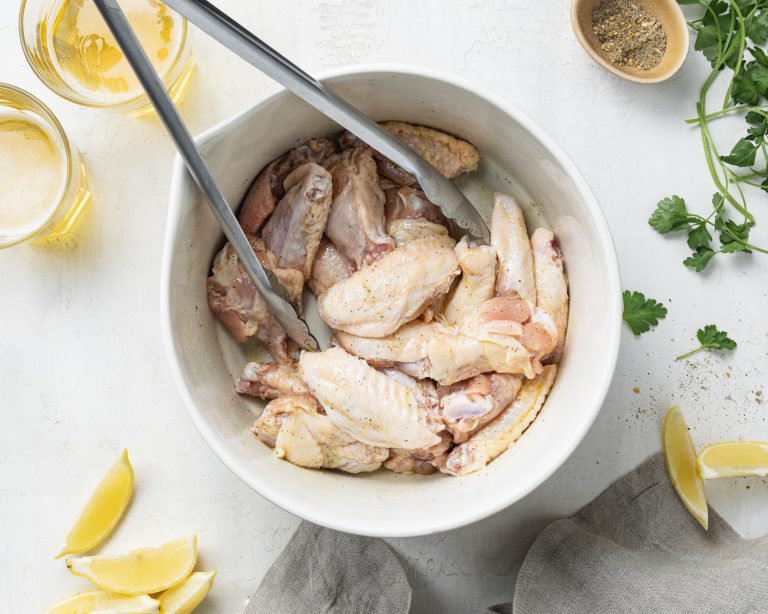
Chicken Wings – Pick up 3 pounds of either drums, flats, or a combination of both for this chicken wing recipe. I typically reach for the “party pack” of wings at the grocery store, but honestly anything you can find/prefer will work. Once you unwrap your chicken wings, make sure you pat each wing dry with a paper towel before cooking. Getting the wings as dry as possible will ensure they bake up super crispy in the oven (or air fryer!).

Lemon Pepper Seasoning – You can either purchase a jar of lemon pepper seasoning, or simply make it yourself! I couldn’t find any pre-made seasoning near me, so I quickly threw together a homemade batch of my own. To do this, I cooked lemon peels in the oven at 170° Fahrenheit for 1 hour until super dried out. Then, I added the peels to a blender along with some whole black peppercorns and a pinch of salt. There are plenty of lemon pepper seasoning recipes out their on the internet, so do a little research and follow one that’s easiest for you! Or, of course, just buy lemon pepper seasoning from the store if you’d like.

Top Tips

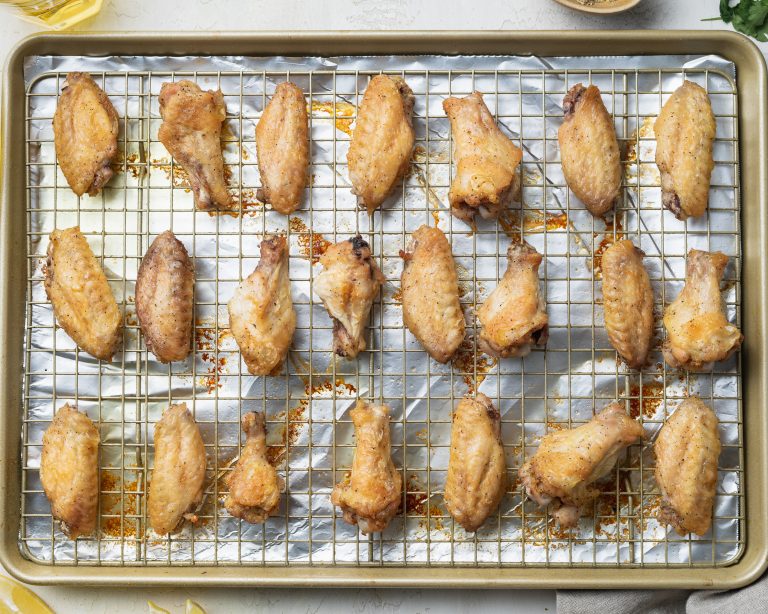
  • Don’t crowd your baking sheet/rack with chicken wings before baking. Place each wing at least an inch apart to ensure that all sides crisp up evenly!
  • Switch up this lemon pepper chicken wings recipe however you’d like! For a little more spice, add in an extra pinch of freshly cracked black pepper. For extra tang, finish off with an extra squeeze of lemon juice. And for a bit more sweetness, use an additional teaspoon or two of honey!
  • Avoid using frozen chicken wings! If your wings are frozen, thaw them completely in the fridge before baking.

Adjust This Recipe to Your Dietary Needs

  • Make it Dairy-Free: Sub the melted butter in this recipe for non-dairy butter to have a completely dairy-free and delicious appetizer!
  • Make it Paleo: For paleo lemon pepper chicken wings, simply use ghee instead of butter and make your own seasoning by drying out lemon peels in the oven and grinding them with black peppercorns and salt.

How to Cook Chicken Wings in the Air Fryer

  1. Pat chicken wings dry with a paper towel, then add to a bowl along with olive oil, salt and black pepper. Toss to coat wings in oil and seasoning.
  2. Transfer chicken wings to air fryer tray or basket in an even layer (work in batches if necessary), cook at 360° Fahrenheit for 12 minutes. After 12 minutes, flip the wings over then cook for another 12 minutes.
  3. Once all wings are cooked and crispy, toss in your homemade lemon pepper sauce and enjoy!

The Best Baked Lemon Pepper Chicken Wings

5 from 2 votes
Recipe by Samantha Course: AppetizersDifficulty: Easy
Servings

6

servings
Prep time

10

minutes
Cooking time

40

minutes
Total time

50

minutes

Incredibly zesty lemon pepper chicken wings are super quick and easy to make in the comfort of your own home! Bake ’em in the oven or air fryer, then finish off with a simple 4-ingredient lemon pepper sauce. These wings are irresistibly crispy and loaded with delicious flavor!

Ingredients

  • For the wings:
  • 3 pounds chicken wings

  • 2 tablespoons olive oil

  • 1 teaspoon salt

  • 1/2 teaspoon black pepper

  • For the lemon pepper sauce:
  • 1/4 cup melted butter, I used non-dairy

  • 1 1/2 tablespoons lemon pepper seasoning

  • 1 tablespoon honey

  • 2 teaspoons lemon juice

  • chopped parsley, for serving

  • lemons, sliced

Directions

  • Preheat oven to 400° Fahrenheit and line a baking sheet with foil, and top with a wire baking rack.
  • Pat chicken wings dry with a paper towel, then add to a bowl along with olive oil, salt and black pepper. Toss to coat wings in oil and seasoning.
  • Transfer wings to an even layer on the prepared baking sheet with baking rack and bake for 35-40 minutes or until golden brown and crispy.
  • Mix together all lemon pepper sauce ingredients in a large bowl, then once wings are cooked toss them in the sauce until evenly coated.

Did you make this recipe?

Share it and tag @samdoesherbest on Instagram!

Like this recipe?

Follow us @samdoesherbest on Pinterest

Other Easy Apps You’ll Love