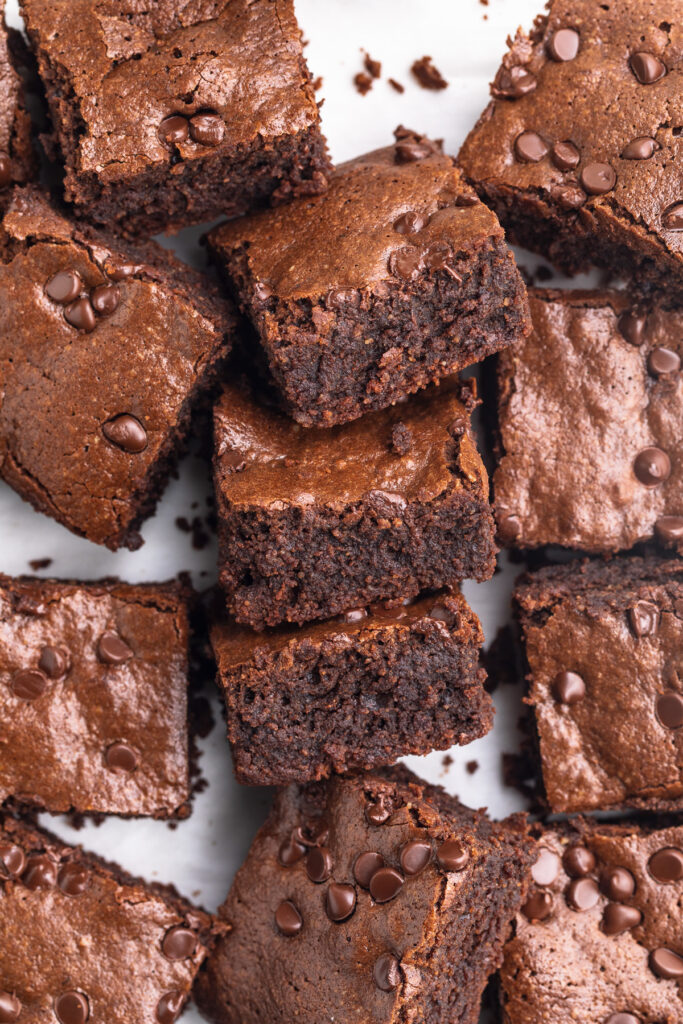
Tag

paleo

Browsing

I. LOVE. DATES. They’re just one of those snack cabinet staples I can’t live without. I love turning them into 4-ingredient date caramels, healthy snickers, cookie dough date bites, or even enjoying them completely on their own. I’m always on the hunt though for creative ways to dress up my dates, and I just knew these smashed dates would be delicious! There’s just something about getting that perfect ratio of date to peanut butter to chocolate in this smashed dates recipe that makes these – dare I say… the best dates ever?! You also can’t beat that they’re just 3 ingredients and entirely no bake!

Why You’ll Love This Recipe

  • Quick and Easy: This recipe takes just 10 minutes of prep and uses only 3 ingredients!
  • Wholesome and Nutritious: Packed with natural sweetness, protein, and healthy fats, these dates are as nutritious as they are delicious.
  • Diet-Friendly: Naturally vegan, dairy-free, and refined sugar-free, making it suitable for various dietary preferences.
overhead image of smashed dates with peanut butter and chocolate on a baking sheet.

What You’ll Need to Make Smashed Dates

  • Medjool Dates: These plump and naturally sweet fruits are the star of the recipe, offering a chewy texture and caramel-like flavor.
  • Unsweetened Peanut Butter: Adds creaminess and a protein-packed, nutty richness to complement the sweetness of the dates. Substitute with almond or sunflower seed butter for based on your needs/preferences.
  • Melted Chocolate Chips: Dark or semi-sweet chocolate works best for a rich topping. Opt for dairy-free or refined sugar-free chocolate if needed, I love these Hu Kitchen chocolate gems!

How to Make Smashed Dates

  1. Prep the Dates: Slice each medjool date lengthwise to remove the pit, then lay them flat on a parchment-lined baking sheet.
  2. Smash and Fill: Use the bottom of a glass or your hand to flatten each date. Spread a generous layer of peanut butter over each one.
  3. Drizzle with Chocolate: Melt your chocolate chips, drizzle over the dates, and transfer them to the fridge or freezer until the chocolate hardens.
  4. Enjoy: Sprinkle with flaky salt, serve, and enjoy!
a bite taken out of a smashed date with peanut butter and chocolate.

Topping Options

  • Flaky Salt: A must for balancing the sweetness and enhancing flavors.
  • Chopped Nuts: Add a crunchy texture by sprinkling crushed peanuts, almonds, or pistachios on top.
  • Coconut Flakes: For a tropical twist, sprinkle unsweetened coconut flakes over the chocolate.

Sam’s Recipe Tips

  • Pit Removal Hack: Use a small knife or your fingers to easily remove the pit from the dates.
  • Smashing Technique: If your dates stick to the glass, lightly grease the bottom with a bit of oil or butter.
  • Storage: Store smashed dates in an airtight container in the fridge for up to 1 week or in the freezer for 3 months!
hand holding a smashed date with peanut butter, chocolate, and flaky salt.
5 from 1 vote

Smashed Dates with Peanut Butter and Chocolate

These smashed peanut butter and chocolate dates require just three ingredients and minimal effort! With naturally sweet medjool dates, creamy peanut butter, and rich melted chocolate, this recipe is vegan, dairy-free, and refined sugar-free, making it perfect for everyone. A sprinkle of flaky salt ties it all together, creating the ultimate indulgent yet wholesome snack or dessert!
Print Pin Rate
Prep Time: 5 minutes
Chill Time: 30 minutes
Total Time: 35 minutes
Servings: 10 servings

Equipment

  • baking sheet

Ingredients

  • 10 medjool dates
  • 1/4 cup unsweetened peanut butter or any nut/seed butter
  • 1/2 cup melted chocolate chips

Instructions

  • Open up each date, remove the pit, then lay it flat on a baking sheet lined with parchment paper.
  • Press down on each date to smash it until it’s as thin as you’d like. Then, spread some peanut butter on top of each smashed date.
  • Drizzle melted chocolate over each date, then transfer the dates to the fridge or freezer until the chocolate has hardened. Top with flaky salt and enjoy!

Nutrition

Serving: 1serving | Calories: 150kcal | Carbohydrates: 25g | Protein: 2.5g | Fat: 6g | Sugar: 20g

This 5-ingredient protein cookie dough is a healthy, gluten-free, and dairy-free treat packed with protein and sweetened with maple syrup. Ready in minutes, it’s perfect for a post-workout snack or healthier dessert. Customize with your favorite mix-ins for a quick, delicious, and indulgent treat!

Why You’ll Love This Recipe

  • Made with just 6 simple ingredients, it’s a healthier take on traditional cookie dough.
  • Packed with protein, making it perfect for a post-workout treat, quick snack, or fun dessert option.
  • Gluten-free and refined sugar-free, catering to various dietary preferences.
  • Quick and easy to make—no baking required, and ready in just minutes!
chocolate chip protein cookie dough on a spoon.

Toppings and Variations

  • Drizzle: Add a drizzle of melted dark chocolate or nut butter on top for extra decadence.
  • Add-Ins: Mix in chopped nuts, shredded coconut, or dried fruit for a fun twist.
  • Seasonal Flavors: Sprinkle in cinnamon, pumpkin spice, or a dash of peppermint extract to suit the season.

Adjust This Recipe to Your Dietary Needs

Make it Dairy-Free: Use non-dairy greek yogurt, and ensure your protein powder and chocolate chips are dairy-free.

Make it Keto: Replace the maple syrup with a keto-friendly liquid sweetener like monk fruit syrup. Use sugar-free chocolate chips for a low-carb treat.

Storage Instructions

Store your protein cookie dough in an airtight container in the fridge for up to a week. If you prefer a firmer texture, chill it for an hour before serving. For longer storage, freeze individual portions and thaw as needed.

5 ingredient edible protein chocolate chip cookie dough in a small cup with a spoon.
4.84 from 6 votes

5 Ingredient Edible Protein Cookie Dough

This 5-ingredient protein cookie dough is a healthy and gluten-free treat packed with protein and sweetened with maple syrup. Ready in minutes, it’s perfect for a post-workout snack or healthier dessert. Customize with your favorite mix-ins for a quick, delicious, and indulgent treat!
Print Pin Rate
Prep Time: 5 minutes
Total Time: 5 minutes
Servings: 4 servings

Equipment

  • 1 small bowl

Ingredients

  • 1/2 cup plain Greek yogurt
  • 1/4 cup almond flour or oat flour
  • 2 scoops (1 serving) vanilla protein powder
  • 2 tablespoons peanut, almond, or cashew butter
  • 1 tablespoon maple syrup
  • 3 tablespoons chocolate chips

Instructions

  • Add all the ingredients except the chocolate chips to a large bowl and stir to combine.
  • Then, fold in the chocolate chips and enjoy!

Nutrition

Serving: 1serving | Calories: 200kcal | Carbohydrates: 16g | Protein: 15g | Fat: 12g | Fiber: 5g | Sugar: 6g

I have to be honest, I’m not the biggest fan of pie. Especially around thanksgiving and christmas – I feel like the dessert table is 90% pies and none are gluten-free. :/ For the last few years I’ve been baking and bringing my own gluten-free desserts, like my gluten-free almond flour brownies, or my almond flour chocolate chip cookies which are always such a hit! But this year, I wanted a dessert that better fit the holiday/pie category, so I came up with the idea for healthy gluten-free pecan pie bars.

These bars are wayyy less daunting than a pie and so much easier to make! They require just 6 simple ingredients, one bowl, and a baking dish. But trust me when I tell you, they’re just as good as any pie (yup, I said it!!!!) and no one will ever guess how much healthier they are!

Why You’ll Love This Recipe

  • Healthier Ingredients: This recipe skips traditional ingredients like refined sugar and flour, making it gluten-free, grain-free, and dairy-free while retaining the classic flavors.
  • Easy and Quick: With a simple crust and filling, these bars are ready for the oven in under 15 minutes.
  • Versatile and Customizable: Add a splash of bourbon or chocolate chips for a twist on traditional pecan pie flavors.
overhead image of a healthy gluten-free pecan pie bar.

What You’ll Need to Make These Gluten-Free Pecan Pie Bars

Almond Flour: The base of our shortbread crust, almond flour provides a rich, buttery flavor and keeps these bars gluten-free and grain-free.

Coconut Oil: Used in both the crust and filling, coconut oil brings moisture and healthy fats to each bite.

Maple Syrup: A natural sweetener that pairs beautifully with pecans, adding just the right amount of sweetness.

Coconut Sugar: Coconut sugar gives the filling a subtle caramel-like flavor, perfect for that traditional pecan pie taste.

Eggs: These help bind the filling, creating that signature pecan pie texture that holds up well as bars.

Pecans: The star ingredient! Chopped pecans add crunch and warmth to every bite.

How to Make Healthy Gluten-Free Pecan Pie Bars

  1. Prepare the Crust: Mix all crust ingredients and press into a lined baking pan. Bake until golden brown and set aside.
  2. Make the Filling: While the crust bakes, whisk together the filling ingredients, then fold in the chopped pecans.
  3. Assemble and Bake: Pour the filling over the baked crust and return to the oven until the filling is set. Let cool before slicing.
healthy gluten-free pecan pie bar with a bite taken out.

Can I Make These Vegan?

Yes! Substitute the eggs with a flax egg (2 tablespoons flaxseed meal mixed with 6 tablespoons water) and allow the mixture to sit for a few minutes until it thickens.

Switch Up the Flavor of Your Pecan Pie Bars

For a unique twist, try adding:

  • Bourbon: Add 1 tablespoon for a rich, warm flavor.
  • Chocolate Chips: Sprinkle ½ cup over the crust before adding the filling for a chocolatey surprise.

Storage Tips

Store these pecan pie bars in an airtight container in the fridge for up to 1 week or freeze for up to 3 months.

three healthy gluten free pecan pie bars stacked on top of each other.
4.67 from 12 votes

Healthy Gluten-Free Pecan Pie Bars

These gluten-free pecan pie bars are the perfect way to enjoy the classic flavors of pecan pie in an easy-to-make, healthier bar form. Made with an almond flour shortbread crust, naturally sweetened filling, and crunchy pecans, this recipe is gluten-free, grain-free, dairy-free, and made with just 6 main ingredients!
Print Pin Rate
Prep Time: 10 minutes
Cook Time: 35 minutes
Total Time: 45 minutes
Servings: 16 servings

Equipment

  • 1 large bowl
  • 1 9×9-inch baking pan

Ingredients

For the shortbread crust:

  • 2 cups almond flour
  • 1/4 cup melted coconut oil
  • 1/4 cup maple syrup
  • 1 teaspoon vanilla extract optional, but recommended

For the pecan pie filling:

  • 1/2 cup coconut sugar or brown sugar
  • 1/4 cup melted coconut oil
  • 1/4 cup maple syrup
  • 2 teaspoons vanilla extract optional, but recommended
  • 2 eggs at room temperature (very important!)
  • 1 1/2 cups chopped pecans raw and unsalted

Instructions

  • Preheat oven to 350° Fahrenheit and line a 9×9-inch baking pan with parchment paper.
  • Add all shortbread crust ingredients to a large bowl and mix to combine. Then, transfer the crust to your prepared baking pan and press the crust down into an even layer over the base of the dish. Bake for 10 minutes or until lightly golden brown around the edges.
  • While the crust bakes, make the filling by whisking together the coconut sugar, coconut oil, maple syrup, vanilla extract, and eggs. Once that’s combined, mix in the chopped pecans.
  • When the crust is finished baking, remove it from the oven and pour the pecan pie filling mixture over the crust. Bake again for 20-25 minutes, or until the filling is set. Remove the bars from the oven and let cool for at least 30 minutes in the pan.
  • Once the pan is cool, transfer the bars to the fridge to chill for about an hour. Then, remove the bars from the pan and cut into 16 squares. Serve immediately or store in the fridge for up to 1 week!

Nutrition

Serving: 1serving | Calories: 272kcal | Carbohydrates: 44g | Protein: 2.5g | Fat: 10g | Sugar: 26g

Perfectly rich and chocolatey almond flour brownies! Super easy to make with just one bowl and 8 ingredients. These brownies are my all-time favorite grain-free, dairy-free, and healthy dessert recipe!

overhead image of almond flour brownies.

What You’ll Need to Make Almond Flour Brownies

Almond Flour – Duh! Almond flour is the star of this show. I highly recommend blanched super-fine almond flour for these gluten-free brownies. I use and love this Bob’s Red Mill Almond Flour in all of my almond flour recipes!

Sugar – I used coconut sugar in my almond flour brownies to make them refined sugar-free. Coconut sugar is just as sweet and tasty as regular sugar, but less processed! However, you can totally use whatever kind of sugar you have on-hand.

Chocolate Chips – Plenty of chocolate chips for these double chocolate brownies! You’ll melt one cup and beat them into the batter, then add 1/2 cup of whole chocolate chips in at the very end. The result is ultra rich and chocolatey brownies, YUM!

three almond flour brownies stacked on top of each other.

Tips and Tricks

  • Beat the eggs and sugar together until super light and fluffy. This is what gives us that crisp, crackly brownie top!
  • Serve these almond flour brownies warm with a scoop of cold vanilla ice cream! I just LOVE turning this dessert into brownie sundaes, such a delicious and decadent treat.
  • Go ahead, add a handful of chopped walnuts to these brownies if you’d like! I personally don’t see anything wrong with walnuts in brownies, so have fun and make these your own.
close-up overhead image of almond flour brownies.

Adjust This Recipe to Your Dietary Needs

Make it Vegan: Simply swap the eggs for your favorite vegan egg substitute. I haven’t tested this option myself just yet, so if you do let me know how it works in the comments!

Make it Paleo: For paleo brownies, use coconut sugar in this recipe, and use either paleo chocolate chips or a chopped paleo chocolate bar. I recommend Hu Kitchen Chocolate Baking Gems!

Don’t Forget to Try These Almond Flour Recipes!

close-up overhead image of almond flour brownies.
4.72 from 14 votes

Almond Flour Brownies

Perfectly rich and chocolatey almond flour brownies! Super easy to make with just one bowl and 8 ingredients. These brownies are my all-time favorite grain-free, dairy-free, and healthy dessert recipe!
Print Pin Rate
Prep Time: 5 minutes
Cook Time: 30 minutes
Total Time: 35 minutes
Servings: 16 brownies

Ingredients

  • 1 cup sugar, I used coconut sugar
  • 3 large eggs
  • 1 1/2 cups almond flour
  • 3 tablespoons unsweetened cocoa powder
  • 1 teaspoon vanilla extract
  • 1/4 teaspoon salt
  • 1 1/2 cups chocolate chips, divided
  • 1/2 cup olive oil, avocado oil or vegetable oil

Instructions

  • Preheat oven to 350° Fahrenheit and line an 8×8-inch pan with parchment paper.
  • In a large bowl, beat together the sugar and eggs with either a hand or stand mixer. Continue beating for 3-5 minutes, until super light and fluffy.
  • Add the almond flour, cocoa powder, vanilla extract, and salt. Stir until everything is just combined, careful not to over-mix.
  • In a separate small bowl, add the olive oil and 1 cup of chocolate chips. Microwave in 30-second intervals, stirring between each interval, until chocolate chips are fully melted.
  • Pour melted chocolate chips and olive oil into the brownie batter, and stir to combine. Then, fold in the remaining chocolate chips.
  • Pour brownie batter into prepared pan and bake for 30-35 minutes, or until the center is just barely set. Remove from oven and let cool completely before slicing into squares.

Notes

  • These almond flour brownies will stay fresh in an airtight container, at room temperature, for up to 1 week. That is… if they last that long!
  • Nutrition

    Serving: 1brownie | Calories: 264kcal | Carbohydrates: 28g | Protein: 4.5g | Fat: 16g | Sugar: 20g

    We brought our toddler apple picking last weekend and I currently swimming in apples over here! Just SO many apples. We of course made my healthy gluten-free apple crisp as soon as we got home. I’ve also been making caramelized apples to go over yogurt and oatmeal bowls (so good OMG!). But we still have more apples than we know what to do with! *Enter the apple pie smoothie.*

    It’s true what they say… an apple a day keeps the doctor away! This smoothie starts with one whole apple, plain yogurt, and a scoop of protein powder for extra protein. The end results is a creamy and perfectly sweet high protein smoothie that tastes just like apple pie. It’s nutritious, deeply satisfying, and guaranteed to keep you full until your next meal!

    apple pie smoothie in a glass with whipped cream.

    Why You’ll Love This Recipe

    This healthy apple pie protein smoothie is the perfect blend of flavors for a cozy, yet refreshing treat. It’s packed with protein, naturally sweetened, and full of fall flavors that make you feel like you’re enjoying a slice of apple pie. Plus, it’s gluten-free, dairy-free, and takes just a few minutes to whip up!

    What You Need to Make This Healthy Apple Pie Smoothie

    Apple: A fresh apple adds natural sweetness, fiber, and a classic apple pie flavor.

    Plain Yogurt (Non-Dairy): This adds creaminess and a boost of protein while keeping the smoothie dairy-free. I recommend Cocojune organic plain unsweetened coconut yogurt, it’s perfectly thick and creamy! Though you can use regular yogurt if preferred.

    Milk (Almond Milk): This helps to blend the smoothie and adds a touch of nuttiness from the almond milk. Any milk can work depending on your dietary needs.

    Unflavored Protein Powder or Collagen Peptides: Boosts protein content to keep you full longer. Unflavored protein powder blends seamlessly with the apple pie flavors. I use and love the Garden of Live vegan protein powder in most of my protein smoothies!

    Rolled Oats or Almond Butter: Adds creaminess and thickness to the smoothie. You can swap with almond butter for extra creaminess or keep it grain-free.

    Cinnamon: The spice that gives this smoothie its signature apple pie flavor.

    Honey or Maple Syrup (Optional): For a little extra sweetness if needed, especially if your apple isn’t very sweet.

    apple pie smoothie with a straw.

    Can I Prep This Apple Pie Smoothie Ahead of Time?

    Yes! You can prep the ingredients the night before by chopping the apple and measuring out the other ingredients. Store them in the fridge, then blend them together in the morning. If you want to make the smoothie ahead of time, blend it and store it in an airtight jar in the fridge for up to 24 hours. Just give it a good shake before drinking!

    Tips and Tricks For the Best Smoothie

    • For a thicker, creamier smoothie either use a frozen apple instead of a fresh one, or add half of a frozen banana to the blender along with all of the other ingredients.
    • Blend your smoothie for longer to ensure a smooth texture without any lumps.
    • Add ice cubes if you like your smoothie extra cold, or freeze the almond milk into cubes for added creaminess!

    Adjust This Recipe to Your Dietary Needs

    • Make it Vegan: Use non-dairy yogurt and plant-based protein powder to make this smoothie 100% vegan.
    • Grain-Free: Skip the oats and use almond butter for added creaminess and healthy fats.
    • Make it Nut-Free: Substitute almond milk with oat milk, and use oats instead of almond butter. It’s that easy!
    Apple pie protein smoothie in a glass with whipped cream and cinnamon on top.
    5 from 1 vote

    Apple Pie Protein Smoothie

    This healthy apple pie protein smoothie is just what you need for a delicious, protein-packed, fall-inspired treat. It’s made with 7 simple ingredients, is gluten-free, dairy-free, high in protein, and can easily be adapted to fit any dietary needs!
    Print Pin Rate
    Prep Time: 5 minutes
    Total Time: 5 minutes
    Servings: 1 serving

    Equipment

    • blender

    Ingredients

    • 1 medium apple cored and cut
    • 1/2 cup plain yogurt (I used non-dairy coconut yogurt)
    • 1/4 cup milk (I used almond milk)
    • 1 scoop unflavored protein powder or collagen peptides
    • 1 tablespoon rolled oats or 1/2 tablespoon almond butter
    • 1/2 teaspoon cinnamon
    • 1/2 tablespoon honey or maple syrup optional

    Instructions

    • Add all ingredients to a blender and blend until smooth, then enjoy immediately!

    Nutrition

    Serving: 1smoothie | Calories: 313kcal | Carbohydrates: 47g | Protein: 22.5g | Fat: 6g | Sugar: 28g