Tag

vegan

Browsing

Everyone needs a good berry crisp recipe in their back pocket! I’ve made a few berry crisps in my day, but to be completely honest – none were quite right. They were either too dry, didn’t have enough berries, or overly sweet. But this triple berry crisp recipe?? Well… I don’t mean to brag but, she’s just PERFECT! Made with 5 ingredients, in one bowl, with frozen berries (so you can bake it year-round!). I drew some inspo from my healthy apple crisp which was a huge hit last fall! And also my 4 ingredient peach cobbler which I can’t wait to break back out this upcoming peach season.

Why You’ll LOVE This Triple Berry Crisp with Frozen Berries

  • Super Easy to Make: With just 5 simple ingredients, this recipe comes together quickly for a stress-free dessert.​
  • Versatile and Adaptable: Easily customize the recipe to suit gluten-free, dairy-free, nut-free, or vegan diets without compromising on flavor.​
  • Deliciously Healthy: Made with wholesome ingredients, this crisp offers a guilt-free indulgence that’s both satisfying and nutritious.​
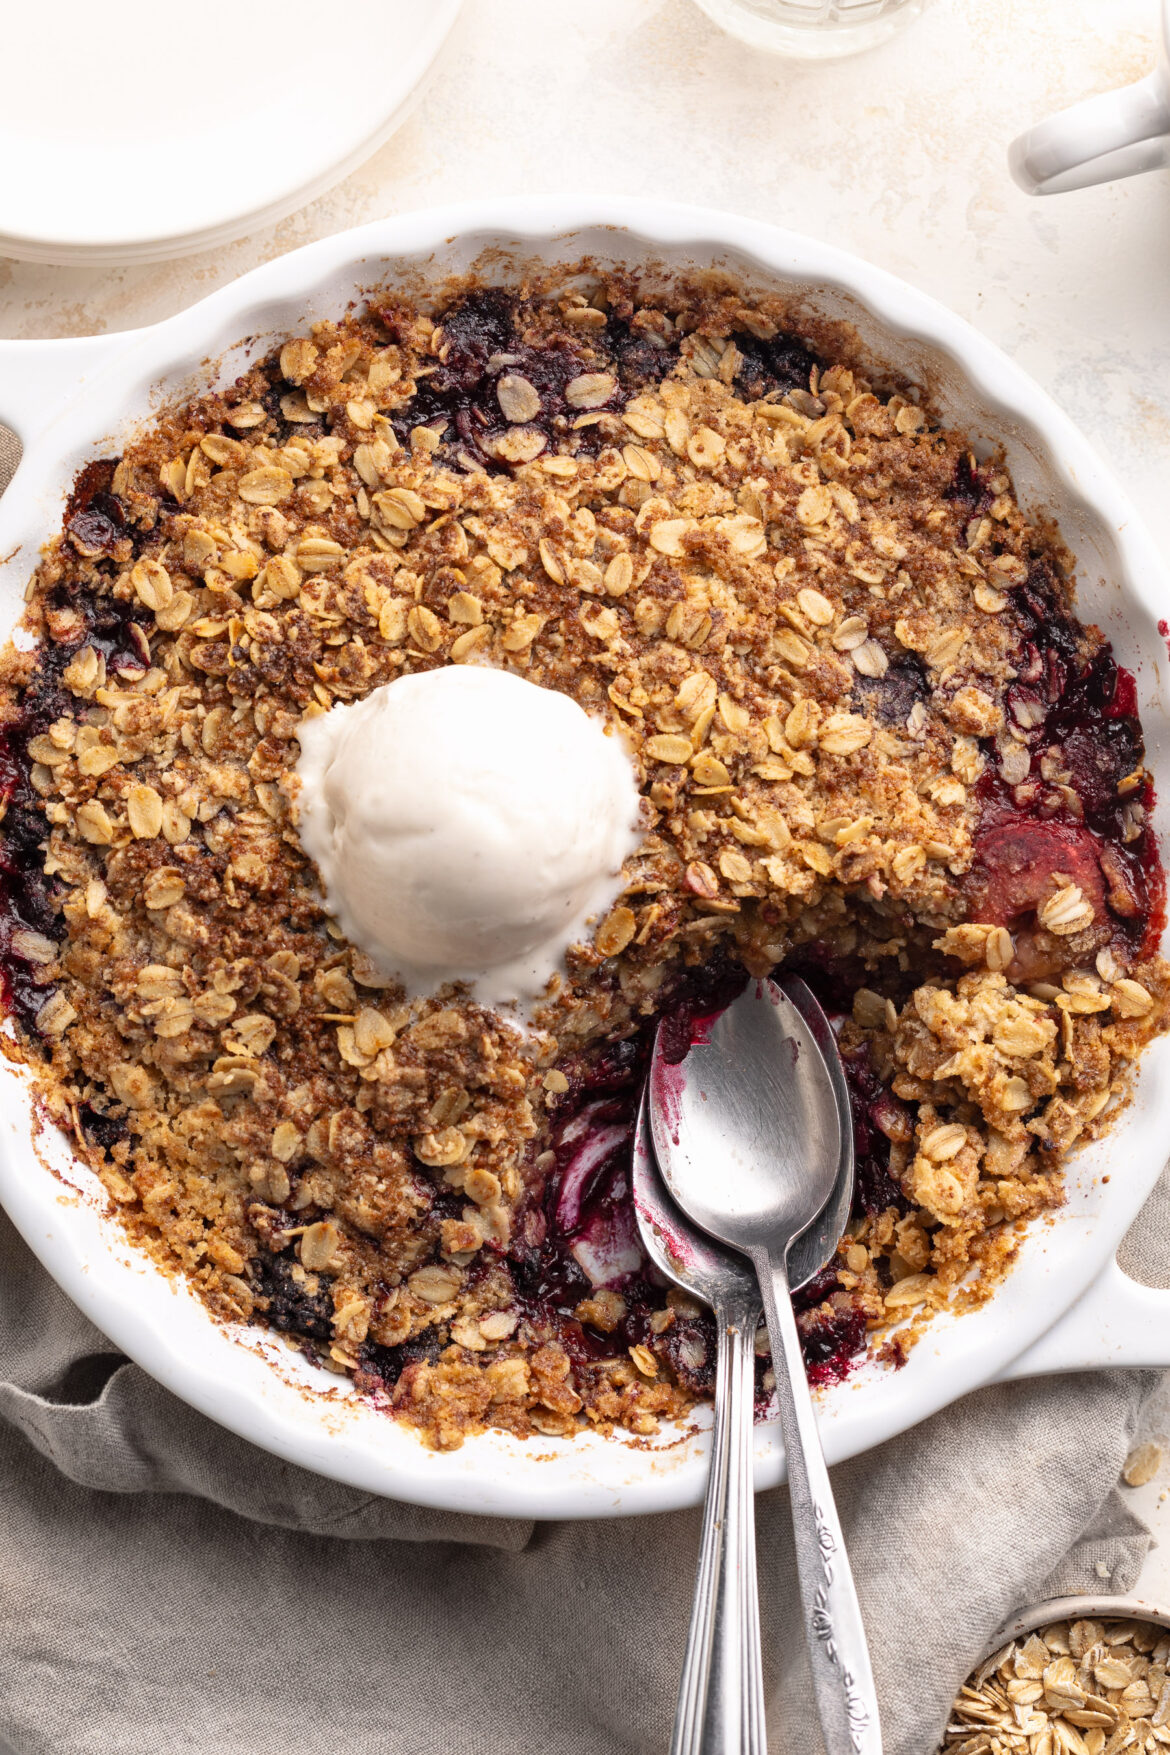
close up image of triple berry crisp with frozen berries in a baking dish.

Can I Use Fresh Berries?

Yes, you can use fresh berries in this recipe. However, frozen berries are convenient and available year-round, providing consistent quality and flavor. If using fresh berries, you may need to adjust the baking time slightly, as they release less juice than frozen ones.

Can I Make Ahead and Freeze This Recipe?

Absolutely! This berry crisp can be prepared ahead of time and frozen either before or after baking:​

  • Before Baking: Assemble the crisp, cover it tightly, and freeze. When ready to bake, remove from the freezer, let it thaw in the refrigerator overnight, and bake as directed.​
  • After Baking: Allow the crisp to cool completely, then cover and freeze. To reheat, warm it in the oven at 350°F until heated through.​
triple berry crisp with frozen berries on a plate with a scoop of vanilla ice cream on top.

Adjust This Recipe to Your Dietary Needs

  • Make it Gluten-Free: Use certified gluten-free oats and gluten-free all-purpose flour or almond flour for the crisp topping.
  • Make it Dairy-Free: Substitute the butter with a non-dairy alternative like coconut oil or a plant-based butter.​
  • Make it Nut-Free: Ensure all ingredients, including oats and flour, are free from cross-contamination with nuts.​
  • Make it Vegan: Replace the butter with a plant-based alternative and use a vegan-friendly sugar.
Overhead image of triple berry crisp with frozen berries in a baking dish with a scoop of vanilla ice cream on top.
3 from 2 votes

5-Ingredient Triple Berry Crisp with Frozen Berries

Effortless and delicious 5-Ingredient Triple Berry Crisp, crafted with frozen mixed berries and a simple, wholesome crisp topping! This fruit crisp is not only simple to make, but also easy to adapt to a variety of diets, making it a perfect treat for any occasion. Serve it warm with a scoop of vanilla ice cream for a delicious and healthy dessert!
Print Pin Rate
Prep Time: 10 minutes
Cook Time: 40 minutes
Total Time: 50 minutes
Servings: 8 servings

Equipment

  • 1 9-inch baking dish
  • 1 large bowl

Ingredients

For the berries:

  • 4 cups frozen mixed berries
  • 1/4 cup cane sugar or coconut sugar
  • 1/4 cup gluten-free all purpose flour or regular all purpose flour
  • 1/2 tablespoon lemon juice optional
  • 1 teaspoon vanilla extract optional

For the crisp:

  • 1 cup rolled oats
  • 3/4 cup gluten-free all purpose flour or almond flour
  • 1/2 cup cane sugar or coconut sugar
  • 6 ounces butter cut into 1-inch cubes

Instructions

  • Preheat oven to 350° Fahrenheit.
  • Add all berry ingredients to a 9-inch baking dish and toss together until evenly coated, then spread the berries into an even layer around the dish.
  • Add all crisp ingredients to a large bowl. Use a fork to mix together, until a crumbly mixture forms. Sprinkled the crisp topping evenly over the berries.
  • Bake for 40-45 minutes or until the berries are super soft, then let cool slightly before serving with a scoop of vanilla ice cream. YUM!
    berry crisp with frozen berries step 3

Nutrition

Serving: 1serving | Calories: 350kcal | Carbohydrates: 45g | Protein: 2g | Fat: 18g | Sugar: 24g

Why You’ll Love These Protein Balls

Easy, No-Bake Snack: Made with just 5 simple ingredients and ready in minutes – no oven required!

Packed with Protein: Each ball contains 7 grams of protein, making them a perfect post-workout or midday snack.

Healthy & Dietary-Friendly: Gluten-free, dairy-free, vegan, and naturally sweetened with maple syrup.

Recipe Variations

  • Mix in Superfoods: Add chia seeds, flaxseeds, or hemp hearts for extra fiber and omega-3s.
  • Swap the Nut Butter: Use almond butter or cashew butter for a different flavor. For nut-free, use sunflower seed butter.
  • Boost the Chocolate: Dip the balls in melted dark chocolate and let them harden in the fridge for a chocolate-covered protein treat!

The Mixture is Too Dry, What Do I Do?

If the mixture is dry or crumbly, simply:

  • Add 1 tablespoon of water or almond milk at a time until the dough comes together.
  • Alternatively, add an extra tablespoon of peanut butter for more moisture and flavor.
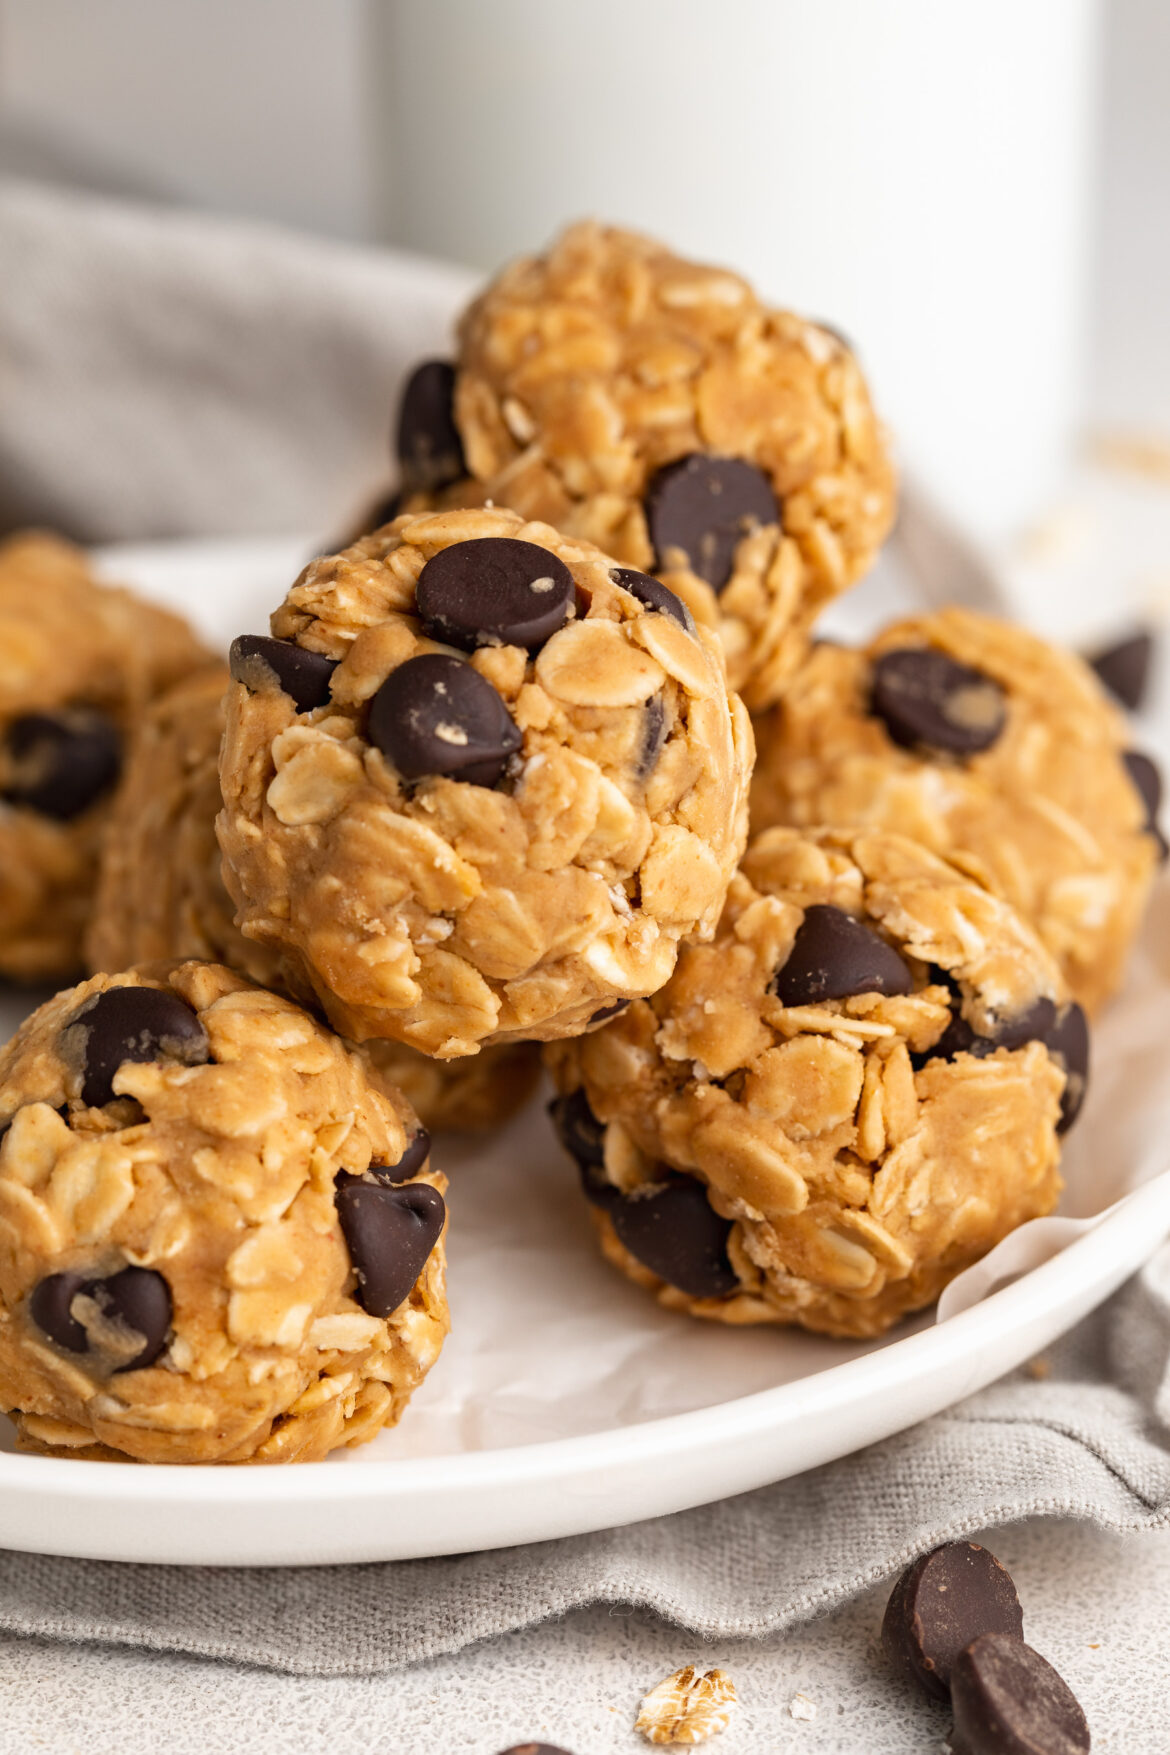
Hand holding a cookie dough protein ball.

Adjust This Recipe to Your Dietary Needs

  • Make it Nut-Free: Swap peanut butter for sunflower seed butter and use oat flour instead of almond flour.
  • Make it Keto: Use almond flour instead of oats and a sugar-free maple syrup alternative.
  • Make it Grain-Free/Paleo: Skip the oats and use almond flour for a smooth, doughy texture.

Storage Instructions

  • Fridge: Store the protein balls in an airtight container in the fridge for up to 1 week.
  • Freezer: Freeze for up to 3 months. Let thaw for a few minutes before enjoying.

More Healthy Snack Recipes

If you love these no-bake protein balls, check out my other snack recipes like:

Enjoy these 5-ingredient cookie dough protein balls as a nutritious snack or dessert! 😋

cookie dough protein balls on a plate
No ratings yet

Cookie Dough Protein Balls

Satisfy your sweet tooth with these 5-ingredient cookie dough protein balls – the perfect no-bake snack! Packed with 7 grams of protein per ball, they’re gluten-free, dairy-free, and vegan, making them ideal for a healthy energy boost. Ready in minutes, they’re a delicious and nutritious way to fuel your day!
Print Pin Rate
Prep Time: 5 minutes
Total Time: 5 minutes
Servings: 8 servings

Equipment

  • 1 medium bowl

Ingredients

  • 1 cup rolled oats or almond flour
  • 1/4 cup vanilla protein powder
  • 1/4 cup peanut butter
  • 3 tablespoons maple syrup or honey
  • 1/4 cup dark chocolate chips

Instructions

  • Add all ingredients to a medium bowl and stir until thoroughly combined.
  • Roll mixture into 1-inch balls.

Nutrition

Serving: 1serving | Calories: 145kcal | Carbohydrates: 16g | Protein: 7g | Fat: 6g | Sugar: 7g

Magic bars were one of my favorite childhood treats! My mom had a few dessert recipes she rotated through – her famous watergate salad was a big one, and 7-layer magic bars were a close second. So when I got hit with this insane craving for magic bars, I looked up a few recipes and was pretty shocked by what I found. Most magic bars are made with tons, and I mean TONS of processed sugar. Though since I’ve basically made it my life’s work to turn our favorite desserts into healthier ones, I knew I had to get working on a healthier magic bar recipe!

This recipe took quite a few tries, but I ultimately perfected it! I used the same almond flour shortbread crust as my healthy pecan pie bars recipe, and riffed off my healthy vegan caramel sauce for a healthier sweetened condensed milk alternative. I then topped these bars with plenty of coconuts, chopped nuts, and of course – chocolate chips! The end result is a bar just as indulgent as the classic magic bars we all know and love, made with healthier ingredients and a fraction of the sugar. I just know you’re gonna LOVE these!

Why You’ll Love This Recipe

  • Naturally Sweetened – No refined sugar, just maple syrup and coconut cream for a rich, caramel-like sweetness.
  • Easy & Quick – Simple ingredients, one bowl for the crust, and a short bake time.
  • Customizable – Easily make them nut-free, keto-friendly, or extra chocolatey!
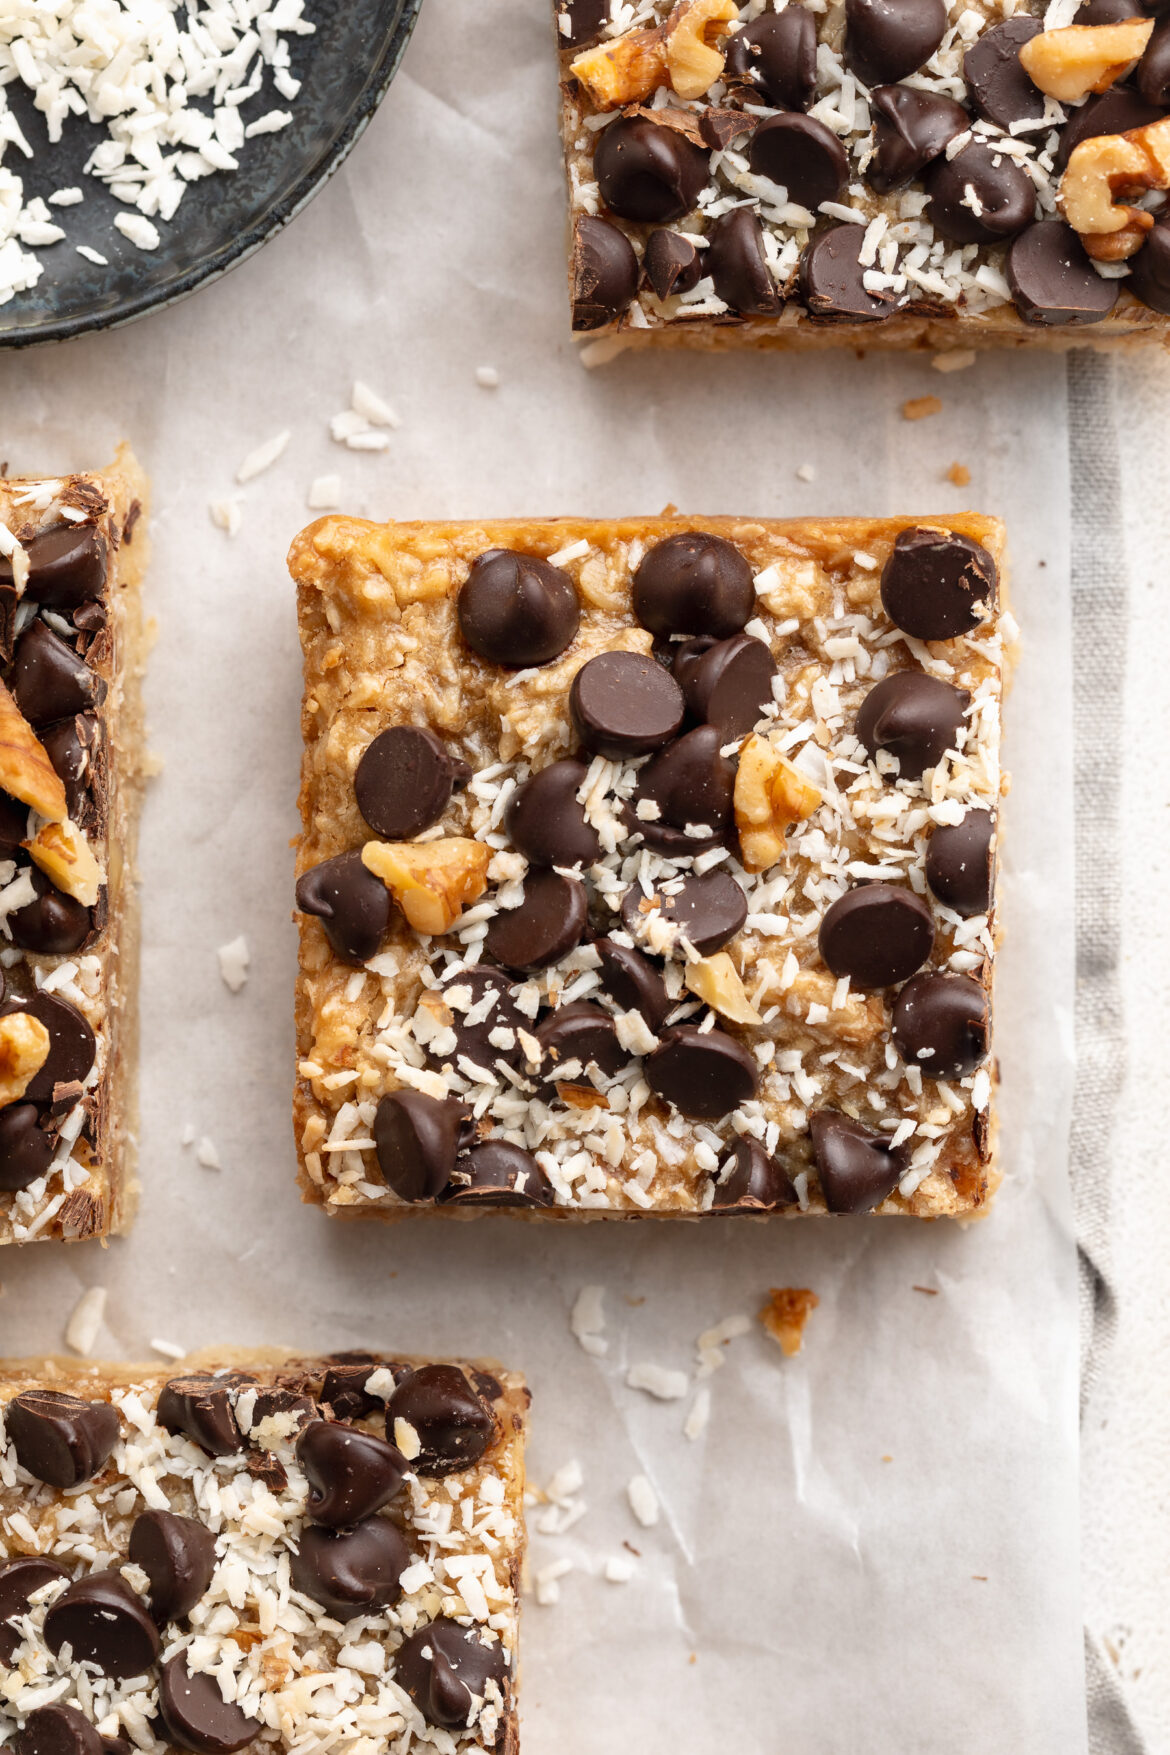
a healthy gluten-free magic bar with a bite taken out.

What Makes These Magic Bars Healthier?

Traditional magic bars are loaded with processed sugars and condensed milk, but this healthier version swaps in:

  • Almond flour for a grain-free, nutrient-dense crust.
  • Maple syrup instead of refined sugar.
  • Coconut cream for a dairy-free caramel alternative.
  • Dark chocolate chips with minimal added sugar, or opt for a refined sugar-free chocolate chip like these!

Sam’s Recipe Tips

  • For Extra Firm Bars – Let them chill in the fridge overnight before slicing.
  • For More Chocolate Flavor – Drizzle melted chocolate over the top before serving.
  • For a More Caramel-Like Texture – Use cashew butter instead of almond butter.
two healthy gluten-free magic bars stacked on top of each other.

Adjust This Recipe to Your Dietary Needs

Nut-Free Option – Use sunflower seed butter instead of almond butter and swap the nuts for pumpkin or sunflower seeds.

Keto-Friendly Option – Substitute maple syrup with a keto-friendly syrup and use sugar-free chocolate chips.

Refined Sugar-Free – Stick with pure maple syrup and dark chocolate for a naturally sweet treat!

Storage Instructions

Fridge: Store bars in an airtight container in the refrigerator for up to one week.
Freezer: For longer storage, freeze them for up to 3 months and thaw before serving.

overhead image of a healthy gluten-free magic bar with chocolate chips on top.
5 from 1 vote

Healthy Gluten-Free Magic Bars

These healthy magic bars are a better-for-you twist on the classic 7-layer bars! Made with a buttery almond flour crust, a naturally sweetened caramel layer, crunchy nuts, coconut, and melty dark chocolate, these bars are gluten-free, dairy-free, vegan, and refined sugar-free. They’re the perfect treat for when you’re craving something sweet but still healthier.
Print Pin Rate
Prep Time: 10 minutes
Cook Time: 30 minutes
Chill Time: 1 hour
Total Time: 1 hour 40 minutes
Servings: 16 bars

Equipment

  • 1 9×9-inch baking pan
  • 1 large bowl
  • 1 small saucepan

Ingredients

For the shortbread crust:

  • 2 cups almond flour
  • 1/4 cup melted coconut oil
  • 1/4 cup maple syrup
  • 1 teaspoon vanilla extract

For the topping:

  • 1/2 cup coconut cream (the thick white part at the top of a can of full-fat coconut milk)
  • 1/4 cup maple syrup
  • 1/4 cup almond butter or peanut butter
  • 1 cup chopped walnuts or pecans
  • 1 cup unsweetened shredded coconut
  • 1 cup dark chocolate chips

Instructions

  • Preheat oven to 350° Fahrenheit and line a 9×9-inch baking pan with parchment paper.
  • Add all shortbread crust ingredients to a large bowl and mix to combine. Then, transfer the crust to your prepared baking pan and press the crust down into an even layer over the base of the baking dish. Bake for 10 minutes or until lightly golden brown around the edges.
  • Remove the crust from the oven to cool, and while it cools make the caramel by adding the coconut cream, maple syrup, and almond butter to a small saucepan over medium-low heat. Whisk the mixture together and cool for 3-5 minutes, whisking constantly, until the caramel has melted together and slightly thickened.
  • Remove the saucepan from the heat and allow the caramel to cool slightly, then mix the chopped walnuts or pecans and shredded coconut into the caramel.
  • Pour the caramel mixture over the cooled crust and spread it into an even layer over the crust. Sprinkle the chocolate chips evenly over the caramel layer (if you’d like, you can then sprinkle an additional 1-2 tablespoons of shredded coconut and chopped walnuts or pecans over the chocolate chips to make the bars a little prettier), then bake the bars for an additional 20 minutes.
  • Remove the bars from the oven and leave them to cool at room temperature for about 30 minutes, then transfer them to the fridge to completely set for at least one hour. Remove the bars from the fridge, cut into square, and enjoy!

Nutrition

Serving: 1bar | Calories: 325kcal | Carbohydrates: 20g | Protein: 6.4g | Fat: 27g | Sugar: 13g

If you have bananas, peanut butter, and cocoa powder at home then you can make the most delicious 3 ingredient brownies! Something about me is I’m constantly stocking up on bananas. Not only because my toddler LOVES them, but they’re the star ingredient of so many of my healthy recipes. I use them most mornings in my 3 ingredient protein pancakes, then I always save some to make my 4 ingredient banana bread, and any leftovers get frozen for healthy protein smoothies!

Bananas are also the perfect base to this 3 ingredient brownies recipe. They provide structure and a natural sweetness to this gluten-free, dairy-free, egg-free, and totally sugar-free recipe! The only other ingredients you’ll need are peanut butter and unsweetened cocoa powder. Then, grab just one bowl and you’ll be on your way to making the most rich and fudgy brownies that are light and healthy, but still taste indulgent!

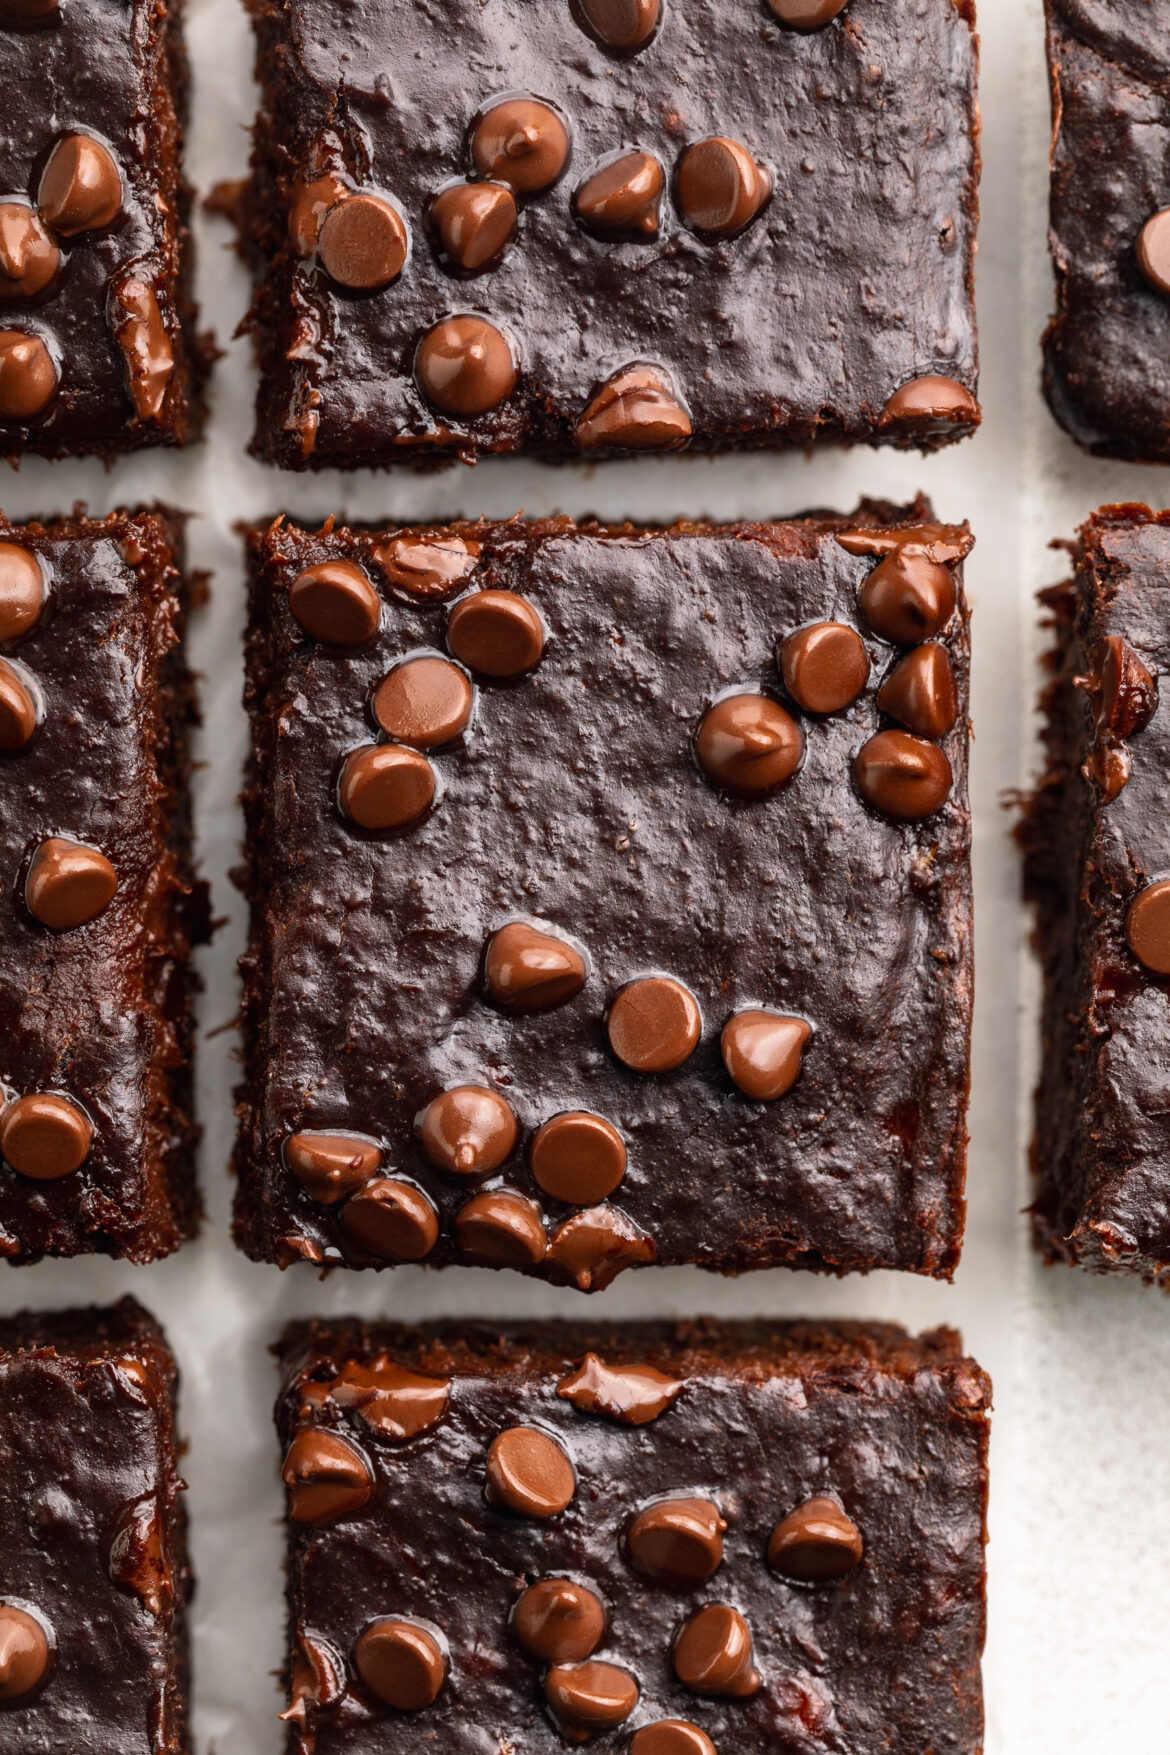
the side of a 3 ingredient brownie resting on top of another brownie.

Why You’ll Love This Recipe

  • Simple Ingredients: Requires only three pantry staples.
  • Quick and Easy: From mixing to baking, you’ll have brownies ready in under 30 minutes.
  • Diet-Friendly: Naturally gluten-free, dairy-free, egg-free, and contains no added sugars.

Sam’s Recipe Tips

  • Ripeness Matters: Use overripe bananas for optimal sweetness and moisture.
  • Nut Butter Choices: Peanut butter adds a robust flavor, while almond or cashew butter offers milder alternatives. And for a nut-free version, try sunflower seed butter instead!
  • Optional Add-Ins: For extra sweetness, mix in maple syrup or sprinkle chocolate chips on top before baking.
3 ingredient brownies on a table stacked on top of each other.

Storage Instructions

  • Room Temperature: Store in an airtight container for up to 2 days.
  • Refrigeration: Keep refrigerated for up to a week.
  • Freezing: Freeze individual slices for up to a month; thaw at room temperature before enjoying.
overhead image of 3 ingredient brownies with mini chocolate chips on top.
5 from 6 votes

3 Ingredient Brownies (gluten-free, dairy-free, egg-free!)

Indulge in these rich, fudgy brownies made with just three simple ingredients: bananas, peanut butter, and cocoa powder. This recipe is perfect for those seeking a quick, healthy, and delicious dessert that's gluten-free, dairy-free, egg-free, and sugar-free. Plus, it all comes together in just one bowl!
Print Pin Rate
Prep Time: 5 minutes
Cook Time: 20 minutes
Total Time: 25 minutes
Servings: 8 servings

Equipment

  • 1 large bowl
  • 1 9×4-inch loaf pan

Ingredients

  • 3 overripe bananas about 1 1/2 cups when mashed
  • 1/2 cup peanut butter or any nut/seed butter
  • 1/3 cup unsweetened cocoa powder

Optional add-ins:

  • 3 tablespoons maple syrup optional, for extra sweetness
  • 1/4 cup chocolate chips optional

Instructions

  • Preheat oven to 350° Fahrenheit and line a 9×4-inch loaf pan with parchment paper, then grease the inside of the pan with oil or butter.
  • Mash the bananas in a large bowl until mostly smooth, then add in the peanut butter, cocoa powder, and maple syrup (if using). Mix everything together until fully combined.
  • Transfer the brownie batter to your prepared baking pan and top with chocolate chips (if using), then bake for 18-20 minutes or until the brownie are just set in the middle.
  • Remove the pan from the oven and let the brownies cool completely before slicing.

Nutrition

Serving: 1brownie | Calories: 140kcal | Carbohydrates: 15g | Protein: 5g | Fat: 8g | Sugar: 6g

Healthier sweet treats are kinda my thing. I recently set out to recreate as many of my favorite classic candy recipes to make them healthier, gluten-free, and dairy-free. My 4-ingredient healthy snickers have been a huge hit, and so have my 4-ingredient date caramels. I even made a healthy homemade butterfingers recipe for halloween last year and OMG they were gone in three days! These healthy twix bars were the obvious next choice because, well – who doesn’t love a twix?! This healthy twix bars recipe absolutely nail the classic flavors and textures we’re all addicted to when it comes to the traditional candy bar. A buttery shortbread crust, smooth and perfectly sweet caramel, and crispy chocolate shell make the perfect quick and easy sweet candy-inspired treat!

overhead image of healthy twix bars on parchment paper with flaky sea salt on top.

Why You’ll Love This Recipe

  • Made with wholesome ingredients – No refined sugars, artificial flavors, or preservatives.
  • Gluten-free, vegan, and dairy-free – Perfect for various dietary needs.
  • Easy to make – Just a few simple steps, no complicated techniques required.
  • Rich, chewy, and delicious – Just like the classic Twix bars but with a healthier twist!

What You’ll Need to Make Homemade Healthy Twix Bars

  • Almond Flour – Creates a light, buttery shortbread base while keeping the recipe gluten-free. I buy my almond flour in bulk on Amazon!
  • Coconut Oil – Used in all three layers for moisture, structure, and a silky texture.
  • Maple Syrup – Naturally sweetens the bars while adding a subtle caramel-like flavor.
  • Vanilla Extract – Enhances the sweetness and deepens the flavors of both the shortbread and caramel layers.
  • Peanut Butter – Provides a rich, creamy caramel-like texture without any refined sugar. Swap with almond or cashew butter for a different flavor.
  • Chocolate Chips – The perfect finishing touch for that classic Twix-like chocolate layer. Use dark chocolate for a richer taste!
close up image of healthy twix bars with flaky salt on top.

How to Make Healthy Twix Bars

  1. Prepare the Shortbread: Mix almond flour, melted coconut oil, maple syrup, and vanilla extract. Press into a lined 9×9-inch pan and bake at 350°F for 10 minutes. Let cool.
  2. Make the Caramel Layer: Heat peanut butter, coconut oil, maple syrup, and vanilla extract in a saucepan until smooth and bubbly. Pour over the shortbread layer and refrigerate until set.
  3. Melt the Chocolate: Melt chocolate chips with coconut oil, then spread over the caramel layer. Refrigerate again until firm.
  4. Slice & Enjoy! Remove from the fridge, cut into bars, and sprinkle with flaky sea salt if desired.

Frequently Asked Questions

  • Can I use regular flour? – No, almond flour is key to the texture and gluten-free nature of this recipe.
  • Can I make these nut-free? – Yes! Swap almond flour for oat flour and use sunflower seed butter instead of peanut butter.
  • What makes these “healthy”? – These bars use natural sweeteners, healthy fats, and no processed ingredients.
  • How do I store them? – Keep them in an airtight container in the fridge for up to a week or freeze for up to 3 months!
healthy twix bar with a bite taken out.

Sam’s Recipe Tips

  • For a crispier shortbread layer, bake for an extra 2-3 minutes.
  • Want a thicker caramel layer? Add an extra ¼ cup of peanut butter!
  • Use dark chocolate for a richer, more intense chocolate flavor.
healthy twix bars stacked on top of each other with flaky salt on top.
5 from 13 votes

6-Ingredient Healthy Twix Bars

These homemade Healthy Twix Bars are made with just six simple ingredients, featuring a buttery almond flour shortbread, creamy peanut butter caramel, and a rich dark chocolate topping. They’re gluten-free, vegan, dairy-free, and naturally sweetened, making them a better-for-you sweet treat!
Print Pin Rate
Prep Time: 15 minutes
Cook Time: 13 minutes
Total Time: 28 minutes
Servings: 16 servings

Equipment

  • 1 9×9-inch baking pan
  • 1 large bowl
  • 1 small saucepan

Ingredients

For the shortbread layer:

  • 2 cups almond flour
  • 1/4 cup melted coconut oil
  • 1/4 cup maple syrup
  • 1 teaspoon vanilla extract

For the caramel layer:

  • 3/4 cup creamy peanut butter unsweetened
  • 1/4 cup coconut oil
  • 1/4 cup maple syrup
  • 1 teaspoon vanilla extract

For the chocolate layer:

  • 1 cup chocolate chips I used dark chocolate chips
  • 1 tablespoon coconut oil
  • flaky salt for topping (optional)

Instructions

  • Preheat oven to 350° Fahrenheit and line a 9×9-inch baking pan with parchment paper.
  • Add all shortbread ingredients to a large bowl and mix to combine. Then, transfer the crust to your prepared baking pan and press the crust down into an even layer over the base of the pan. Bake for 10 minutes or until lightly golden brown around the edges. Leave the shortbread to cool for at least 10 minutes before adding the caramel.
  • Make the caramel layer by adding all caramel ingredients to a small saucepan over medium-low heat. Whisk the mixture together, and continue whisking as it heats up and starts to gently bubble.After 2 minutes, remove the caramel from the heat and pour over the cooled shortbread crust. Transfer the baking pan to the fridge to allow the peanut butter to set for at least 30 minutes and up to one hour. Once the caramel is completely set and firm to the touch, make the chocolate layer.
  • To make the chocolate layer, melt together the chocolate chips and coconut oil in either the microwave or over a double boiler until completely smooth. Pour the melted chocolate over the caramel and gently spread into an even layer. Transfer the pan back to the fridge to set one last time for about 30 minutes or until the chocolate has hardened. Remove the twix bars from the fridge, then remove them from the pan and cut into 16 “full size” bars or 32 “mini” bars.

Nutrition

Serving: 1bar | Calories: 218kcal | Carbohydrates: 15g | Protein: 4g | Fat: 17g | Sugar: 11g