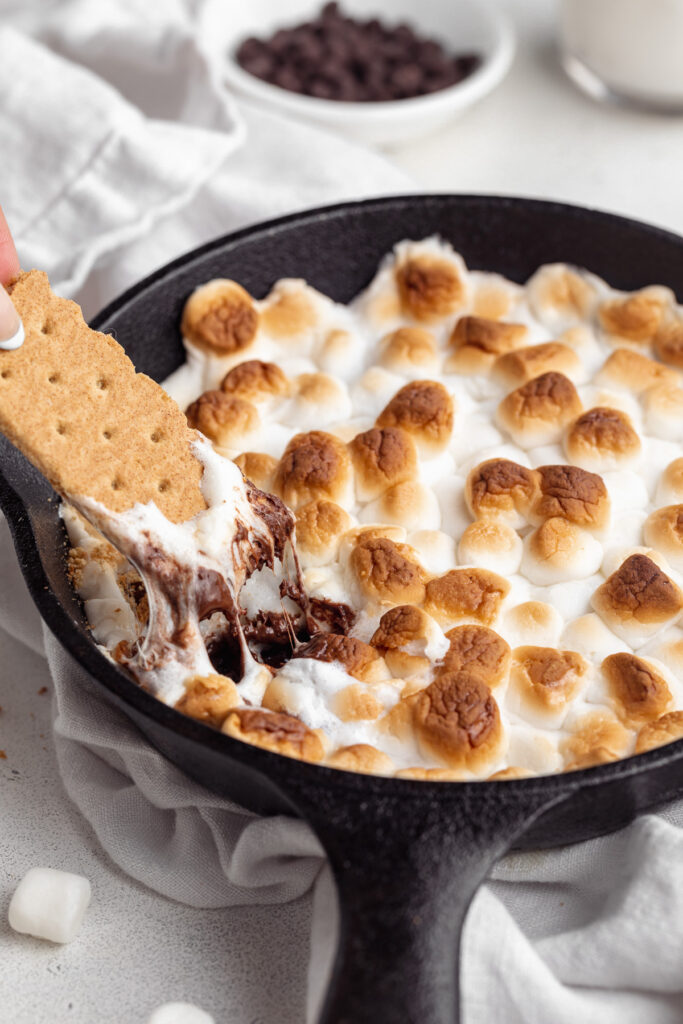
Super quick and easy 3-ingredient s’mores dip! Melty chocolate and gooey marshmallows, served with graham crackers. Throw together this simple dessert in just 10 minutes!
What You’ll Need to Make S’mores Dip
Chocolate Chips – Either chocolate chips or a chopped chocolate bar will work here! Layer your chocolate at the bottom of a baking pan, then top with marshmallows. After baking, the chocolate chips will be perfectly melty and delicious.
Marshmallows – I used mini marshmallows in my s’mores dip, but large marshmallows work just as well. Arrange the marshmallows on top of the chocolate chips before baking. Then, bake until the marshmallows are perfectly toasted and golden brown.
Graham Crackers – Serve your s’more dip with graham crackers on the side. Or, if graham crackers aren’t really your thing, serve it with whatever you’d like! For a healthier option, try fresh strawberries and apple slices. I also love serving my dip with these Simple Mills Honey Sweet Thins – they’re gluten-free!
Tips and Tricks
Like a more well-done s’more? Then bake this dessert dip for a few extra minutes, or until the marshmallows are toasted to your liking.
Jazz up this recipe for your next holiday party! Making s’mores dip for fourth of July? Add a small handful of red, white, and blue sprinkles to the top of your dip right before serving.
Store leftover s’mores dip covered, at room temperature, for up to one week. To reheat, simply add back into the oven according to the recipe instructions.
Adjust This Recipe to Your Dietary Needs
Make it Vegan: For a vegan s’more dip, use vegan chocolate chips and vegan marshmallows.
Make it Gluten-Free: Use your favorite gluten-free graham crackers in this recipe.
5 from 1 vote
3-Ingredient S’mores Dip
Super quick and easy 3-ingredient s’mores dip! Melty chocolate and gooey marshmallows, served with graham crackers. Throw together this simple dessert in just 10 minutes!
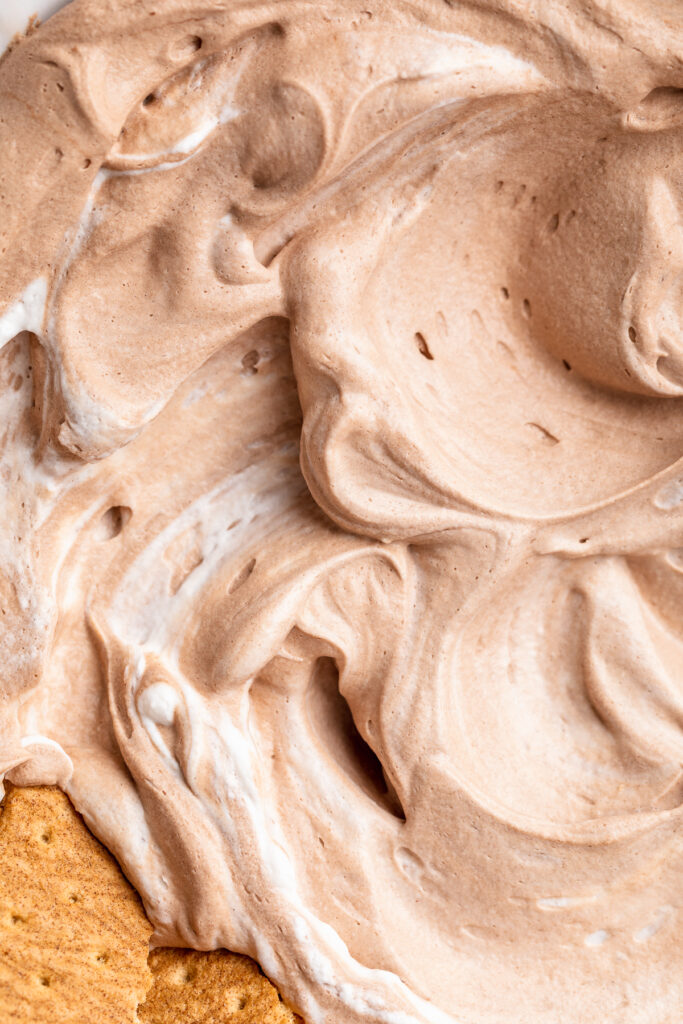
Blissfully easy and delicious vegan hot chocolate dip! Made with just 3 ingredients, no cooking or baking required. This fool-proof dessert recipe is perfect for holiday parties or potlucks!
What You’ll Need to Make Vegan Hot Chocolate Dip
Vegan Whipped Cream – If not vegan, feel free to use regular ole’ whipped cream instead. However, I used Truwhip’s Vegan Whipped Topping and it tastes just like the real thing. I’ve also tested this recipe with So Delicious cocowhip, and it turned out fabulous! Or, for a healthier option, feel free to make a homemade coconut whipped cream. To do this, whip together the coconut cream (not the liquid part) from two cans of full-fat coconut milk with either a hand or stand mixer until light and fluffy. If taking this option, I recommend adding in at least 3 tablespoons of sugar to help sweeten this dessert dip!
Unsweetened Cocoa Powder – It’s super important to use unsweetened cocoa powder in this vegan hot chocolate dip recipe. If sweetened, you risk an overly sweet dip. Therefore, check the baking aisle at your grocery store for an unsweetened cocoa powder, such as this Hershey’s one.
Vanilla Extract – A splash of vanilla extract is the finishing touch to this vegan dessert recipe! It brings the hot chocolate flavor together, and is seriously so good.
Tips and Tricks
Don’t over-mix your dip! An over-mixed dip will turn runny, and lose its fluffiness. Simply stir until everything’s incorporated, then enjoy!
Feel free to prepare this vegan hot chocolate dip in advance! To do this, store in an airtight container in either the freezer for up to 2 months, or the fridge for up to 4 days. If freezing, simply transfer to the fridge a few hours before serving to thaw, then give it a quick stir.
Serve this chocolatey dessert dip however you’d like! I love mine with graham crackers and fresh strawberries. Though chocolate chip cookies, teddy grahams, apple slices, or even marshmallows all make for great dippers!
Adjust This Recipe to Your Dietary Needs
Make it Paleo: For a paleo version, make a homemade coconut whipped cream and sweeten with either coconut sugar or a splash of maple syrup – YUM!
5 from 1 vote
Vegan Hot Chocolate Dip
Blissfully easy and delicious vegan hot chocolate dip! Made with just 3 ingredients, no cooking or baking required. This fool-proof dessert recipe is perfect for holiday parties or potlucks!
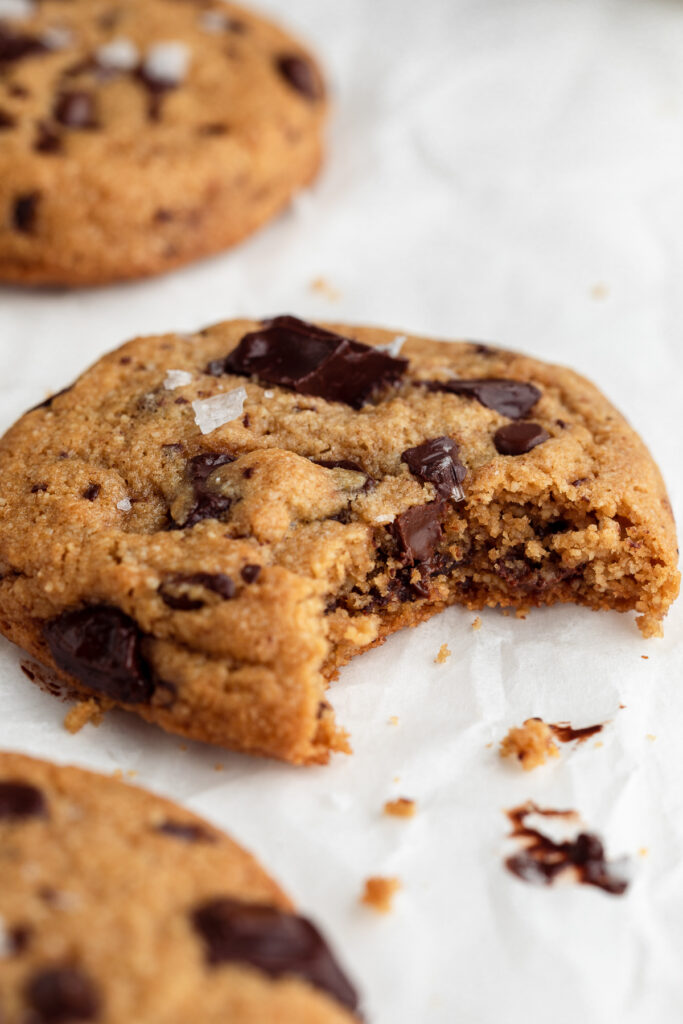
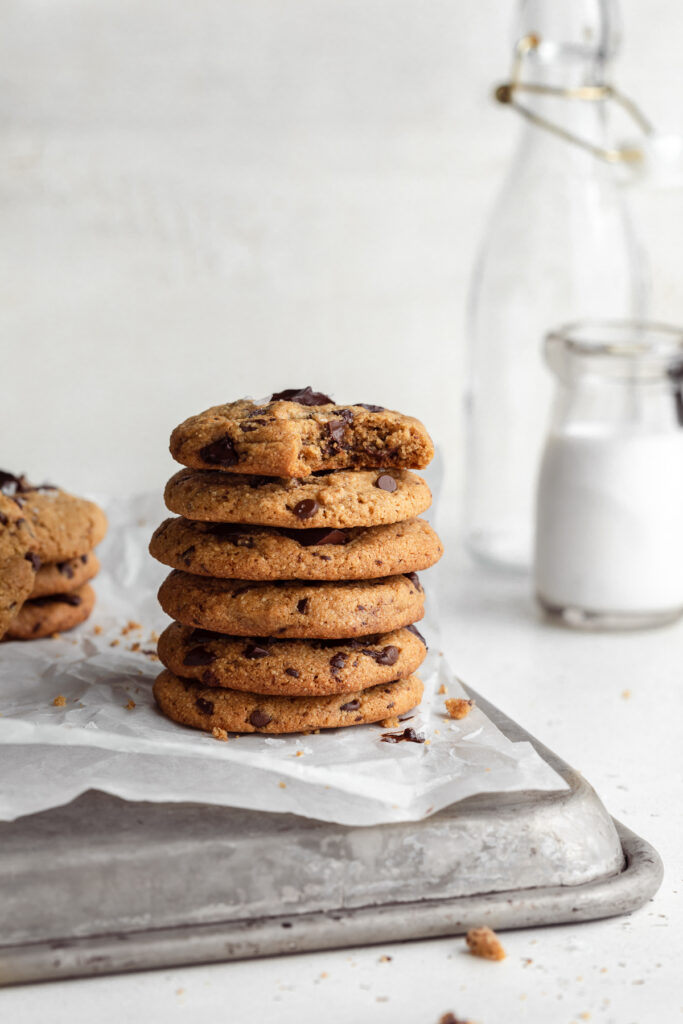
Crispy on the outside and soft on the inside almond flour chocolate chip cookies!A super easy one-bowl, gluten-free dessert recipe everyone will love. These cookies are perfectly sweet, and stuffed with plentyyyy of melty chocolate.
Who doesn’t love a classic chocolate chip cookie!? These gluten-free almond flour-based cookies are sure to be a family favorite. These are perfect not just for the holidays, but for any night that you’re looking for a simple one-bowl sweet treat with lots of chocolate!
Why You’ll Love This Recipe
Pantry Staples: This recipe’s ingredients are all items you may have right on hand in your pantry, which will make this a super easy gluten-free chocolate chip cookie recipe to put together!
Versatile & Customizable: Feel free to add your favorite chopped chocolate or even chopped nuts for additional flavor and melty goodness!
Easy & Quick: These chocolate chip cookies only take 10-12 minutes to bake in the oven!
What You’ll Need to Make Almond Flour Chocolate Chip Cookies
Butter: I used Myoko’s Vegan Butter to keep my cookies both gluten and dairy-free. However, you can certainly use any type of butter you’d like. Just be sure to let it come to room temperature before baking, this’ll help whip together the butter and sugar in the first step.
Brown Sugar or Coconut Sugar: Either one works! I used coconut sugar because it’s less processed than standard brown sugar. But I recommend you use whatever you have on-hand. Brown or coconut sugar give these almond flour chocolate chip cookies a deeper, more intense flavor!
Almond Flour: Of course, these wouldn’t be what they are without plenty of almond flour. With any recipe that calls for almond flour, be sure to use blanched almond flour – not almond meal. Almond meal will yield a more grainy and crumbly cookie, which is not what we’re looking for here.
Chocolate Chips: I can’t lie, I’ve got a pretty heavy hand when it comes to the chocolate chips. I used both chocolate chips AND chopped chocolate in my almond flour chocolate chip cookies. The end result was chocolate in every bite – yum! Though, again, feel free to use whichever you have on-hand when baking these cookies.
How To Make Gluten-Free Almond Flour Chocolate Chip Cookies
Combine Your Wet Ingredients: Beat together the butter, coconut oil, and sugar in a large bowl with either a hand or stand mixer for 2-3 minutes. Add your egg and vanilla extract until well combined
Assemble Your Batter: Add in almond flour, baking soda, and salt, stirring with a spatula or large spoon until combined then, fold in your chocolate.
Bake & Cool: Bake at 350 degrees for 10-12 minutes or until golden brown.
Tips and Tricks
The cookie dough will appear more wet than standard cookie doughs, but this is ok! Simply scoop them onto a baking sheet, tidy up the edges of each cookies, then throw them in the oven to bake. They’ll still bake up beautifully, trust me!
For a softer cookie, bake them for only 10 minutes. Or, for a crispier, more well-done cookie, bake these cookies for a full 12 minutes. And always keep a close eye on them toward the end so they don’t burn!
Adjust This Recipe to Your Dietary Needs
Make it Dairy-Free: Easily make these cookies dairy-free by swapping the butter for non-dairy butter. Also, make sure the chocolate chips you’re using are dairy-free (most aren’t).
Make it Vegan: For vegan almond flour chocolate chip cookies, take the dairy-free option above, as well as swap out the egg for your favorite vegan egg substitute. While I haven’t tried this version myself yet, I have high hopes it’ll work!
Make it Paleo: For a paleo cookie recipe, use coconut sugar instead of brown sugar, and softened coconut oil in place of the butter.
5 from 2 votes
Perfect Almond Flour Chocolate Chip Cookies
Crispy on the outside and soft on the inside almond flour chocolate chip cookies! A super easy one-bowl, gluten-free dessert recipe everyone will love. These cookies are perfectly sweet, and stuffed with plentyyyy of melty chocolate.
2tablespoonscoconut oil, melted (or 2 additional tablespoons of butter)
1/2cupbrown sugar or coconut sugar
1teaspoonvanilla extract
1egg, at room temperature
2 1/4cupsalmond flour
1/2teaspoonbaking soda
1/4teaspoonsalt
1cupchocolate chips
Instructions
Preheat oven to 350° Fahrenheit and line a baking sheet with parchment paper.
Beat together the butter, coconut oil, and sugar in a large bowl with either a hand or stand mixer for 2-3 minutes.
Add in the vanilla extract and egg, beat until combined.
Add in almond flour, baking soda, and salt, this time stirring with a spatula or large spoon until just combine.
Fold in the chocolate chips, then scoop tablespoon-sized balls of cookie dough onto prepared baking sheet. Place each cookie about 2-3 inches apart, and lightly flatten with the palm of your hand.
Bake cookies 10-12 minutes or until golden brown, then transfer to a wire cooling rack to cool completely.
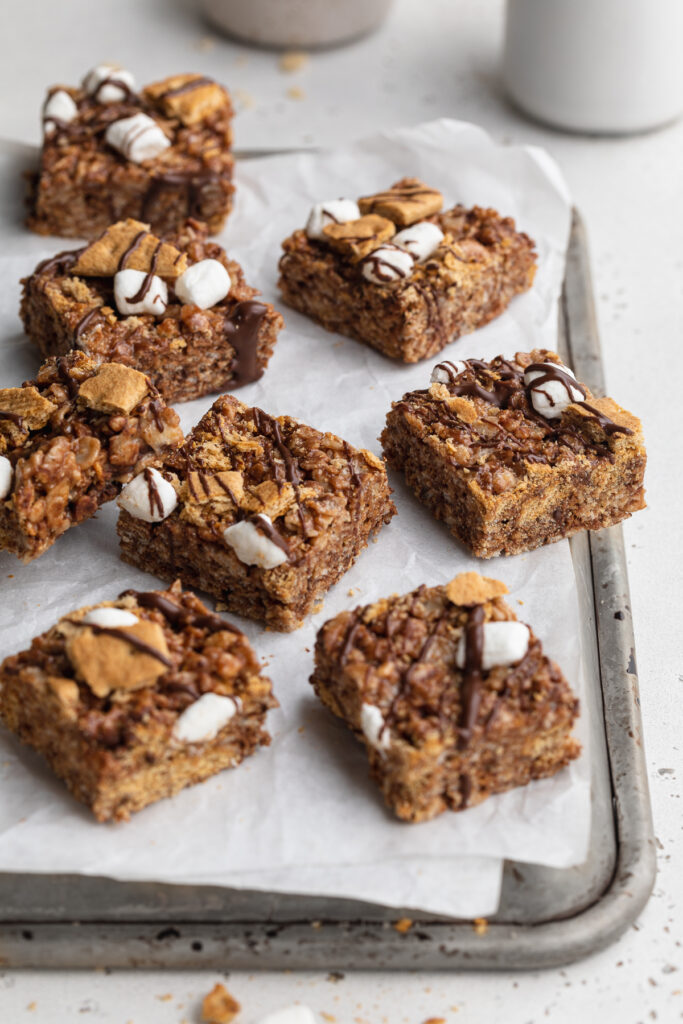
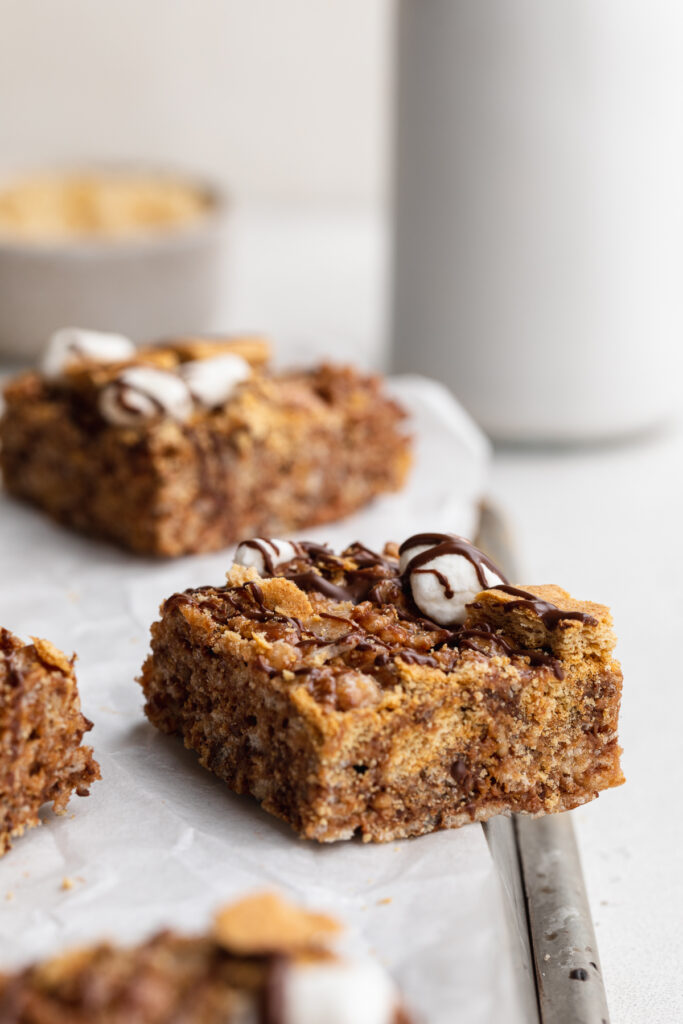
These s’mores rice crispy treats are insanely delicious and super easy to make! They’re loaded with gluten-free cookies, crisp rice cereal, gooey melted marshmallow, and plenty of chocolate chips.
What You Need To Make S’mores Rice Crispy Treats
Rice Cereal – Classic Rice Krispies cereal is my favorite in this recipe! They’re light and remain super crunchy in these treats. I have to say, I’ve tried a handful of off-brand rice cereals for this recipe and none taste nearly as good as Rice Krispies do. I’m not sure what it is, but most other kinds end up too soft and almost soggy when mixed into these s’mores rice crispy treats.
Marshmallows – I used regular-sized marshmallows to make my s’mores rice crispy treat. However, you can use a 10-ounce bag of mini marshmallows instead. I also recommend topping your treats with a small handful of mini marshmallows for a super cute look!
Make it Nut-Free: Use nut-free graham crackers/cookies!
Tips For Making S’mores Rice Crispy Treats
Move quickly when adding the melted marshmallow mixture into the cereal mixture. The melted marshmallows will immediately start to cool once removed from the heat. And you’ll notice that as soon as they cool, they also begin to seize up and can be quite difficult to work with.
Spray a little cooking oil on your hands before handling the treats! I like to sprits a little cooking oil on one hand and then rub them together right before transferring the treats to the baking dish.
Similar to your hands, spray a little cooking oil on your knife before slicing! A greased knife will glide through these s’mores rice crispy treats. However, an un-greased knife will almost certainly get stuck and struggle to make it through your treats!
5 from 1 vote
S’mores Rice Crispy Treats (Vegan, Gluten-Free)
These s’mores rice crispy treats are insanely delicious and super easy to make! They’re loaded with gluten-free cookies, crisp rice cereal, gooey melted marshmallow, and plenty of chocolate chips.
Line a 9×9-inch baking dish with parchment paper, then melt butter and marshmallows in a large saucepan over medium-low heat.
Mix together the rice cereal, crushed graham crackers, and chocolate chips in a large bowl.
Add melted marshmallows to the cereal mixture, mix well.
Transfer treats mixture to your lined baking dish and let sit at room temperature for 1 hour before slicing.
Video
Notes
Optional Step: Top finished treats off with an extra sprinkling of crushed graham crackers, marshmallows, and chocolate. Then place it in the oven on broil for 1 minute or until marshmallows are golden brown and toasty!
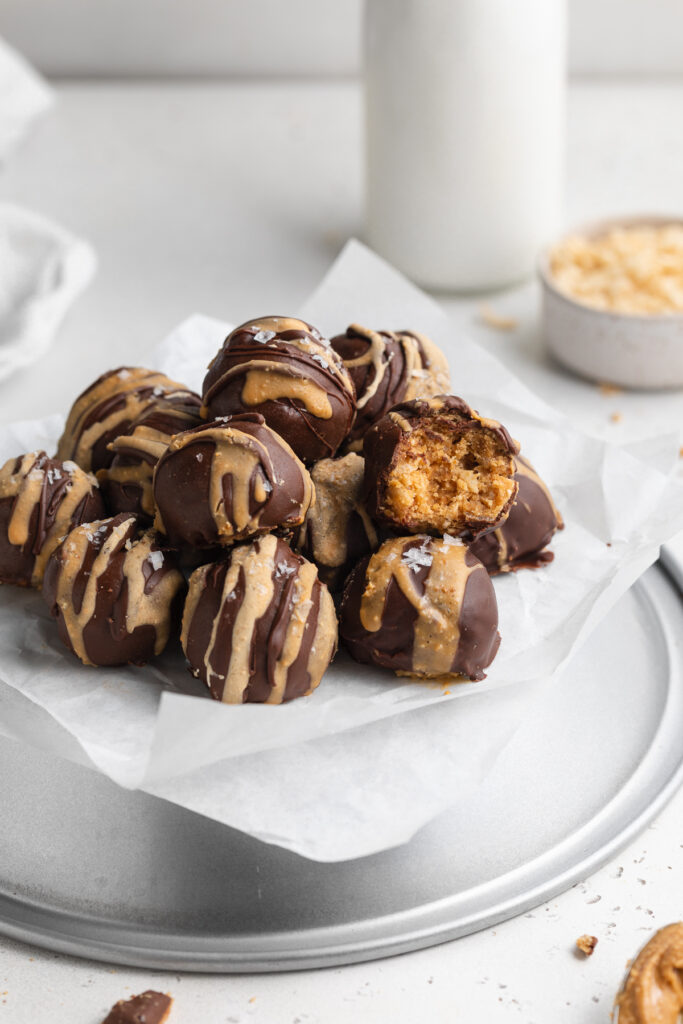
Crunchy peanut butter balls covered in chocolate! Perfectly sweet, surprisingly healthy, and super easy to make. This no-bake dessert is the perfect summer treat when it’s too hot to turn on the oven!
What You’ll Need to Make Crunchy Peanut Butter Balls
Creamy Peanut Butter – Unsweetened, creamy peanut butter is the base of this easy dessert recipe. Check your peanut butter labels closely and make sure it doesn’t contain any sugar! Added sugar in the peanut butter would totally throw off the sweetness in this recipe. For unsweetened peanut butter, I love both Trader Joe’s and Teddie’s brand.
Maple Syrup – Really any liquid sweetener will work in these peanut butter balls. Maple syrup, along with honey and date syrup, are the three least processed options which is why I always use and recommend them. Though is you don’t have those, you can use agave nectar instead. Or, for a sugar-free dessert option, check the “Make it Sugar-Free” section below!
Almond Flour – This gluten-free, low-carb flour is one of my favorites! It’s healthy, super easy to find, and virtually flavorless. The almond flour is also super helpful in holding these dessert balls together, so don’t go without it.
Crispy Rice Cereal – One cup of crispy rice cereal gives these peanut butter balls their unexpected crunch! Feel free to use whichever brand you like best. Or, for an even healthier option, use one cup of puffed quinoa instead.
Tips and Tricks
Don’t feel like dipping in chocolate? Save major time and energy my melting the chocolate, then simply drizzling over the top of each ball!
For an extra salty plus sweet combo, finish off these crunchy no-bake peanut butter balls with a pinch of flaky sea salt! A bit of salt balances out the sweetness, and adds an extra layer of crunch.
These treats are best stored in the refrigerator! The freezer works too, but the fridge helps them hold their shape while also maintaining their crunchiness. But whatever you do, don’t store them at room-temperature, and especially not in the summertime because they will melt!
Adjust This Recipe To Your Dietary Needs
Make it Nut-Free: For a nut-free no-bake dessert, sub sunflower seed butter for the peanut butter and 3 tablespoons of coconut flour in place of the almond flour! Still just as delicious, and totally nut-free friendly.
Make it Sugar-Free: Replace the maple syrup in this recipe with your favorite liquid sugar-free sweetener.
5 from 3 votes
Crunchy No-Bake Peanut Butter Balls
Crunchy peanut butter balls covered in chocolate! Perfectly sweet, surprisingly healthy, and super easy to make. This no-bake dessert is the perfect summer treat when it’s too hot to turn on the oven!
Mix together the creamy peanut butter, maple syrup, and vanilla extract in a large bowl.
Add in almond flour and crispy rice cereal, mix to combine.
Scoop and roll tablespoon-sized balls of the peanut butter ball mixture between the palms of your hands. Repeat this process until no more mixture remains, should make about 12 crunchy peanut butter balls.
Place balls in freezer for 10-15 minutes, and add chocolate chips and coconut oil to a small bowl. Microwave chocolate in 30 second increments until fully melted.
Once crunchy peanut butter balls are chilled, dip or drizzle with melted chocolate before placing back in the freezer. Freeze for at least 10 minutes before eating, then store in the fridge.