Tag

chocolate chips

Browsing

We LOVE a healthy sweet treat around here, and this gluten free mug cake fits right in! If you know me, you know I’m a total dessert person. I eat dessert quite literally every single night. Lately, my go-to simple dessert recipes have been my healthy gluten free cookie dough, or if I have a few extra minutes I’ll bake these one-bowl gluten free almond flour chocolate chip cookies (SO GOOD!). But now, I’m super excited to add this 6-ingredient gluten free mug cake to the rotation!

This recipe is gluten-free, paleo, and dairy-free! But still perfectly sweet and totally indulgent. It’s also one of those recipes you can customize however you’d like. I love adding a small handful of chocolate chips to mine for a chocolate chip mug cake. Or, when I’m feeling festive, I’ll mix in a tablespoon of rainbow sprinkles! However you serve it, I guarantee you’ll love it.

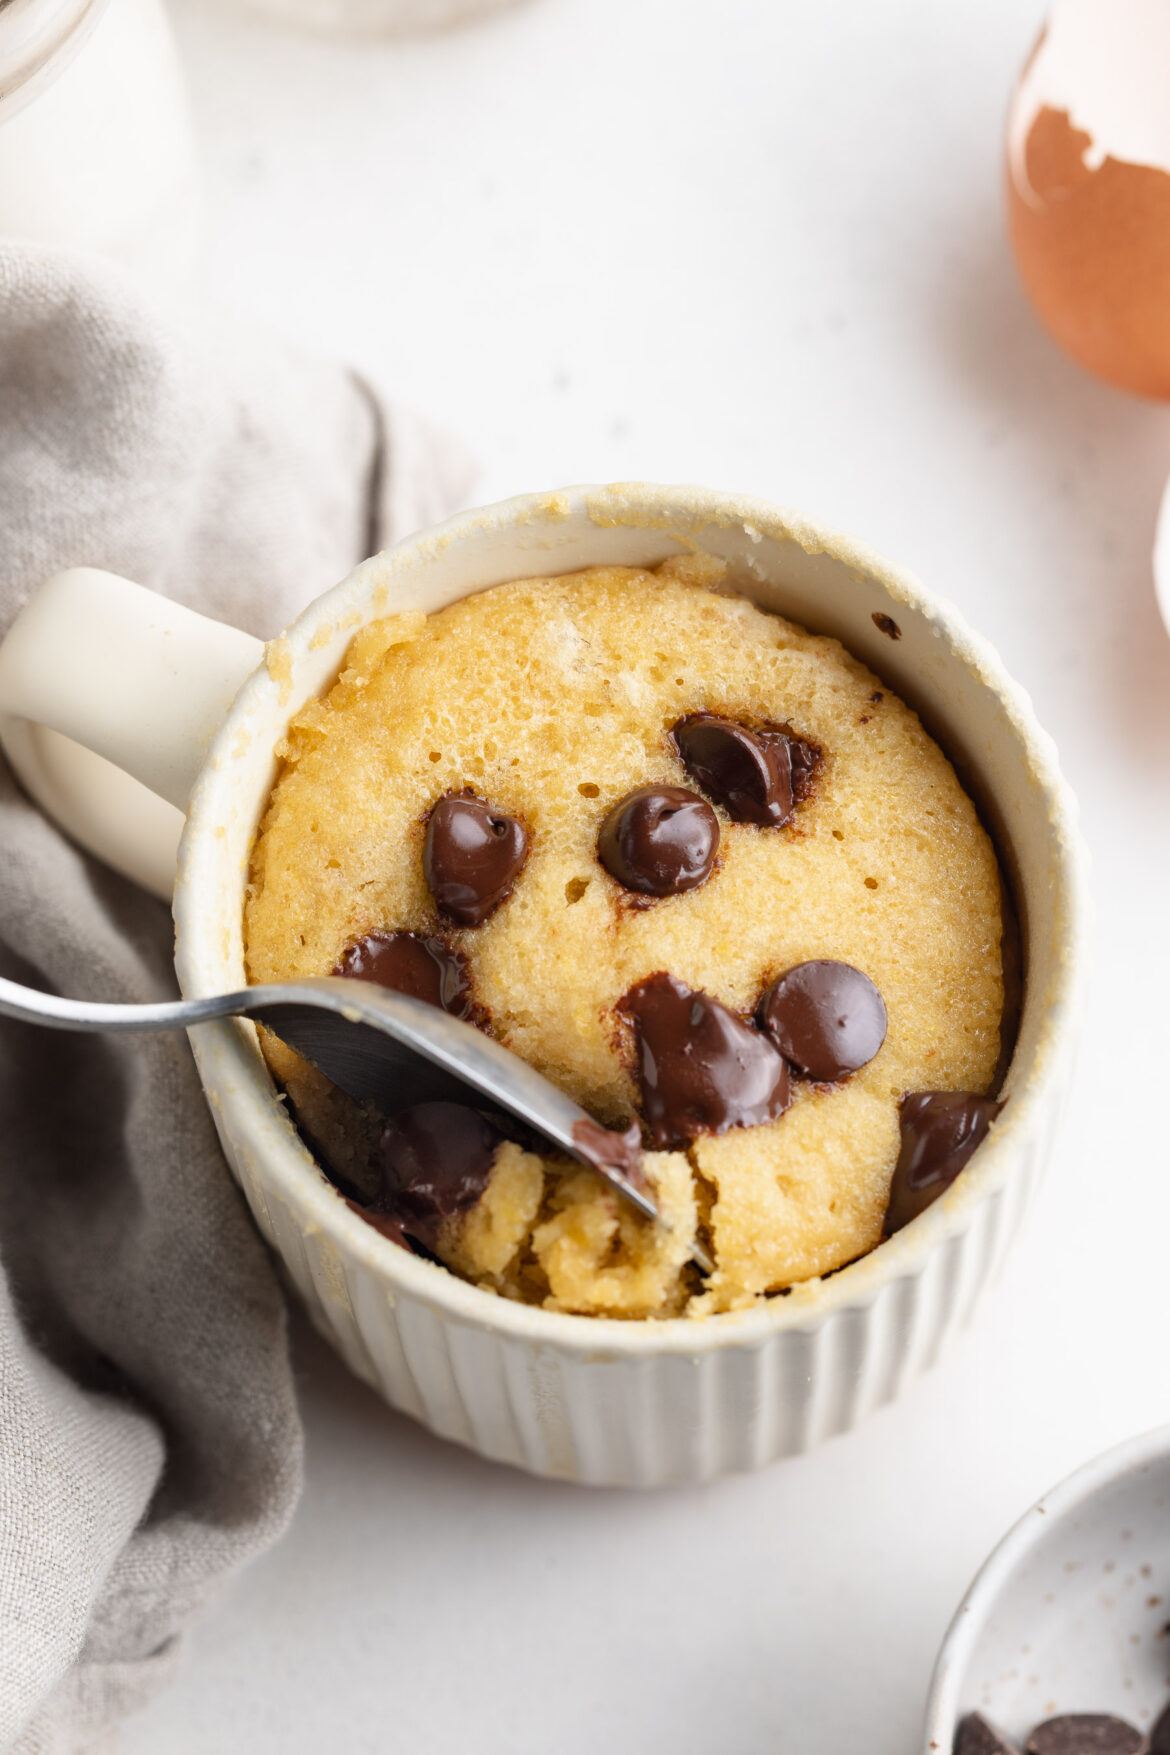
overhead image of healthy gluten free mug cake with chocolate chips on top.
Here’s a link to the microwave-safe mugs I used for this recipe!

What You’ll Need To Make A Healthy Gluten Free Mug Cake

Almond Flour: Almond flour serves as the base for this mug cake, providing a nutty flavor and tender texture. It’s also a great gluten-free alternative to traditional flour. I buy my almond flour in bulk, so I always have some on-hand for this recipe!

Maple Syrup: Sweeten your mug cake naturally with maple syrup, adding a touch of sweetness without refined sugars.

Egg: A large egg helps bind the ingredients together and provides structure and extra fluffiness to the mug cake.

Coconut Oil: Melted coconut oil adds moisture to the cake, resulting in a soft and fluffy texture. Feel free to use any oil or melted butter of your choice if coconut oil isn’t available.

Vanilla Extract: Enhance the flavor of your mug cake with a splash of vanilla extract, adding depth and richness!

Baking Powder: Baking powder is a pantry stables, and it helps this gluten free mug cake rise and become light and airy.

healthy gluten free mug cake ingredients laid out on a table.

Tips and Tricks

  • Ensure all ingredients are well combined to prevent any pockets of unmixed flour or egg in your mug cake. Use a fork or small whisk to thoroughly whisk the batter until smooth.
  • Microwave cooking times may vary, so keep an eye on your mug cake as it cooks. If the cake looks like it’s about to overflow, pause the microwave and allow it to settle before continuing to cook.
  • After microwaving, resist the temptation to dive right into your mug cake. Let it cool for a few minutes to avoid burning your mouth! Trust me, learn from my mistakes.

How To Bake It In The Oven Instead

  1. Preheat the oven to 350° Fahrenheit.
  2. Whisk together all ingredients in an oven-safe mug or ramekin.
  3. Bake for 15 minutes, or until a toothpick inserted down the center of the mug cake comes out clean.
  4. Let it cool for a few minutes, then enjoy!

Make This Gluten-Free Mug Cake Vegan (No Egg)

For a vegan version of this recipe, simply replace the egg with 2 tablespoons of apple sauce or 2 tablespoons of non-dairy milk. The cake won’t rise quite as much, but it’ll taste just as delicious!

gluten free mug cake with chocolate chips on top.
5 from 3 votes

Healthy Gluten Free Mug Cake

This gluten free mug cake is the perfect quick and easy sweet treat! Perfectly sweet, moist, and totally delicious. Throw this healthier dessert together with just 6 ingredients in 5 minutes.
Print Pin Rate
Prep Time: 3 minutes
Cook Time: 2 minutes
Total Time: 5 minutes
Servings: 1 serving

Ingredients

  • 1/4 cup almond flour
  • 2 tablespoons maple syrup
  • 1 large egg
  • 1 tablespoon melted coconut oil, or any vegetable oil
  • 1 teaspoon vanilla extract
  • 1/2 teaspoon baking powder

Instructions

  • Add all ingredients to a mug and whisk until a batter comes together.
  • Microwave the mug for 2 minutes, then carefully remove from the microwave (the mug will be hot!) and let it cool for a few minutes.
  • Top with whipped cream or a scoop of ice cream and enjoy!

Notes

  • Check the bottom of your mug to make sure it’s microwave safe before using it in this recipe!
  • My toxic trait is needing a little something sweet after every meal. Lately, I’ve been reaching for either a slice of my 4-ingredient banana bread or a bite of gluten-free almond flour brownies. However, sometimes I just don’t have the time to bake anything – and that’s where this no-bake gluten free cookie dough comes in!

    Just 5 ingredients (not including the chocolate chips), one bowl, and only a few minutes to throw together. This seriously simple dessert recipe is so easy, even my husband could make it… and that’s saying something!

    a scoop of gluten free edible cookie dough in a small dish with a spoon.

    What You’ll Need to Make This Recipe

    Softened Butter or Coconut Oil: Choose your preferred butter or coconut oil to create that perfect cookie dough consistency. Butter adds richness, while coconut oil keeps it light and healthy.

    Milk: Opt for non-dairy milk to make this recipe dairy-free. Choose your favorite variety – almond, soy, or oat – to enhance the cookie dough’s creaminess.

    Sugar: Select your sweetener of choice – brown sugar, coconut sugar, maple sugar, or cane sugar. Cane sugar is best for a sugar cookie flavored dough, and brown sugar is best for a chocolate chip cookie flavored dough. I used maple sugar to make mine a little healthier, but still delicious!

    Vanilla Extract: A teaspoon of vanilla extract elevates the dough’s aroma and taste, creating that classic cookie flavor.

    Gluten-Free All-Purpose Flour: The star of our gluten-free show! Ensure it’s a high-quality gluten-free flour blend for the best tasting results.

    Mini Chocolate Chips: Tiny bits of chocolatey goodness – these Enjoy Life mini chocolate chips are perfectly sized for this edible cookie dough. However, if you don’t have mini chocolate chips, feel free to use any size chocolate chip or chunk you’d like!

    coconut oil, gluten free flour, vanilla extract, maple sugar, and chocolate chips on a table.

    Why You’ll Love This Gluten-Free Edible Cookie Dough

    • Simple & Quick: This recipe is incredibly easy to make with just a few ingredients and minimal prep time.
    • Delicious & Creamy: The combination of sugars and vanilla gives this dough a sweet, creamy flavor that’s perfect for satisfying your cookie dough cravings.
    • Versatile: Enjoy it straight from the bowl, as a topping for ice cream, or use it in other dessert creations like truffles or as a cake filling.

    Safety Tips (How to Heat-Treat Flour)

    To ensure the gluten-free flour is safe to eat raw, you can heat-treat it:

    • Microwave Method: Microwave the flour for about 1 minute, ensuring it reaches a temperature of 165°F.
    • Oven Method: Spread the flour on a baking sheet and bake at 350°F for 5-10 minutes, stirring occasionally to prevent burning.

    Adjust This Recipe to Your Dietary Needs

    Dairy-Free/Vegan: Use coconut oil instead of butter and non-dairy milk like almond milk. Ensure the chocolate chips are dairy-free and vegan.

    Sugar Alternatives: You can substitute brown sugar with coconut sugar, cane sugar, or maple sugar to fit your dietary preferences.

    Recipe Variations and FAQs

    Variations:

    • Chocolate Cookie Dough with Marshmallows: Add 2 tablespoons of cocoa powder and mini marshmallows.
    • Matcha White Chocolate Cookie Dough: Add 1 tablespoon of matcha powder and white chocolate chips.
    • Lemon Poppyseed Cookie Dough: Add ½ teaspoon lemon juice, ½ teaspoon lemon zest, and ½ tablespoon poppy seeds.

    FAQs:

    Can Gluten-Free Flour Be Eaten Raw?: It’s generally safe, but heat-treating the flour is recommended to kill any potential bacteria.

    How Long Will the Dough Last in the Fridge?: Store in an airtight container for up to 5 days.

    Can You Freeze Gluten-Free Cookie Dough?: Yes, freeze the dough for up to 3 months for later use.

    Edible double chocolate gluten-free cookie dough in a small dish with a spoon.

    Additional Notes

    • Storage: Keep the dough in an airtight container in the refrigerator to maintain its freshness and prevent it from drying out or absorbing other flavors from the fridge.
    • Use Fresh Ingredients: Ensure your ingredients, particularly the butter and milk, are fresh for the best taste and texture.
    • Enjoy Responsibly: This recipe is meant to be eaten raw, so don’t try to bake it as it won’t hold together properly without eggs.
    overhead image of gluten free edible cookie dough in a small dish with a spoon.
    4 from 60 votes

    Gluten Free Edible Cookie Dough Recipe – 2 ways!

    A super simple recipe for edible gluten-free cookie dough! It’s a quick and easy fix to satisfy your sweet tooth. Made dairy-free, egg-free, and healthy too!
    Print Pin Rate
    Prep Time: 5 minutes
    Total Time: 5 minutes
    Servings: 6 servings

    Ingredients

    Classic Gluten-Free Cookie Dough

    • 2 tablespoons butter or coconut oil, softened
    • 3-4 tablespoons milk, I used non-dairy almond milk
    • 1/4 cup sugar (brown sugar, cane sugar, coconut sugar, or maple sugar)
    • 1 teaspoon vanilla extract
    • 3/4 cup gluten-free all purpose flour
    • 1/4 cup mini chocolate chips

    Double Chocolate Gluten-Free Cookie Dough

    • 2 tablespoons butter or coconut oil, softened
    • 3-4 tablespoons milk, I used non-dairy almond milk
    • 1/4 cup sugar (brown sugar, cane sugar, coconut sugar, or maple sugar)
    • 1/2 cup gluten-free all purpose flour
    • 1/4 cup unsweetened cocoa powder
    • 1/4 cup mini chocolate chips

    Instructions

    • Add all the ingredients except the chocolate chips to a large bowl and stir to combine.
    • Then, fold in the chocolate chips and enjoy!
      edible gluten free cookie dough step 2
    • For Storage: Keep the dough in an airtight container in the refrigerator to maintain its freshness and prevent it from drying out or absorbing other flavors from the fridge.

    Notes

  • Gluten-Free All Purpose Flour: I recommend using either Bob’s Red Mill 1:1 Gluten-Free Flour or King Arthur’s Gluten-Free Measure For Measure Flour, I’ve made these recipes with both brands and they’re delicious! The one gluten-free flour brand I would avoid is Trader Joe’s, for some reason the taste of that flour can be quite bitter.
  • Don’t Miss These Cookie Dough Recipes!

    With valentine’s day right around the corner, I was craving something extra chocolate-y! I’ve been drinking my healthy hot chocolate pretty much daily and gathered the ingredients for my 3-ingredient oreo mug cake, but I wanted something new …something a little more special. After all, this is my baby’s first Valentine’s day, and I plan on going ALL out!

    So what did I do? I took my almond flour brownies, threw in some freeze dried strawberries, and topped with a chocolate drizzle – and voilà, these chocolate covered strawberry almond flour brownies were born! They’re rich, fudgy, and extra indulgent but totally grain-free, dairy-free, and sweetened with coconut sugar. So whether you’re also craving something special this month, or looking to treat that someone special, you gotta give these chocolate covered strawberry almond flour brownies a try. It’s love at first bite!

    bite shot of chocolate covered strawberry almond flour brownies.

    What You’ll Need to Make Chocolate Covered Strawberry Almond Flour Brownies

    Sugar: I used coconut sugar in my brownies, but cane sugar works great too! Use whatever you prefer, even granulated monk fruit sweetener will do the trick.

    Almond Flour: Almond flour is the secret ingredient in these chocolate covered strawberry *almond flour* brownies, making them gluten-free and grain-free. Don’t mess with it though, the almond flavor can’t be subbed without compromising this recipe!

    Olive Oil: This is the secret to extra fudgy brownies! Olive oil is the magic touch for that perfect consistency and rich flavor. Embrace it – your taste buds will thank you.

    Freeze Dried Strawberries: I used the Natierra freeze-dried strawberries and they were delicious. But I know Trader Joe’s sells them too! No freeze-dried strawberries? No problem. Fresh chopped strawberries work just as well.

    close-up overhead image of chocolate covered strawberry almond flour brownies with chocolate drizzle and freeze dried strawberries on top.

    Can I use store bought brownie mix instead?

    You sure can! To make these chocolate covered strawberry brownies with store bought brownie mix, start by preparing the mix according to the package instructions. Then, add in 1 cup of freeze dried strawberries to the batter and stir to combine. Transfer the batter to a lined and/or greased brownie pan and bake according to package instructions. Once brownies are baked, remove them from the oven and let them cool completely before topping with the chocolate drizzle. Just as delicious with half the effort!

    Tips and Tricks

    • Whip the sugar and eggs until they’re super light and fluffy – a key step for that melt-in-your-mouth brownie texture.
    • When bringing together the dry ingredients, give them a gentle stir. Over-mixing can impact the texture of your brownies, so keep it light and just right.
    • For that pro finish, hold off on the chocolate drizzle until your brownies are entirely cooled. Patience pays off for that beautiful, glossy topping!
    overhead image of chocolate covered strawberry almond flour brownies with a chocolate drizzle and freeze dried strawberries on top.
    3 from 3 votes

    Chocolate Covered Strawberry Almond Flour Brownies

    These chocolate covered strawberry brownies are rich, fudgy, and totally delicious! They’re made with almond flour and coconut sugar for a healthier twist, but are still just as indulgent. These are the perfect Valentine’s Day recipe, or any day treat!
    Print Pin Rate
    Prep Time: 30 minutes
    Cook Time: 40 minutes
    Servings: 4 servings

    Ingredients

    • 1 cup sugar, I used coconut sugar
    • 3 large eggs
    • 1 1/2 cups almond flour
    • 3 tablespoons unsweetened cocoa powder
    • 1 teaspoon vanilla extract
    • 1/4 teaspoon salt
    • 1 1/2 cups chocolate chips, divided
    • 1/2 cup olive oil, or any vegetable oil
    • 1 cup freeze-dried strawberries, or 1 cup fresh chopped strawberries

    For the chocolate drizzle:

    • 1/2 cup chocolate chips
    • 1 teaspoon coconut oil

    Instructions

    • Preheat oven to 350° Fahrenheit and line an 8×8-inch pan with parchment paper.
    • In a large bowl, beat together the sugar and eggs with either a hand or stand mixer, or a whisk (hello arm workout!). Continue beating for 3-5 minutes, until light and fluffy.
    • Add the almond flour, cocoa powder, vanilla extract, and salt. Stir until everything is just combined, careful not to over-mix.
    • In a separate small bowl, add the coconut oil and 1 cup of chocolate chips. Microwave in 30-second intervals, stirring between each interval, until chocolate chips are fully melted.
    • Pour melted chocolate chips and olive oil into the brownie batter, and stir to combine. Then, add in the remaining chocolate chip and freeze dried strawberries and fold to combine.
    • Pour brownie batter into prepared pan and bake for 30-35 minutes, or until the center is just barely set. Remove from oven and let cool completely.
    • Once brownies are cool, make the chocolate drizzle by melting the chocolate chips and coconut oil together in the microwave in 30 seconds increments. Stir the chocolate between each increment until completely smooth.
    • Cut the brownies into squares, then top the brownies with the melted chocolate drizzle and additional freeze dried strawberries if you’d like.

    Nutrition

    Calories: 300kcal

    This gluten-free zucchini bread is deliciously moist! It’s super easy to make and loaded with fresh zucchini. Enjoy a thick slice of this gluten-free zucchini bread with a little butter for breakfast or as a snack!

    gluten-free zucchini bread on a baking sheet.

    The Story Behind This Gluten-Free Zucchini Bread Recipe

    My parents were those people that built a garden during quarantine. Anyone else?? And while it took a while to enjoy the fruits (literally) of their labor, oh man was it worth all their hard work! They have strawberries, blueberries, lettuce, every herb you can think of, and a whole BUNCH of zucchini. Like A LOT of zucchini. So when they sent me home a couple weeks ago with a massive bag of homegrown zucchini, I knew exactly what I was going to do with it. Though I had never made gluten-free zucchini bread before, so I took a few notes from my gluten-free banana bread recipe, tweaked things a bit, and this incredible recipe was born!

    sliced gluten-free zucchini bread on a baking sheet with milk on the side.

    What You Need To Make Gluten-Free Zucchini Bread

    Zucchini – This dark green veggie is loaded vitamins, minerals, and antioxidants! It’s also high in fiber and has been proven to aid healthy digestion. Good-for-you zucchini also flourishes in the summer months! (A big reason why my parents currently have SO much of it right now).

    To prep zucchini for this recipe, simply slice off one end and run the zucchini down a cheese grater. Continue to grate the zucchini until you have one heaping cup worth of shredded zucchini. Once grated, you’ll wrap the zucchini in a dish towel and squeeze out as much of the liquid from the zucchini as possible. This summer vegetable holds on to a lot of water, and to avoid a soggy zucchini bread, you’ll want to squeeze out as much of that water as you can. Once the water is removed, you’re ready to use your shredded zucchini in this gluten-free zucchini bread recipe!

    Gluten-Free All Purpose Flour – I use and love the King Arthur Measure for Measure Gluten-Free Flour for most of my gluten-free baked goods recipes. It’s a solid gluten-free flour that holds its structure when baked and never fails me. However, you can use your favorite gluten-free all purpose flour for this recipe. My one suggestion is to always make sure that whatever gluten-free all purpose flour you use contains xanthan gum. Xanthan gum is crucial to binding and quite literally keeping everything together.

    gluten-free zucchini bread step 1
    gluten-free zucchini bread step 3
    gluten-free zucchini bread step 4

    Adjust This Recipe to Your Dietary Needs

    • Make it Nut-Free: Omit the almond flour in this recipe and use an additional 1/2 cup of gluten-free all purpose flour instead.
    • Make it Vegan: To make this a gluten-free and vegan zucchini bread, try using either two flax eggs, one ripe mashed banana, or 1 cup of apple sauce in place of the eggs in this recipe.
    • Add Gluten: Use 2 cups of regular all purpose flour in place of the gluten-free all purpose flour and almond flour.
    sliced gluten-free zucchini bread on a baking sheet with a knife.
    5 from 1 vote

    Gluten-Free Zucchini Bread

    This gluten-free zucchini bread is deliciously moist! It’s super easy to make and loaded with fresh zucchini. Enjoy a thick slice of this gluten-free zucchini bread with a little butter for breakfast or as a snack!
    Print Pin Rate
    Prep Time: 10 minutes
    Cook Time: 45 minutes
    Total Time: 55 minutes
    Servings: 8 servings

    Ingredients

    • 1 cup shredded zucchini
    • 1 1/2 cups gluten-free all purpose flour, see Notes
    • 1/2 cup almond flour
    • 1 teaspoon baking soda
    • 1 teaspoon baking powder
    • 1 teaspoon cinnamon
    • 2 eggs
    • 1/2 cup coconut oil or butter, melted
    • 1 cup sugar
    • 1 tablespoon lemon juice
    • 2 teaspoons vanilla extract

    Instructions

    • Preheat oven to 375° Fahrenheit and lightly grease a 9×5 loaf pan.
    • Wrap the shredded zucchini in a dish towel and squeeze over the sink to remove as much water from the zucchini as possible, then set aside.
    • Mix together the gluten-free all purpose flour, almond flour, baking soda, baking powder, and cinnamon in a large bowl.
      gluten-free zucchini bread step 1
    • In a separate bowl, whisk together the eggs, melted coconut oil, sugar, lemon juice, and vanilla extract until combined.
      gluten-free zucchini bread step 2
    • Add the wet ingredients into the dry ingredients and gently fold together until no flour remains.
    • Gently fold in the shredded zucchini until just combined.
    • Transfer batter to prepared loaf pan and bake for 45-50 minutes or until a toothpick inserted in the center comes out clean. Let cool in pan for 10 minutes before transferring to a wire rack to cool completely.
      gluten-free zucchini bread step 5

    Notes

  • Gluten-Free All Purpose Flour: I use and love the King Arthur Measure for Measure Gluten-Free Flour in this recipe, though you can use any all purpose gluten-free flour you’d like as long as it contains xantham gum.
  • Nutrition

    Calories: 300kcal

    Seriously delicious healthy no-bake cookie dough bars! These bars are vegan, gluten-free, dairy-free, and refined sugar-free. Enjoy as a guilt-free dessert or sweet snack!

    healthy no bake cookie dough bars on a baking sheet.

    What You’ll Need to Make Healthy No-Bake Cookie Dough Bars

    Almond Flour – Use blanched almond flour for these dessert bars, not almond meal. Blanched almond flour is ground finer and makes for a smoother cookie dough. Looking for more almond flour recipes? Try these!

    Peanut or Cashew Butter – Either peanut or cashew butter will work! I used peanut butter because I love the taste. However, cashew butter yields little flavor and works perfectly to hold these no-bake bars together. But whichever you use, make sure it’s both creamy and unsweetened.

    Maple Syrup – We use maple syrup in place of traditional refined sugar to keep these healthy cookie dough bars refined sugar-free. The maple syrup in these bars can easily be replaced with honey, or even your favorite sugar-free liquid sweetener for sugar-free cookie dough bars!

    Chocolate Chips – I used the Enjoy Life Mini Chocolate Chips to keep these bars vegan/dairy-free, but really any chocolate chip will work! For refined sugar-free chocolate chips, try these date-sweetened Hu chocolate chips.

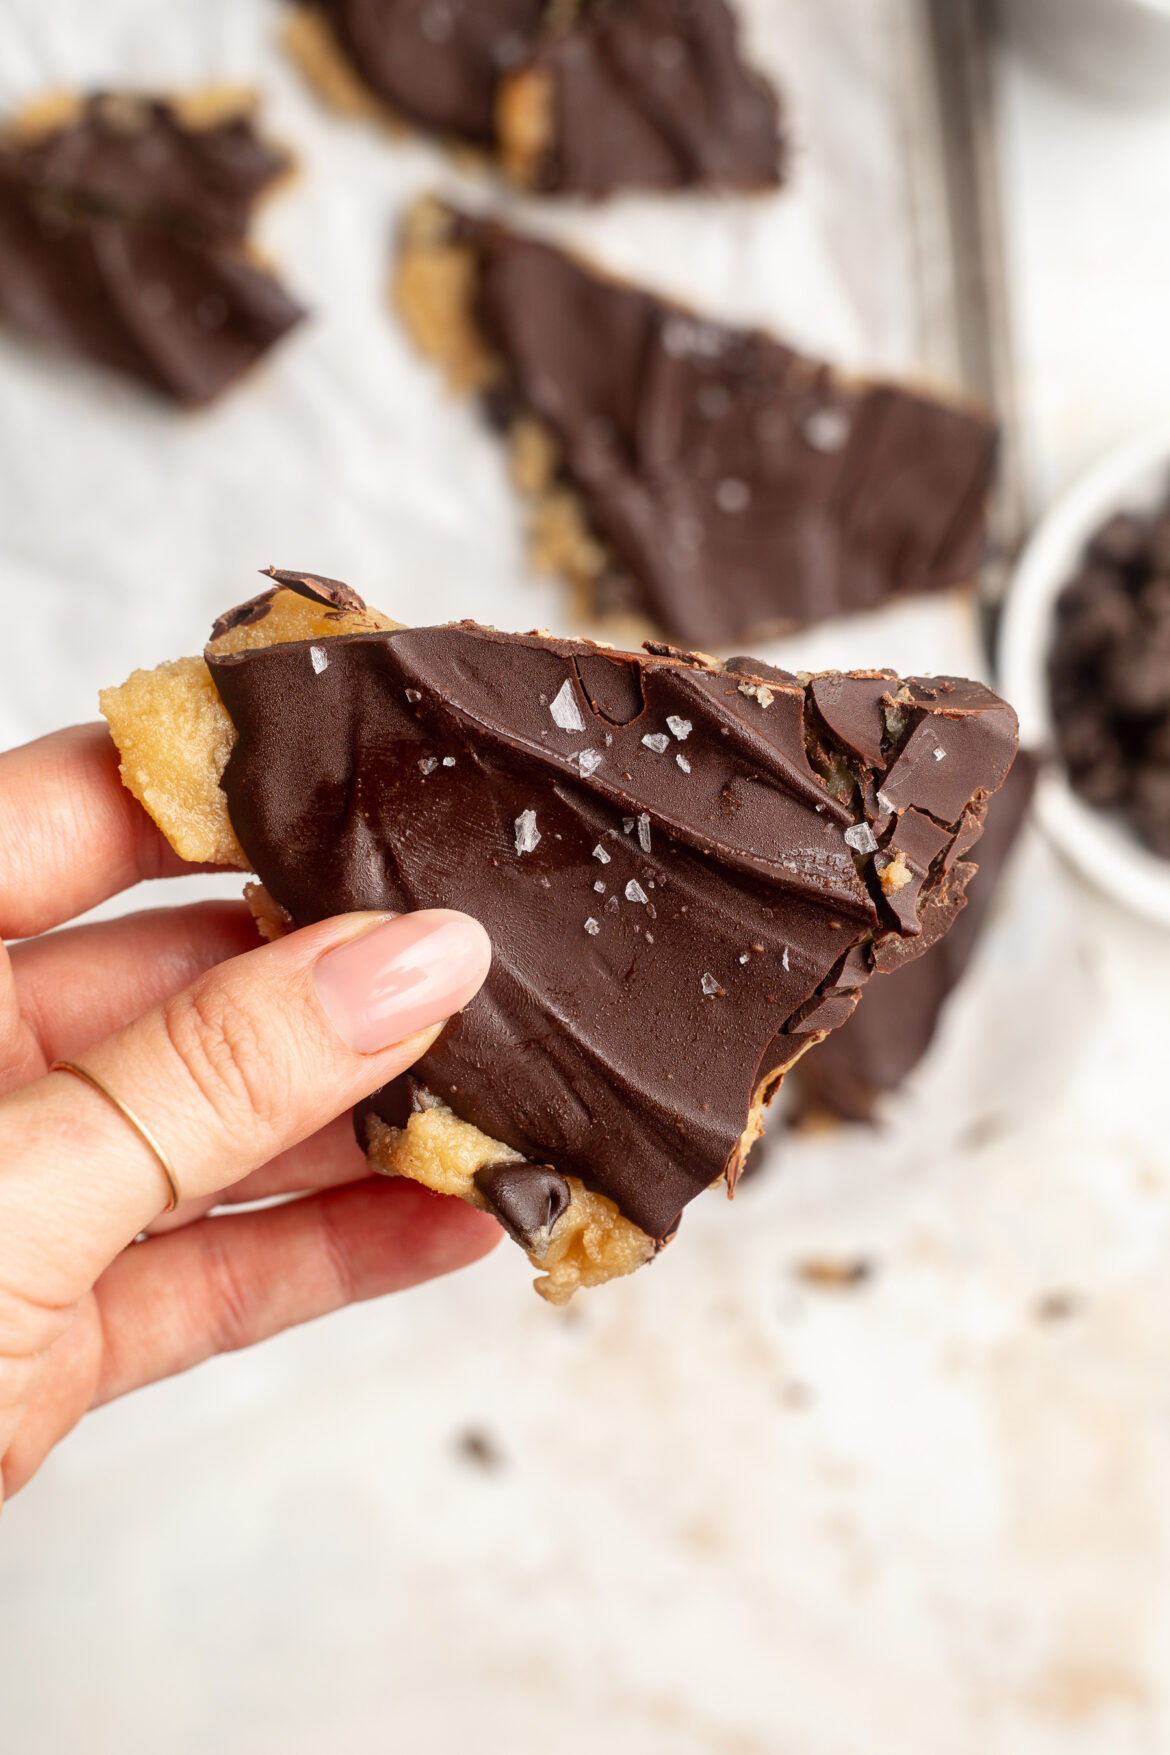
    three healthy no bake cookie dough bars stacked on top of each other.

    Tips and Tricks

    • Chill these healthy no-bake cookie dough bars in the freezer for at least one hour before slicing! Don’t rush this step, otherwise the chocolate won’t be fully set.
    • Store leftover bars in an airtight container in the fridge or freezer. Avoiding leaving them at room temperature for too long, because the chocolate may melt.
    close-up image of a healthy no bake cookie dough bar.

    Adjust This Recipe to Your Dietary Needs

    Make it Nut-Free: For a nut-free version of this recipe, replace the almond flour with oat flour. Also, replace the cashew or peanut butter with unsweetened sunflower seed butter!

    Make it Paleo: Make paleo cookie dough bars by using unsweetened creamy almond butter in place of the cashew or peanut butter.

    two healthy no-bake cookie dough bars stacked on top of each other on a baking sheet.
    4.24 from 59 votes

    Healthy No-Bake Cookie Dough Bars

    Seriously delicious healthy no-bake cookie dough bars! These bars are vegan, gluten-free, dairy-free, and refined sugar-free. Enjoy as a guilt-free dessert or sweet snack!
    Print Pin Rate
    Prep Time: 5 minutes
    Cook Time: 1 hour
    Total Time: 1 hour 5 minutes
    Servings: 8 servings

    Ingredients

    For the cookie dough layer:

    • 1 1/2 cups almond flour
    • 1/2 cup creamy peanut or cashew butter, unsweetened
    • 1/4 cup maple syrup
    • 1/4 cup coconut oil or butter, melted
    • 1 teaspoon vanilla extract
    • pinch of salt
    • 1/2 cup chocolate chips

    For the chocolate layer:

    • 1 cup chocolate chips
    • 1/4 cup creamy peanut or cashew butter, unsweetened

    Instructions

    • Line a 9×5-inch baking pan with parchment paper.
    • Make the cookie dough layer by mixing together the almond flour, peanut or cashew butter, maple syrup, melted coconut oil, vanilla extract, and salt in a large bowl. Add in the chocolate chips and mix until evenly distributed throughout the dough.
    • Transfer dough to prepared baking pan and press into an even layer.
    • Make the chocolate layer by melting the chocolate chips and peanut or cashew butter in the microwave in 30 second increments. Stir together until smooth, then pour and spread into an even layer on top of the cookie dough.
    • Chill in the freezer for one hour, then remove and slice into squares.

    Nutrition

    Calories: 300kcal