Tag

eggs

Browsing

One pan and a few simple ingredients is all you’ll need for the best EVER breakfast tacos! Smoky chorizo, creamy refried beans, fluffy eggs, and fresh avocado piled high atop warm tortillas. And did I mention they take just 15 minutes to make?! There truly is no better way to start the day.

breakfast tacos with sliced avocado and vegan sour cream on top, and coffee on the side

What You’ll Need

Tortillas – Either corn or flour tortillas will work for these breakfast tacos! I actually used Siete’s grain-free tortillas to keep my tacos a little lighter and healthier. Whatever tortillas you use, be sure to heat them up slightly in your pan to make them pliable and crispy around the edges.

Chorizo – The two most common types of chorizo are semi-cooked chorizo and dried chorizo. For this recipe, we’re looking for either semi-cooked chorizo or fresh chorizo. While uncommon, fresh chorizo works best in this recipe, so if you can find it definitely use it! Though I used semi-cooked chorizo and my breakfast tacos still turned out perfect. For semi-cooked, chop the chorizo into half or quarter moons then quickly cook in a hot skillet. For fresh chorizo, remove the meat from its casing and cook in a hot skillet until completely cooked through, crumbling the sausage as it cooks.

Eggs – They wouldn’t be breakfast tacos without some scrambled eggs! Luckily, scrambled eggs are super easy to throw together. Use as many or as few eggs as you’d like, I sometimes add a couple more into my scramble for extra protein.

Refried Beans – Either canned or homemade refried beans will taste delicious in this easy breakfast recipe. For homemade, I recommend this recipe, and for store bought, I prefer the Amy’s Organic Refried Beans.

Adjust This Recipe To Your Dietary Needs

  • Make it Vegan: Making vegan breakfast tacos is surprisingly easy with a few simple swaps. Cook up some scrambled tofu and double up on refried beans to make up for the lack of chorizo. The end result will be a delicious vegan breakfast with plenty of protein!
  • Make it Paleo: Use Siete Almond Flour Tortillas in place of regular tortillas to turn this into a paleo meal.
  • Make it Whole30: Ditch the tortillas and wrap these breakfast tacos in butter lettuce leaves instead! Also, make sure your refried beans and chorizo are Whole30 compliant. If you can’t find Whole30 compliant chorizo, use Whole30 compliant bacon instead.

How to Freeze Breakfast Tacos

  1. Wrap tortilla completely around filling, then wrap each individual taco in aluminum foil.
  2. Store in the freezer for up to 1 month.
  3. To reheat, place tacos still in foil in the oven at 350° Fahrenheit for 15-20 minutes or until heated through.

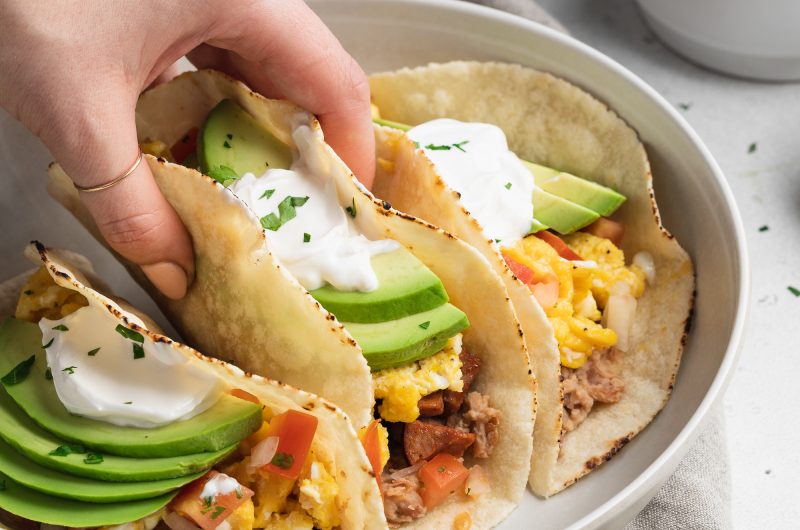
Easy Breakfast Tacos (Freezer Friendly)

0 from 0 votes
Recipe by Samantha Course: BreakfastDifficulty: Easy
Servings

4

servings
Prep time

5

minutes
Cooking time

10

minutes
Total time

15

minutes

One pan and a few simple ingredients is all you’ll need for the best EVER breakfast tacos! Smoky chorizo, creamy refried beans, fluffy eggs, and fresh avocado piled high atop warm tortillas. And did I mention they take just 15 minutes to make?! There truly is no better way to start the day.

Ingredients

  • 8 small corn or flour tortillas

  • 4 ounces chorizo sausage, removed from casing or chopped

  • 8 large eggs, whisked

  • salt and pepper, to taste

  • 1 cup refried beans

  • 2 avocados, peeled and sliced

  • Optional toppings:
  • salsa

  • fresh cilantro, chopped

  • cheese

  • sour cream

  • hot sauce

Directions

  • Heat tortillas in a skillet over medium-low heat, one at a time, until soft and pliable then set aside.
  • Add olive oil to skillet and cook chorizo sausage until browned and cooked through, then remove and set aside.
  • Add whisked eggs to skillet, season with salt and pepper, and scramble until full cooked.
  • Warm refried beans in either the microwave or a small saucepan over low heat.
  • Assemble tacos by spooning some refried beans, then chorizo, then scrambled eggs into each tortilla. Top with sliced avocado and any other toppings you’d like.

Did you make this recipe?

Share it and tag @samdoesherbest on Instagram!

Like this recipe?

Follow us @samdoesherbest on Pinterest

More Quick and Delicious Breakfast Recipes

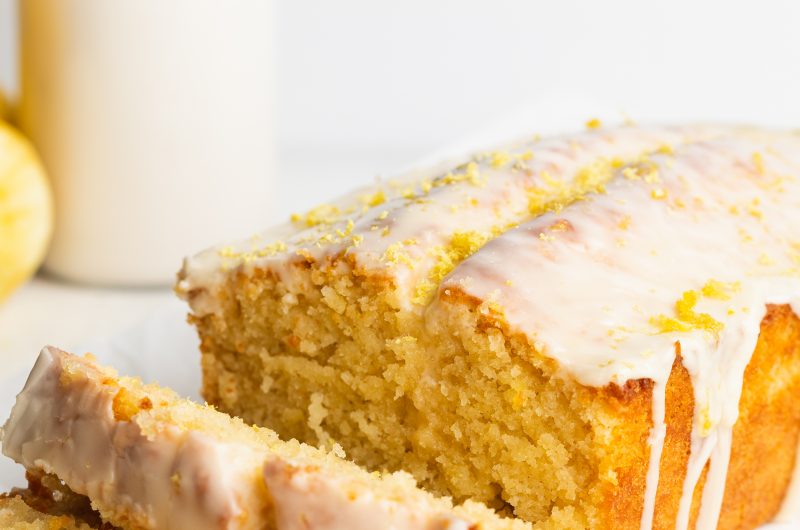
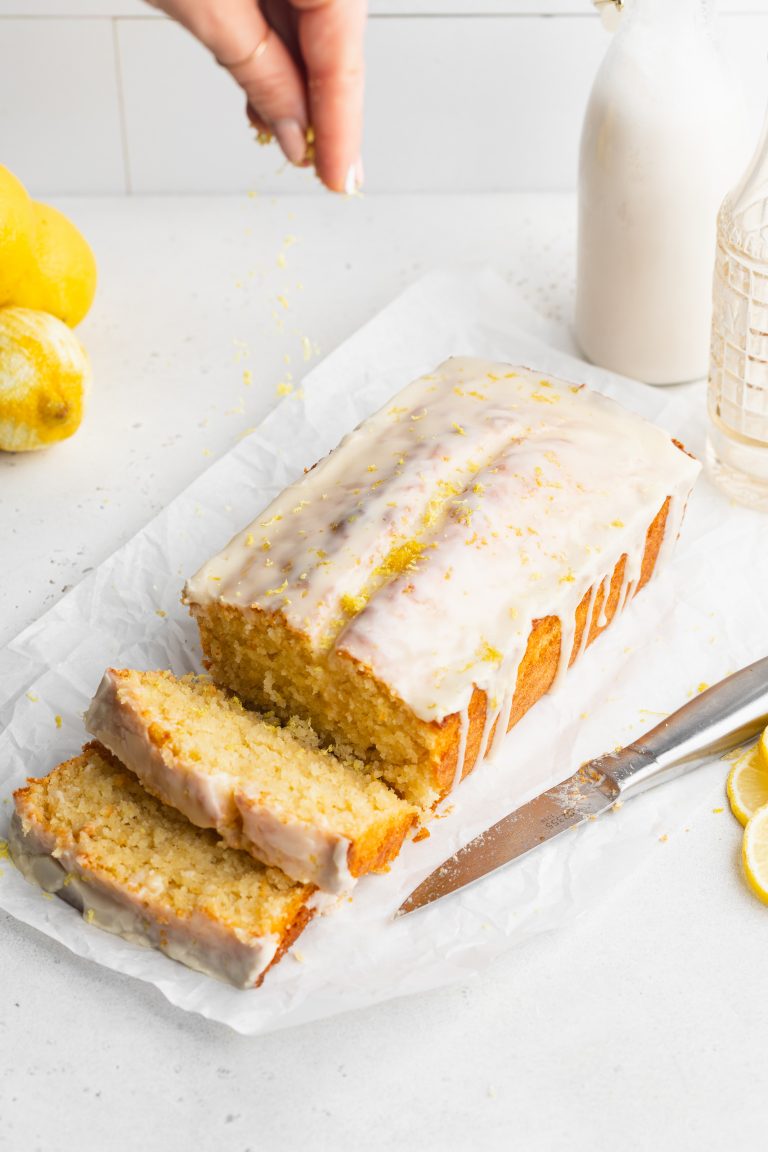
With a delicious burst of tart lemon flavor and a moist and delicate crumb, this Gluten-Free Lemon Drizzle Cake recipe is a classic dessert that can be enjoyed for any occasion.

Gluten-Free Lemon Drizzle Cake

Main Ingredients For Gluten-Free Lemon Drizzle Cake

  • Sugar

  • Lemon Zest

  • Softened Butter – I used non-dairy.

  • Eggs

  • All Purpose Flour – I use Bob’s Red Mill’s gluten-free all purpose flour.

  • Almond Flour – adds protein and moisture to the cake. 

  • Baking Powder

  • Salt

  • For the lemon drizzle you’ll need powdered sugar and lemon juice

Tips When Making Lemon Drizzle Cake

  • Add poppy seeds: Mix in 1 tablespoon of poppy seeds to the batter just after mixing in the dry ingredients. 

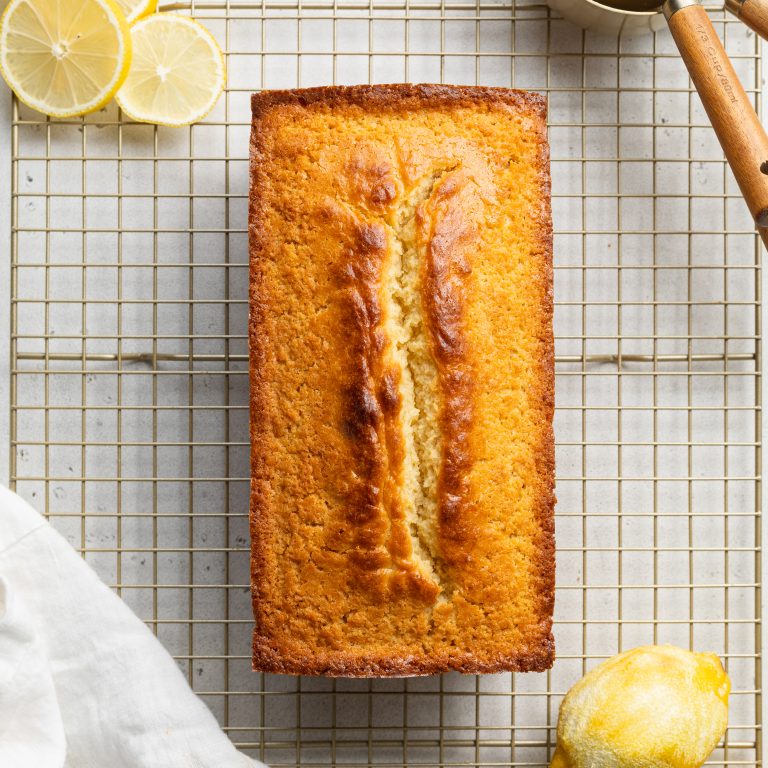
  • How do I know when the lemon drizzle cake is done? The cake should be golden brown on the outside. Insert a toothpick into the center and it should come out clean or with just a few crumbs.

  • How do I store the lemon drizzle cake if there are leftovers? Store the cake in an airtight container at room temperature for up to 3 days.

Gluten-Free Lemon Drizzle Cake

4 from 5 votes
Recipe by Samantha Course: DessertsCuisine: BritishDifficulty: Medium
Servings

8

servings
Prep time

10

minutes
Cooking time

1

hour 
Total time

1

hour 

10

minutes

With a delicious burst of tart lemon flavor and a moist and delicate crumb, this Gluten-Free Lemon Drizzle Cake recipe is a classic dessert that can be enjoyed for any occasion.

Ingredients

  • 1 Cup Sugar

  • 2 Tablespoons Lemon Zest

  • 1 Cup Softened Butter (non-dairy)

  • 4 Large Eggs

  • 1/4 Cup Milk (or non-dairy milk)

  • 3 Tablespoons Lemon Juice

  • 1 3/4 Cups Gluten-Free All Purpose Flour

  • 1/2 Cup Almond Flour

  • 2 Teaspoons Baking Powder

  • 1/4 Teaspoon Salt

  • For the lemon drizzle:
  • 1 Cup Powdered Sugar

  • 1/4 Teaspoon Lemon Juice

Directions

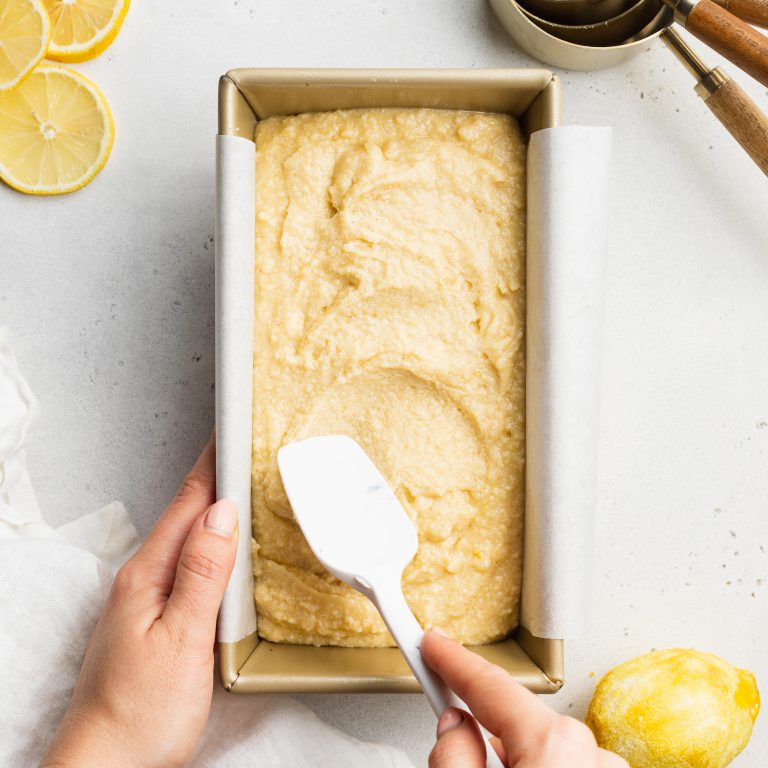
  • Preheat oven to 350° Fahrenheit and line a loaf pan with parchment paper.
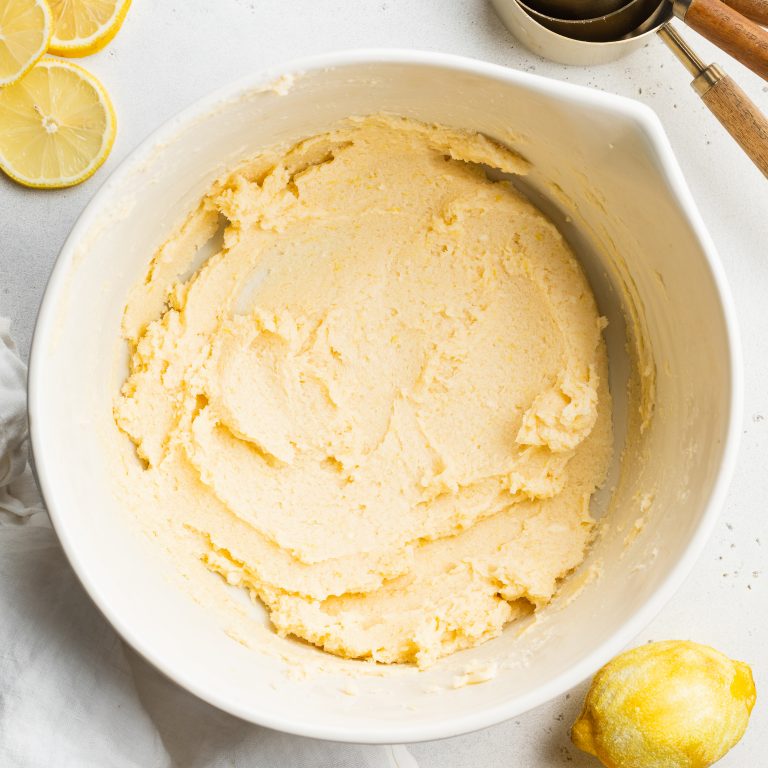
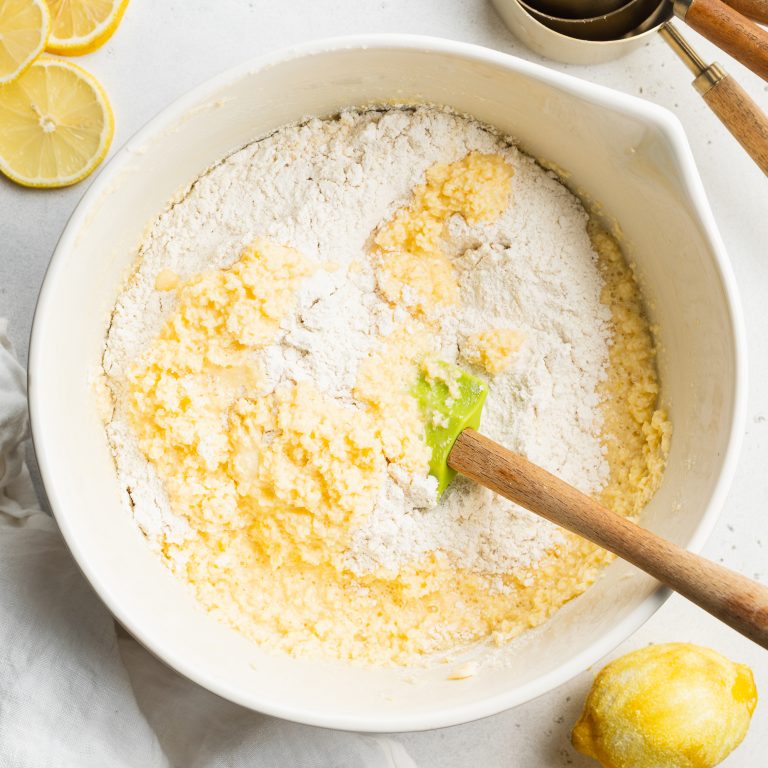
  • Mix together the sugar and lemon zest in a large bowl. Add in the butter and use either a hand or stand mixer to beat until pale yellow.
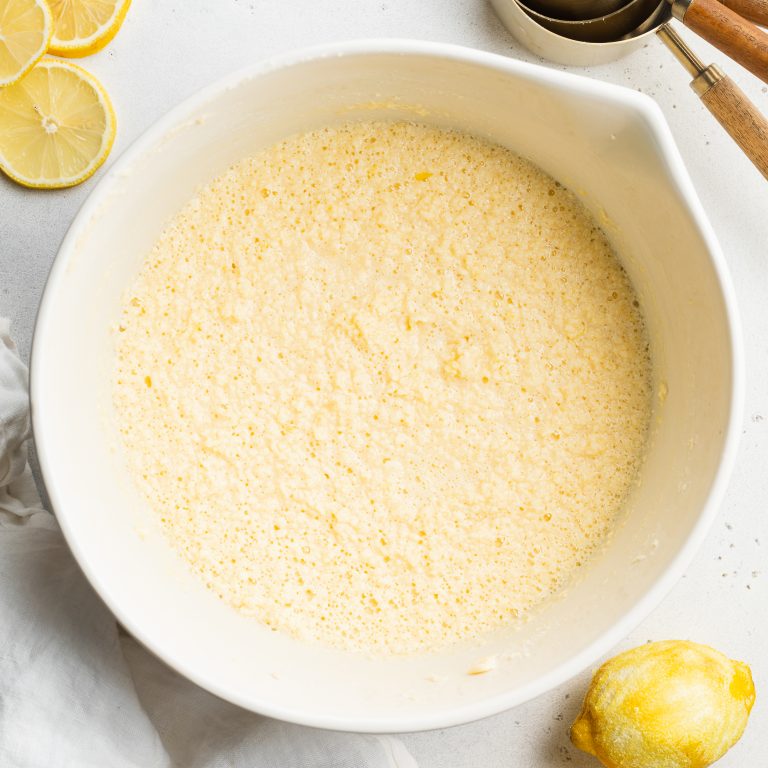
  • Beat in one egg at a time, before adding in the milk and lemon juice. Mix until combined.
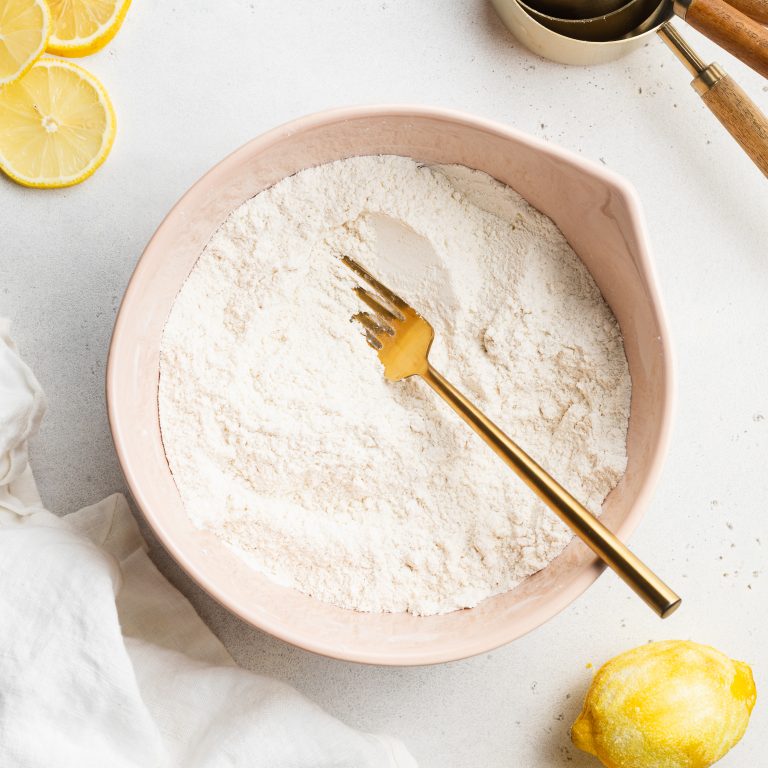
  • In a separate bowl, mix together the gluten-free all purpose flour, almond flour, baking powder, and salt.
  • Slowly fold flour mixture into butter mixture until just combined, do not overmix.
  • Transfer batter to prepared loaf pan and bake for 1 hour, or until a toothpick inserted down the center comes out clean. Let cool in pan for 10 minutes before removing and placing on a wire rack to cool the rest of the way.
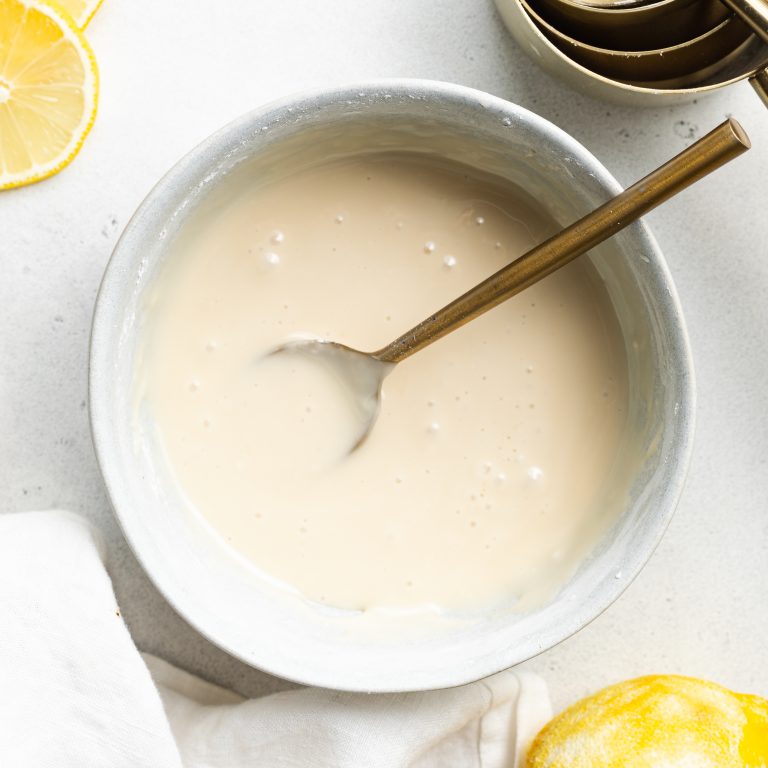
  • While the lemon cake cools, make the drizzle by whisking together all ingredients in a small bowl.
  • Once cake has cooled completely, spoon lemon drizzle over top. Leave drizzle to set for about 10-15 minutes before slicing and enjoying.

Did you make this recipe?

Share it and tag @samdoesherbest on Instagram!

Like this recipe?

Follow us @samdoesherbest on Pinterest

More Dessert Recipes

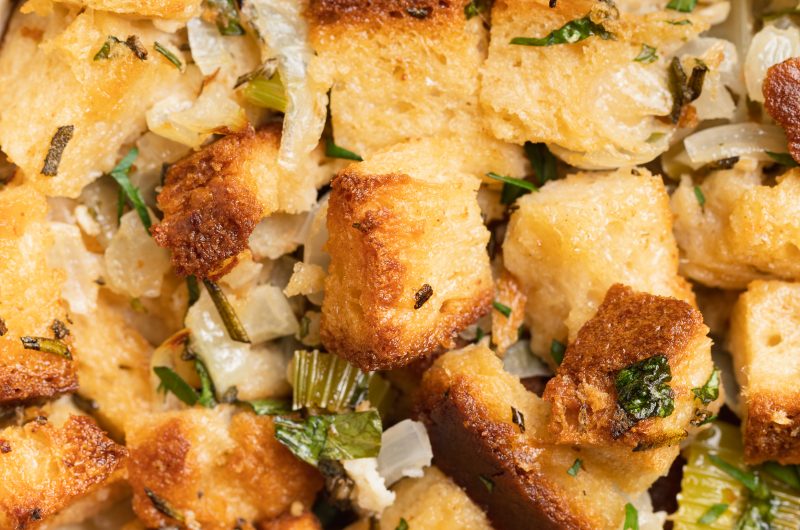
Full of savory flavors and made with 11 simple ingredients, this gluten-free stuffing recipe is a classic dish you can make for the upcoming holidays to share with family and friends!

Gluten-Free Stuffing

A Thanksgiving meal isn’t complete without the stuffing! I love the savory flavors of onion, celery, sage, rosemary and chicken stock all mixed together with cubes of toasted bread. With the holidays coming up, you’re going to want a quick, delicious gluten-free stuffing recipe on hand. This one will not disappoint. It’s not only gluten-free but it’s also dairy-free, ensuring even those with allergies can enjoy this timeless dish.

MAIN INGREDIENTS NEEDED

  • Gluten-Free Bread

  • Butter

  • Yellow Onion

  • Celery

  • Garlic Cloves

  • Fresh Sage, Parsley & Rosemary

  • Salt

  • Chicken/Vegetable Stock

  • Eggs

TIPS TO FOLLOW WHEN MAKING This Classic Gluten-Free Thanksgiving Stuffing

  • I used Canyon Bakehouse Gluten-Free Mountain White bread in this recipe and it cooked up beautifully!

  • I kept this stuffing recipe classic, but you could easily add sautéed mushrooms, cranberries, apples, or a little sausage to it if you’d like. Here’s one variation you can try if you want to add a little sweet to this savory dish.

    • Cranberry-Apple Stuffing: When cooking onions and celery, add 2 peeled, cored and diced apples, and 1 cup dried cranberries to the aromatics when you add the stock.
  • To make this dairy-free, all you have to do is replace the butter with vegan butter!

Gluten-Free Stuffing (With Dairy-Free Option)

5 from 1 vote
Recipe by Samantha Course: SidesCuisine: AmericanDifficulty: Medium
Servings

4

servings
Prep time

20

minutes
Cooking time

1

hour 
Total time

1

hour 

20

minutes

Full of savory flavors and made with 11 simple ingredients, this gluten-free stuffing recipe is a classic Thanksgiving dish you can make for the upcoming holidays to share with family and friends!

Ingredients

  • 15 Ounce Loaf (cut into cubes)

  • 1/2 Cup Butter

  • 1 Large Yellow Onion (chopped)

  • 1 Cup Celery (chopped)

  • 5 Whole Garlic Cloves (minced)

  • 1/2 Cup Fresh Parsley (chopped)

  • 3 Tablespoons Fresh Rosemary (chopped)

  • 3 Tablespoons Fresh Sage (chopped)

  • 2 Teaspoons Salt

  • 2 Cups Chicken or Vegetable Stock (divided)

  • 2 Whole Eggs

Directions

  • Preheat oven to 350° Fahrenheit.
  • Spread bread cubes into an even layer on a baking sheet and bake for 30 minutes, tossing halfway through.
  • Melt butter in a small saucepan over medium heat, then add in the onion, celery, and garlic. Sauté until soft, about 8 minutes.
  • Add toasted bread cubes, onion mixture, fresh parsley, sage, rosemary, salt, and 1 cup of stock to a large bowl – toss to combine.
  • In a separate bowl, whisk together the remaining one cup of stock and eggs. Pour egg mixture into bread mixture and stir until just combined.
  • Transfer to a 9×13-inch baking dish and bake for 45-50 minutes or until golden brown.

Recipe Video

Did you make this recipe?

Share it and tag @samdoesherbest on Instagram!

Like this recipe?

Follow us @samdoesherbest on Pinterest

More Healthy Recipes

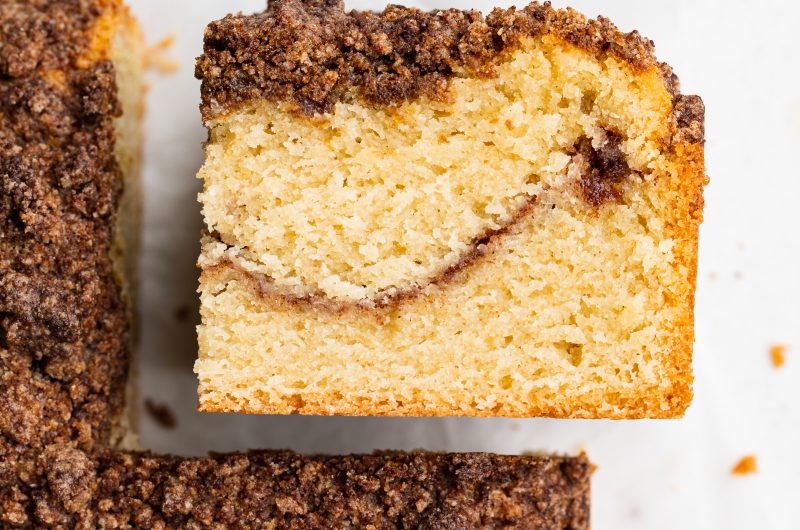
Learn how to make this deliciously soft and buttery gluten-free coffee cake with a cinnamon filling and streusel crumb topping. This recipe also includes a dairy-free option, making it a treat something everyone can get excited about!  

Gluten-Free Cinnamon Streusel Coffee Cake

This gluten-free coffee cake recipe so easy to make and such a perfect breakfast or brunch recipe on the weekend. Serve a big slice with a hot cup of coffee for a breakfast treat!

While there are a few different parts to this recipe — the coffee cake, streusel, and filling — they are all very quick to make.

MAIN INGREDIENTS NEEDED TO MAKE Gluten-Free Cinnamon Streusel Coffee Cake

  • 1:1 Baking Flour – I used Bob’s Red Mill 1-to-1 Gluten Free Baking flour in this recipe.

  • Butter – I used non-dairy butter. Consider using unsalted butter to control the salt content in this recipe.

  • Eggs – A common pantry item, you only need 3 large eggs for this.

  • Milk – I used non-dairy, but any milk can work with this.

  • Vanilla Extract – I use this in almost all my baked goods recipes because it enhances all the other flavors in the recipe.

  • Cinnamon – This wouldn’t be a cinnamon streusel coffee cake without the cinnamon!

  • Brown Sugar – This will be used for the streusel topping.

ADJUST THIS RECIPE TO YOUR DIET

  • Add dairy: I used non-dairy butter and milk, but it’s totally fine to use regular dairy products too.

  • Add Gluten: You can try using all purpose flour instead of the gluten-free version. However, flours like almond flour or coconut flour have not been tested in this recipe.

TIPS FOR MAKING Gluten-Free Cinnamon Streusel Coffee Cake

  • I like to line my baking dish with parchment paper for easy removal of the coffee cake from the pan after baking. 

  • You can make the filling and streusel ahead of time. Just store in the refrigerator until ready to use.

Gluten-Free Cinnamon Streusel Coffee Cake (Dairy-Free)

5 from 2 votes
Recipe by Samantha Course: Breakfast, DessertCuisine: AmericanDifficulty: Easy
Servings

9

servings
Prep time

10

minutes
Cooking time

50

minutes
Calories

300

kcal
Total time

1

hour 

Learn how to make this deliciously soft and buttery gluten-free coffee cake with a cinnamon filling and streusel crumb topping. This recipe also includes a dairy-free option, making it a treat something everyone can get excited about!  

Ingredients

  • For the cake:
  • 3 cups gluten-free 1:1 baking flour

  • 2 teaspoons baking powder

  • ½ teaspoon salt

  • 1 ½ cups sugar

  • 1 cup butter, melted (I used non-dairy butter)

  • 3/4 cup milk (I used non-dairy milk)

  • 3 eggs

  • 1 tablespoon vanilla extract

  • For the filling:
  • ¼ cup sugar

  • 1 tablespoon gluten-free 1:1 baking flour

  • 1 teaspoon cinnamon

  • For the streusel topping:
  • 1 cup gluten-free 1:1 baking flour

  • 1 cup brown sugar

  • ½ cup butter, softened (I used non-dairy butter)

  • 1 teaspoon cinnamon

Directions

  • Preheat oven to 350° Fahrenheit and grease a 9×9-inch cake pan.
  • In a large bowl, mix together the gluten-free flour, baking powder, and salt.
  • In a separate bowl, whisk together the sugar, butter, milk, eggs, and vanilla extract.
  • Slowly pour the wet ingredients into the dry ingredients while stirring, then mix until just combined.
  • Add all filling ingredients to a bowl and mix together.,
  • Then, add all streusel topping ingredients to a bowl and mix together until crumbly.
  • Transfer half of the batter to the cake pan, then evenly pour the filling over the top.
  • Follow that layer with the remaining cake batter before topping the whole thing off with an even sprinkling of the streusel topping.
  • Bake for 45-50 minutes or until a toothpick inserted down the center of the cake comes out mostly clean. Remove from pan and cool on a wire rack before slicing and serving.

Recipe Video

Notes

  • Storage: Store cooled coffee cake covered at room temperature up to 2 days.
  • Be sure to cool this one at least 30 minutes to let it set and be easier to cut and serve.

Did you make this recipe?

Share it and tag @samdoesherbest on Instagram!

Like this recipe?

Follow us @samdoesherbest on Pinterest

OTHER GLUTEN-FREE DESSERTS

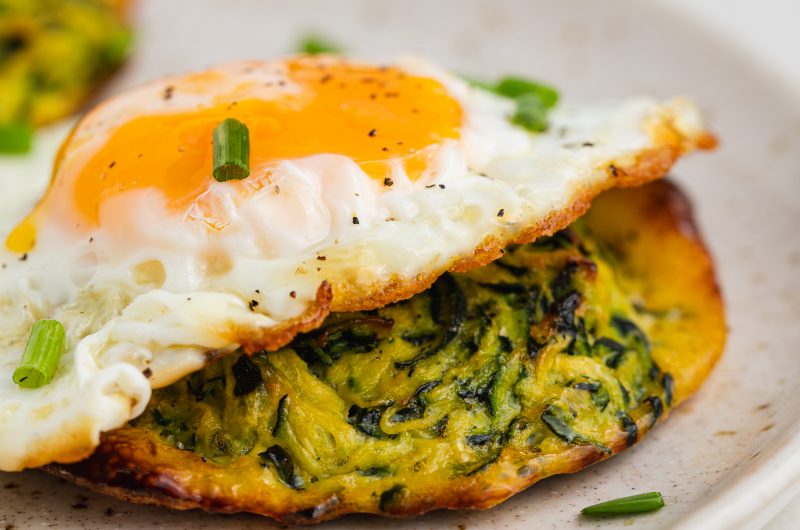
These zucchini hash browns are perfectly seasoned, easy to make, and incredibly delicious! Serve alongside a fried egg and some fresh herbs for a quick and easy breakfast.

two zucchini hash browns on a plate with a fried egg on top

Hash browns have always been and always will be my favorite part of a breakfast plate. I love my hash browns extra crispy, with just the right amount of flavor. These zucchini hash browns hit the spot while being low-carb and super healthy. And the best part? They require a whopping four ingredients to make! You can catch me throwing together these super easy zucchini hash browns all zucchini-season long. I also plan on prepping a big batch for my freezer to reheat and enjoy in the winter months.

If you’re like me and have difficulty finding time to throw together a complete breakfast for yourself in the morning, then you need this recipe in your life. I highly recommend doubling or even tripling it ahead of a long week and keeping them in the fridge or freezer as a quick grab-and-go breakfast all week or month long.

What You Need To Make Zucchini Hash Browns

Zucchini – Peak zucchini season runs from May through August, but can usually be found at grocery stores year round. If you own a zucchini plant, you know how fruitful these plants are (like zucchini for daysssss). To prepare zucchini for this recipe, start by trimming off one end of the zucchini and running that same end down a medium box grater. Immediately transfer the shredded zucchini to a dish cloth and get started with this recipe!

Egg – The egg not only adds protein to these zucchini hash browns, but holds them together while they cook. Most zucchini hash browns call for all purpose flour or cheese to help bind them together. Though I found that in order to keep them gluten-free and dairy-free you’ll just need one egg to hold these babies together.

Garlic Powder – I kept the seasoning light in this recipe as to not overwhelm this mild veggie. Feel free to add whatever other seasoning you’d like or even leave the garlic powder out altogether!

How To Freeze

  • Let the zucchini hash browns cool completely before transferring to a freezer-safe bag or container.
  • When ready to eat, remove from the freezer and heat in a 400° Fahrenheit oven for 5-8 minutes or until warmed through. Or you can pop them in the microwave for 1 minute – they won’t be as crispy but will still be delicious.
  • Either wrap them in a napkin to take with you and enjoy during your morning commute or top with a fried egg and fresh herbs for a complete breakfast!

Zucchini Hash Browns (Gluten-Free, Dairy-Free)

0 from 0 votes
Recipe by Samantha Russo Course: BreakfastDifficulty: Easy
Servings

3

hash browns
Prep time

30

minutes
Cooking time

25

minutes
Total time

55

minutes

These zucchini hash browns are perfectly seasoned, easy to make, and incredibly delicious! Serve alongside a fried egg and some fresh herbs for a quick and easy breakfast.

Ingredients

  • 2 zucchini, shredded

  • 1 egg

  • 1/2 teaspoon salt, divided

  • 1/2 teaspoon garlic powder

Directions

  • Preheat oven to 400° Fahrenheit and line a baking sheet with parchment paper.
  • Place shredded zucchini on a dish towel in a single layer, then sprinkle with 1/4 teaspoon salt. let sit for 30 minutes to draw out as much moisture as possible.
  • Wrap zucchini in towel and squeeze out as much liquid as possible, then transfer zucchini to a bowl.
  • Add in the remaining ingredients then mix until well combined.
  • Divide into 3 hash browns and transfer to the baking sheet.
  • Bake for 25-30 minutes or until golden brown, remove and let cool slightly before serving.

Recipe Video

Notes

  • Feel free to add or remove any seasoning you’d like, don’t be scared to make this recipe your own!

Did you make this recipe?

Share it and tag @samdoesherbest on Instagram!

Like this recipe?

Follow us @samdoesherbest on Pinterest

More Healthy Recipes You’ll Love