Tag

gluten-free

Browsing

Perfectly fluffy and delicious coffee cake muffins made gluten-free, with a dairy-free option as well! They’re irresistibly soft, sweet, and complete with a cinnamon streusel topping. I especially love enjoying a warm gluten-free muffin with my coffee in the morning – there’s no better way to start the day!

three gluten-free coffee cake muffins stacked on top of each other

What You’ll Need For This Recipe

Gluten-Free All Purpose Baking Flour – I use Bob’s Red Mill Gluten Free 1-1 Baking Flour in most of my gluten-free baking recipes. It bakes up beautifully and can pretty much be used as a 1:1 swap for regular all purpose flour! However, you can use any gluten-free all purpose baking flour you’d like. Though when it comes to gluten-free flours, it’s super important to the integrity of your bake that your flour contains xanthan gum. Xanthan gum creates structure and will essentially hold these muffins together. Therefore, if your gluten-free flour doesn’t have xanthan gum, supplement it with 1 teaspoon of xanthan gum in this gluten-free coffee cake muffins recipe.

Butter – Any butter you’d like will work here! Salted, unsalted, and non-dairy butter all bake perfectly in this recipe. When it comes to salted butter, I truly don’t believe any butter has enough salt in it to make any difference in a recipe. So, feel free to use whatever butter you have on hand!

Eggs – Bring your eggs to room temperature before getting started on this delicious breakfast or snack recipe. By doing this, we reduce the risk of the cold eggs re-solidifying the melted butter. It’s also always a great rule-of-thumb to have all ingredients at room temperature before starting on any baked goods recipe!

Top Tips

  • You can freeze leftover gluten-free muffins for up to 3 months! I currently have half my batch in the freezer right now, ensuring they don’t go bad before I have a chance to eat them. Though for muffins you plan on eating right away, simple store them in an airtight container at room temperature for up to 1 week.
  • Avoid over-mixing the batter, as this could result in tough and chewy muffins! Therefore, when folding the wet ingredients into the dry, simply mix until no more flour pockets remain. Once just combined, put down the spatula and head straight into the next step!
  • These muffins are best enjoyed warm! So to warm them up after baking, I recommend either popping them in the microwave for 10-15 seconds, or into the toaster for a couple of minutes. Once warm, they’re irresistibly soft and flufy!

Adjust This Recipe To Your Dietary Needs

Make it Vegan – While I haven’t tried this variation myself yet, you may be able to get away with replacing the eggs in these muffins with a vegan egg substitute. I’ve used the Bob’s Red Mill Vegan Egg Substitute in other recipes, and have almost always found it successful. Flax eggs might work here as well, though expect a slightly more dense gluten-free muffin if going that route.

Cut the Recipe in Half – This recipe makes 24 gluten-free coffee cake muffins, but if that sounds like too much for you, you can easily cut this recipe in half! That’s right, use half of all ingredients listed for just 12 perfect muffins.

Use Regular Flour – Feel free to simply swap the gluten free all purpose flour for regular all purpose flour in this recipe.

Other Delicious Mix-Ins

Instead of the cinnamon and streusel topping, feel free to add one of the following to your gluten-free muffins:

  • Blueberries
  • Sliced Bananas
  • Chocolate Chips
  • Cranberries and Orange Zest
  • Lemon Juice and Poppyseeds
  • Strawberries
  • Raspberries
  • or simply leave them plain!

Perfect Gluten-Free Coffee Cake Muffins

3 from 137 votes
Recipe by Samantha Course: BreakfastDifficulty: Easy
Servings

24

servings
Prep time

10

minutes
Cooking time

20

minutes
Total time

30

minutes

Perfectly fluffy and delicious coffee cake muffins made gluten-free, with a dairy-free option as well! They’re irresistibly soft, fluffy, sweet, and complete with a cinnamon streusel topping. I especially love enjoying a warm gluten-free muffin with my coffee in the morning – there’s no better way to start the day!

Ingredients

  • For the gluten-free muffins:
  • 3 cups gluten-free all purpose baking flour

  • 2 teaspoons baking powder

  • 1 teaspoon cinnamon

  • 1/2 teaspoon salt

  • 1 cup sugar

  • 1 cup butter, melted (I used non-dairy butter)

  • 3/4 cup milk (I used non-dairy almond milk)

  • 3 eggs, at room temperature

  • 1 teaspoon vanilla extract

  • For the crumb topping:
  • 1 cup gluten-free all purpose baking flour

  • 1 cup brown sugar

  • 1/2 cup butter, softened

  • 1 teaspoon cinnamon

Directions

  • Preheat oven to 350° Fahrenheit and line a muffin tin with cupcake liners.
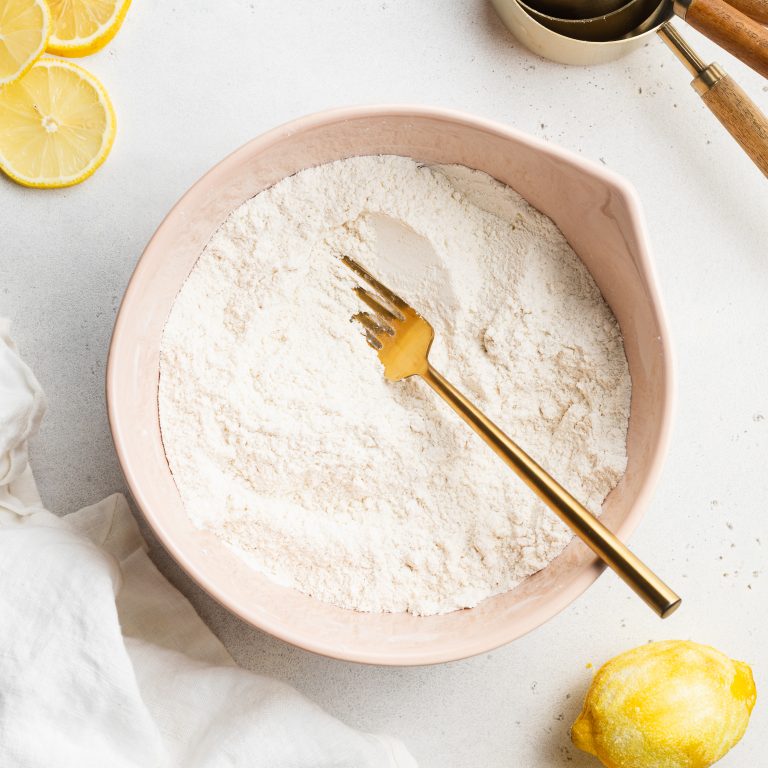
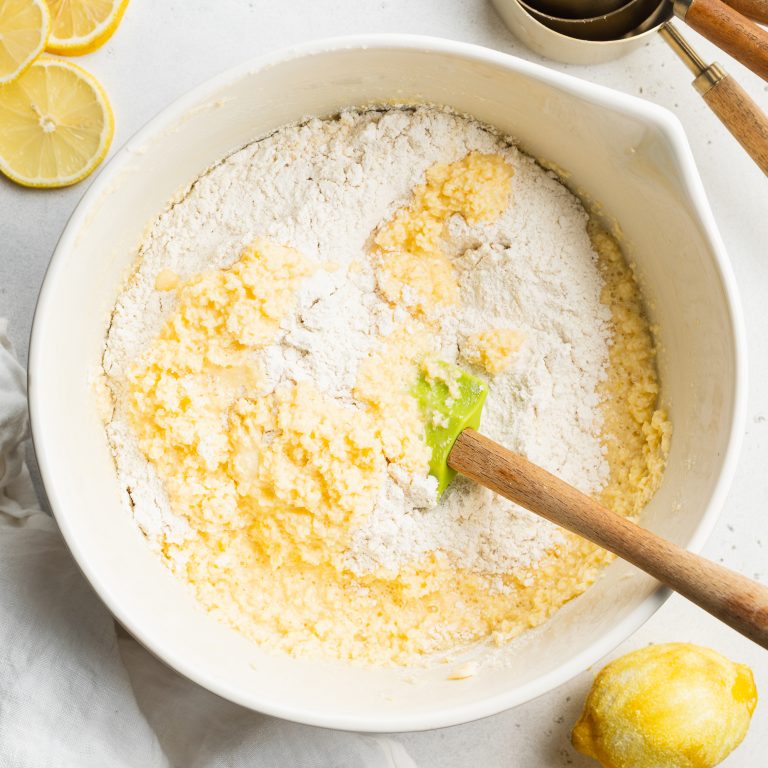
  • Mix together the flour, baking powder, cinnamon, and salt in a large bowl.
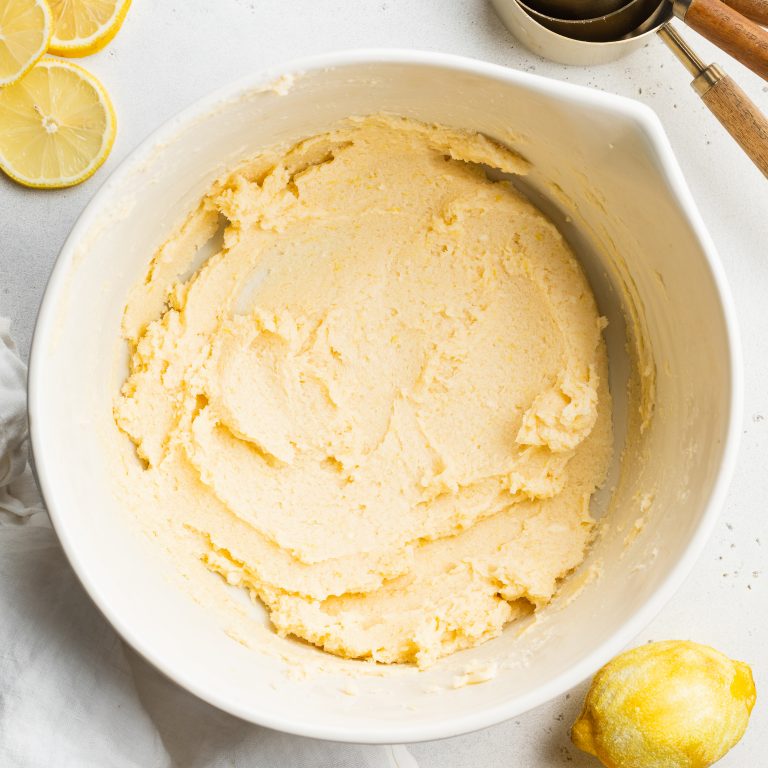
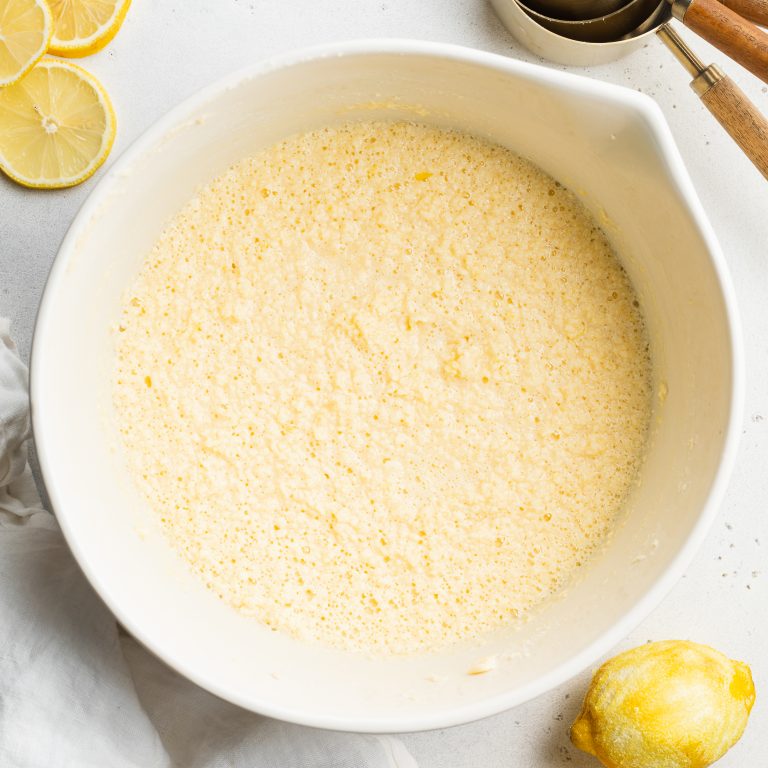
  • In a separate bowl, whisk together the sugar, melted butter, milk, eggs, and vanilla extract.
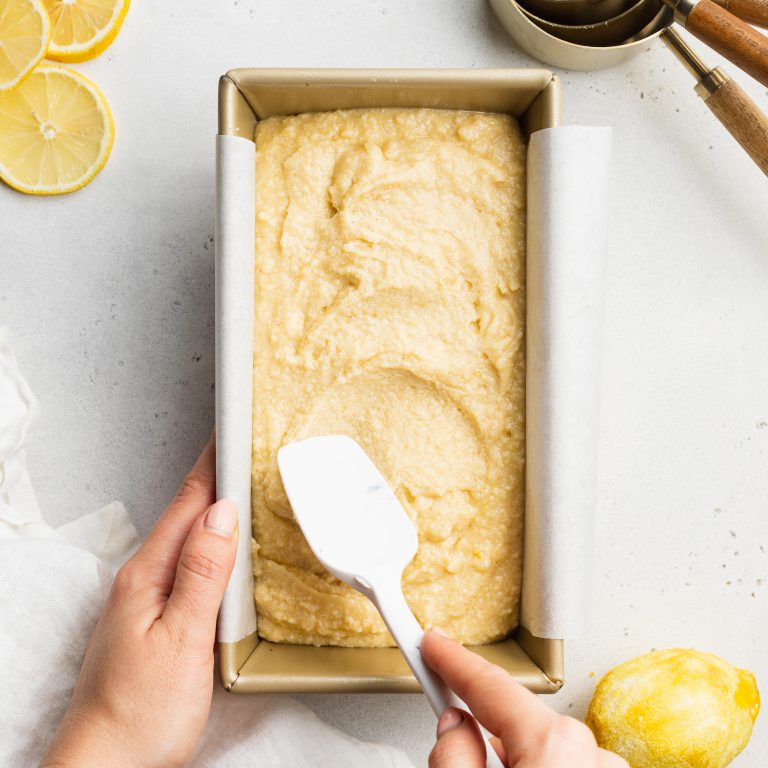
  • Slowly pour the wet ingredients into the dry ingredients, mix until just combined. Fill each muffin mold with about ¼ cup of batter.
  • Mix together all crumb topping ingredients in a bowl, then sprinkle over each muffin.
  • Bake for 20-25 minutes or until a toothpick inserted down the center of a muffin comes out clean. Let cool in tin for 10 minutes before transferring to a wire cooling rack to cool completely.

Notes

  • Gluten-Free All Purpose Flour: I used Bob’s Red Mill Gluten Free 1:1 Baking Flour.
  • Butter: I used Earth Balance Vegan Buttery Sticks to make this recipe dairy-free.

Did you make this recipe?

Share it and tag @samdoesherbest on Instagram!

Like this recipe?

Follow us @samdoesherbest on Pinterest

Other Delicious Gluten-Free Recipes You Must Try!

This Christmas crack is the perfect last-minute holiday recipe! With just 4 ingredients and minimal effort, you’ll have a perfectly sweet, slightly salty Christmas treat. This totally foolproof saltine chocolate toffee bark recipe is super easy, perfect for even the most inexperienced home cooks!

christmas crack pieces on a baking sheet with milk on the side

Main Ingredients You’ll Need to Make This Recipe

  • Crackers – I used Simple Mill’s almond flour sea salt crackers, they’re entirely grain-free and a totally delicious! They act as the perfect substitute to Saltine crackers, used in most traditional Christmas crack recipes. This simple swap makes this holiday dessert recipe gluten-free, and a little bit healthier.

  • Butter – Feel free to use whatever kind of butter you’d like, though I used vegan butter to keep this recipe vegan-friendly. My sister’s vegan, so I always try to make at least a few holiday treats that she can eat too. And honestly, you can’t even taste the difference in this vegan version!

  • Sugar – I used coconut sugar, since it’s less refined and slightly lower on the glycemic index. However, brown sugar will work just as well!

  • Chocolate Chips – Either 2 cups of chocolate chips or chopped chocolate will do! Also, you can use whatever intensity of chocolate you’d like – I prefer dark chocolate to balance out some of that sweetness in the caramel layer. If you don’t have a microwave, or would prefer not to use it, then simply melt your chocolate over a double boiler instead. I always opt for the microwave because it’s easier!

  • Toppings (optional) – Christmas crack is great on its own, but feel free to add additional toppings like chopped nuts, candy, sprinkles, shredded coconut, or crushed candy canes.

Christmas Crack Recipe (Vegan, Gluten-Free Options)

5 from 1 vote
Recipe by Samantha Course: DessertDifficulty: Easy
Servings

10

servings
Prep time

5

minutes
Cooking time

5

minutes
Chilling Time

6

hours

This Christmas crack is the perfect last-minute holiday recipe! With just 5 ingredients and minimal effort, you’ll have a perfectly sweet, slightly salty Christmas treat. This totally foolproof recipe is super easy, perfect for even the most inexperienced home cooks!

Ingredients

  • 1 Sleeve Saltine Crackers or 1 box Simple Mill’s GF Crackers

  • 1 Cup Butter (Dairy or Non-Dairy)

  • 1 Cup Coconut Sugar

  • 2 Cups Chocolate Chips

Directions

  • Preheat oven to 400° Fahrenheit and line a large baking sheet with aluminum foil. Arrange crackers in an even layer on baking sheet.
  • Melt butter and sugar in a small saucepan over medium heat, stirring frequently. Once butter has melted, cook for another 4-5 minutes, stirring constantly until dark brown and bubbling.
  • Remove from heat, then immediately pour over crackers. Bake for 5 minutes, until hot and bubbly.
  • Melt chocolate in the microwave, in 30 second intervals until completely smooth. Remove crackers from oven and let cool for 1 minute or until no longer bubbling, then pour chocolate over top and spread into an even layer.
  • Leave to cool at room temperature then transfer to either the fridge for 6-8 hours, or the freezer for 3-4 hours. Remove crack candy from pan, peel away foil, and break into large chunks.

Notes

  • To Store: Store Christmas Crack in an airtight container for up to two weeks.
  • To Freeze: Break or cut it into pieces and store it in freezer-safe bags for up to 3 months.

Did you make this recipe?

Share it and tag @samdoesherbest on Instagram!

Like this recipe?

Follow us @samdoesherbest on Pinterest

More Dessert Recipes

Rich in flavor, yet delicate in texture, gingerbread cookies are a classic Christmas holiday hit! These gluten-free gingerbread cookies are soft, chewy and flavorful from the molasses and warm spices. Dairy-free option is also included, so everyone can enjoy!

Gluten-Free Gingerbread Cookies

I love the holiday season, especially for all the food and desserts that come with it. Gingerbread cookies are one of the Christmas cookies that I love to make this time of year. Since my gingerbread cookies recipe is both gluten-free and dairy-free, it’s super friendly to dietary restrictions and baked slightly crisp with a soft, chewy, and perfectly spiced middle!

Main Ingredients Needed To Make Gluten-Free Gingerbread Cookies

  • All Purpose Gluten-Free Baking Flour

  • Butter – Dairy or non-dairy is fine depending on your preference, but I used non-dairy.

  • Egg

  • Baking Soda

  • Brown Sugar

  • Molasses – if you don’t know what molasses is: a syrupy byproduct of sugars from sugarcane and sugar beets.

  • Spices – ground ginger, cinnamon, nutmeg, ground allspice, salt

  • For the icing: powdered sugar, milk, vanilla extract

Tips When Making Gingerbread Cookies

  • To make vegan, use 2 flax eggs! To make one flax egg you will simply mix 2.5 tablespoons water and 1 tablespoon flaxseed meal and allow to sit for 5 minutes. Once it’s thick, you’ll use the flax mixture just as you would a regular egg.

  • You could substitute the molasses with maple syrup if you need something more “on hand,” but I definitely prefer it with molasses!

  • Blackstrap molasses provides a richer flavor and deeper color. Regular unsulphured molasses can be substituted for a lighter color and flavor.

  • Get your friends and family involved with the gingerbread cookie decorations (while sipping on big mugs of vegan hot chocolate). There’s no better way to get in the Christmas spirit!

  • Be creative! Turn these gingerbread cookies into a snowman, yeti, teddy bear and more.

What to use on GINGERBREAD Cookies For Decorations?

  • Shredded coconut: This can help to mimic snow when decorating your cookies (especially great when making house-shaped cookies).
  • Mini chocolate chips
  • Cream cheese frosting: Instead of the simple glaze, combine plain vegan cream cheese with powdered sugar.

Gluten-Free Gingerbread Cookies

0 from 0 votes
Recipe by Samantha Course: DessertsCuisine: American, Christmas
Servings

12

servings
Prep time

10

minutes
Cooking time

1

hour 

10

minutes
Total time

1

hour 

20

minutes

Rich in flavor, yet delicate in texture, gingerbread cookies are a classic Christmas holiday hit! These gluten-free gingerbread cookies are soft, chewy and flavorful from the molasses and warm spices. Dairy-free option is also included, so everyone can enjoy!

Ingredients

  • 6 Tablespoons Butter (softened)

  • 1/2 Cup Brown Sugar

  • 1/2 Cup Molasses

  • 1 Egg (at room temperature)

  • 2 1/2 Cups All Purpose Gluten-Free Baking Flour

  • 1 Teaspoon Baking Soda

  • 1/2 Teaspoon Salt

  • 1 Tablespoon Ground Ginger

  • 1 Teaspoon Cinnamon

  • 1 Teaspoon Nutmeg

  • 1/2 Teaspoon Ground Allspice

  • For the icing:
  • 2 Cups Powdered Sugar

  • 2 Tablespoons Milk

  • 1/2 Teaspoon Vanilla Extract

Directions

  • Beat butter and brown sugar together in a large bowl with either a hand or stand mixer, until light and fluffy. Add in molasses and egg, beat until combined.
  • In a separate bowl, mix together gluten-free flour, baking soda, salt, ginger, cinnamon, nutmeg, and allspice.
  • Add flour mixture into butter mixture and beat until a dough forms. Cover dough and let chill in fridge for at least one hour.
  • Once ready to bake, preheat oven to 350° Fahrenheit and line baking sheets with parchment paper.
  • Place dough on a floured surface and roll until ¼-inch thick. Use a cookie cutter to cut out shapes from dough and carefully transfer shapes to prepared baking sheets.
  • Bake cookies for about 7 minutes, then remove, and transfer to a wire cooling rack to cool completely.
  • Make icing by whisking all ingredients together in a small bowl. Add food coloring if you’d like, then use to decorate cookies.

Notes

  • To Store: Once the glaze has dried, store the vegan cookies in a cookie tin for 2-3 weeks.
  • To Freeze: Once the cookies are cooled place the undecorated cookies in a plastic freezer bag and place them in the freezer.  The cookies can be frozen for up to six months.

Did you make this recipe?

Share it and tag @samdoesherbest on Instagram!

Like this recipe?

Follow us @samdoesherbest on Pinterest

More Dessert Recipes

With a delicious burst of tart lemon flavor and a moist and delicate crumb, this Gluten-Free Lemon Drizzle Cake recipe is a classic dessert that can be enjoyed for any occasion.

Gluten-Free Lemon Drizzle Cake

Main Ingredients For Gluten-Free Lemon Drizzle Cake

  • Sugar

  • Lemon Zest

  • Softened Butter – I used non-dairy.

  • Eggs

  • All Purpose Flour – I use Bob’s Red Mill’s gluten-free all purpose flour.

  • Almond Flour – adds protein and moisture to the cake. 

  • Baking Powder

  • Salt

  • For the lemon drizzle you’ll need powdered sugar and lemon juice

Tips When Making Lemon Drizzle Cake

  • Add poppy seeds: Mix in 1 tablespoon of poppy seeds to the batter just after mixing in the dry ingredients. 

  • How do I know when the lemon drizzle cake is done? The cake should be golden brown on the outside. Insert a toothpick into the center and it should come out clean or with just a few crumbs.

  • How do I store the lemon drizzle cake if there are leftovers? Store the cake in an airtight container at room temperature for up to 3 days.

Gluten-Free Lemon Drizzle Cake

4 from 5 votes
Recipe by Samantha Course: DessertsCuisine: BritishDifficulty: Medium
Servings

8

servings
Prep time

10

minutes
Cooking time

1

hour 
Total time

1

hour 

10

minutes

With a delicious burst of tart lemon flavor and a moist and delicate crumb, this Gluten-Free Lemon Drizzle Cake recipe is a classic dessert that can be enjoyed for any occasion.

Ingredients

  • 1 Cup Sugar

  • 2 Tablespoons Lemon Zest

  • 1 Cup Softened Butter (non-dairy)

  • 4 Large Eggs

  • 1/4 Cup Milk (or non-dairy milk)

  • 3 Tablespoons Lemon Juice

  • 1 3/4 Cups Gluten-Free All Purpose Flour

  • 1/2 Cup Almond Flour

  • 2 Teaspoons Baking Powder

  • 1/4 Teaspoon Salt

  • For the lemon drizzle:
  • 1 Cup Powdered Sugar

  • 1/4 Teaspoon Lemon Juice

Directions

  • Preheat oven to 350° Fahrenheit and line a loaf pan with parchment paper.
  • Mix together the sugar and lemon zest in a large bowl. Add in the butter and use either a hand or stand mixer to beat until pale yellow.
  • Beat in one egg at a time, before adding in the milk and lemon juice. Mix until combined.
  • In a separate bowl, mix together the gluten-free all purpose flour, almond flour, baking powder, and salt.
  • Slowly fold flour mixture into butter mixture until just combined, do not overmix.
  • Transfer batter to prepared loaf pan and bake for 1 hour, or until a toothpick inserted down the center comes out clean. Let cool in pan for 10 minutes before removing and placing on a wire rack to cool the rest of the way.
  • While the lemon cake cools, make the drizzle by whisking together all ingredients in a small bowl.
  • Once cake has cooled completely, spoon lemon drizzle over top. Leave drizzle to set for about 10-15 minutes before slicing and enjoying.

Did you make this recipe?

Share it and tag @samdoesherbest on Instagram!

Like this recipe?

Follow us @samdoesherbest on Pinterest

More Dessert Recipes

If you’re looking for a fudge snack that you can easily make at home, try my fudge recipe which only requires a few basic pantry ingredients. It doesn’t require sweetened condensed milk as many fudge recipes do, but it’s just as delicious!

close up image of fudge without condensed milk

What is Condensed Milk? How is the fudge made without it?

Condensed milk is cow’s milk from which water has been removed. It’s also sweetened with added sugar and is often used in traditional fudge recipes because it’s thick and sweet. However, not everyone has condensed milk in their pantry. So, if you want to make fudge on a whim, you need to improvise with some basic ingredients that you likely already have on hand. This is where my recipe comes in handy!

Melting the butter and chocolate in the microwave is the easiest way to create this fudge without condensed milk. But, this can also be done on a stovetop by melting and constantly stirring until combined.

However, keep in mind that evaporated milk is completely different and shouldn’t be used as a substitute.

overhead image of fudge without condensed milk cut into squares.

Main Ingredients For Fudge Without Condensed Milk Recipe

  • Chocolate – your choice of dark chocolate or chocolate chips!

  • Butter – I used non-dairy.

  • Milk – I used almond milk.

  • Powdered Sugar

  • Vanilla Extract

Tips When Making This Fudge Without Condensed Milk Recipe

  • Chocolate: I recommend using semi-sweet chocolate or darker. I used 70% dark chocolate for this fudge recipe and had delicious results. The additional powdered sugar contributes quite a bit of sweetness to this recipe, therefore to avoid fudge that’s too sweet, use a dark chocolate which contains less sugar.

  • Milk: I used almond milk but regular milk works fine too. Or if you’re feeling adventurous, you can try chocolate milk!

Storage

Store this fudge in the fridge for best results! If left at room temperature, the fudge runs the risk of melting (especially in warmer climates). I actually prefer to store my fudge in the freezer in the summertime, it’s still soft enough to sink my teeth into – but perfectly firm, cold, and just SO delicious!

Easy Fudge Recipe Without Condensed Milk

3 from 93 votes
Recipe by Samantha Course: DessertsCuisine: AmericanDifficulty: Easy
Servings

4

servings
Prep time

30

minutes
Cooking time

40

minutes
Total time

0

minutes

If you’re looking for a fudge snack that you can easily make at home, try my fudge recipe which only requires a few basic pantry ingredients. It doesn’t require sweetened condensed milk as many fudge recipes do, but it’s just as delicious!

Ingredients

  • 6 Ounces Dark Chocolate (or 3/4 cup chocolate chips)

  • 1/4 Cup Butter (Dairy or Dairy-free)

  • 1/4 Cup Milk (Dairy or Dairy-Free)

  • 2 Cups Powdered Sugar

  • 1 Teaspoon Vanilla Extract

Directions

  • Line and grease a loaf pan. 
  • Microwave chocolate, butter, and milk in a bowl for 2 minutes or until melted – stir to combine.
  • Add in powdered sugar and vanilla extract, beat with a hand or stand mixer until smooth.
  • Transfer mixture to prepared pan, cover, and refrigerate for 1-2 hours or until firm. Use a greased knife to cut fudge into squares.

Recipe Video

Notes

  • This fudge is best stored in the fridge or freezer.

Did you make this recipe?

Share it and tag @samdoesherbest on Instagram!

Like this recipe?

Follow us @samdoesherbest on Pinterest

More Dessert Recipes