")
This vegan cashew queso dip recipe is super quick and easy to make, requiring just 9 ingredients, 5-10 minutes, and 1 blender. It’s comprised of raw cashews, nutritional yeast, spices, and jalapenos blended to creamy perfection. This queso (along with your choice of crunchy tortilla chips) is a perfect appetizer dish for Mexican night with your friends or fam!
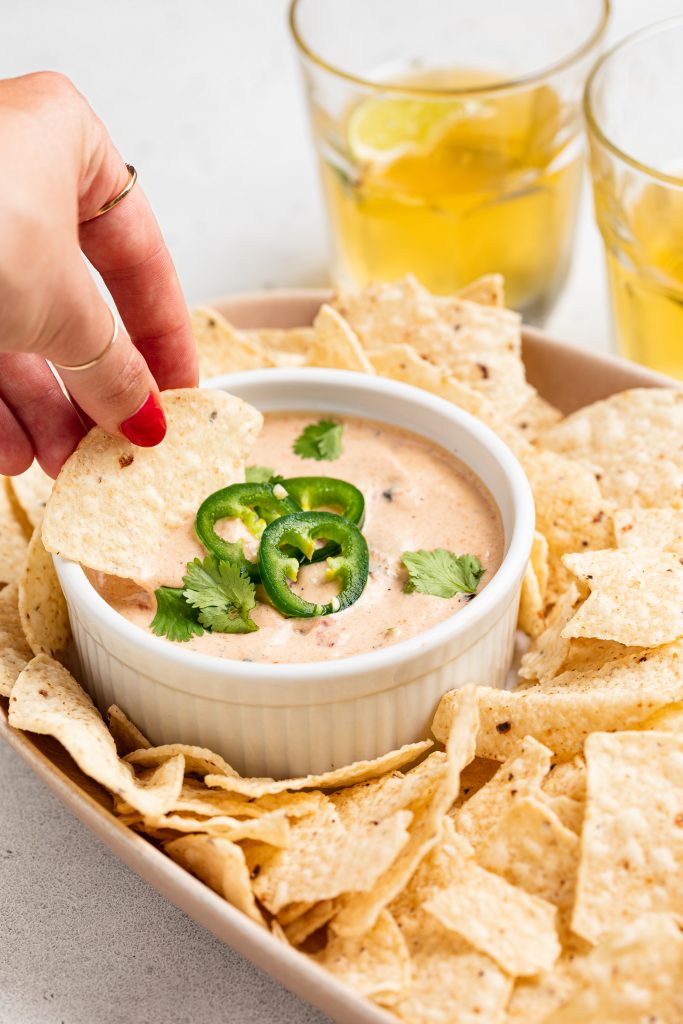
If you need a delicious dip for a Mexican dinner night, a party, or even just for yourself, look no further than this vegan cashew queso! It’s made with just a few simple ingredients you probably already have on hand and is 100% healthy.
Although it differs from your traditional Mexican queso (excludes the cheese and meat), I promise you won’t even miss the cheese – the cashews and nutritional yeast take the place of it quite nicely! Super quick and easy to make, this queso is perfect for serving with nachos, burrito bowls, tacos, and more!
MAIN INGREDIENTS NEEDED TO MAKE VEGAN CASHEW QUESO
- Cashews – This dip gets its creaminess from raw cashews. Not only do cashews have a lower fat content than most other nuts, they’re also loaded with iron and magnesium.
- Nutritional Yeast – This is a deactivated yeast that contains B-complex vitamins and provides a “cheesy” flavor to vegan dishes.
- Lemon Juice – Juice the lemons yourself for the best flavor, or use bottled if that’s what you have at home.
- Jalapenos – Bring on the spice!
ADJUST THIS VEGAN CASHEW QUESO RECIPE TO YOUR DIET
- Dairy: Sub the almond milk for regular milk.
TIPS FOR MAKING VEGAN QUESO
- To make this easy vegan cashew queso, all you really need is a blender. I recommend soaking your cashews ahead of time if you have a standard blender. However, if you have a high-speed one, you can even skip that for a faster dip.

Vegan Cashew Queso (Gluten-Free)
Course: AppetizersCuisine: MexicanDifficulty: Easy2
servings5
minutes5
minutes300
kcal10
minutesThis vegan cashew queso dip recipe is super quick and easy to make, requiring just 9 ingredients, 5 minutes, and 1 blender. It’s comprised of raw cashews, nutritional yeast, spices, and jalapenos blended to creamy perfection. This queso (along with your choice of crunchy tortilla chips) is a perfect appetizer dish for Mexican night with your friends or fam!
Ingredients
1 cup raw cashews, soaked in hot water for 5-10 minutes
¾ cup almond milk or water
3 tablespoons nutritional yeast
1 tablespoon lemon juice
½ teaspoon cumin
½ teaspoon chili powder
1 teaspoon salt
1 (14 ounce) can fire roasted diced tomatoes, drained
2 tablespoons pickled jalapenos, finely chopped
Directions
- Soak the raw cashews in boiling hot water for 5-10 minutes, then rinse cashews and add to a blender.
- Add all other ingredients to the blender except diced tomatoes and pickled jalapenos. Blend mixture until completely smooth.
- Transfer vegan queso to a small saucepan over medium-low heat then stir in the fire roasted diced tomatoes and pickled jalapenos. Once warm, remove from the heat and serve.
Recipe Video
Notes
- Storage: This can last up to 5 days in the fridge.
- Pair this with a spicy margarita to round out this delicious appetizer. (Link below!)
Did you make this recipe?
Share it and tag @samdoesherbest on Instagram!
Like this recipe?
Follow us @samdoesherbest on Pinterest
")

")
")

")


%20is%20a%20perfect%20appetizer%20dish%20for%20Mexican%20night%20with%20your%20friends%20or%20fam!%20)