Tag

honey

Browsing

These healthy teriyaki chicken rice bowls come together in under 20 minutes! Fresh ginger, garlic, tamari to make it gluten-free, and honey to naturally sweeten things up. Ditch the takeout this week, and make this healthier recipe instead!

close-up image of healthy teriyaki chicken

What You’ll Need to Make Healthy Teriyaki Chicken Rice Bowls

Chicken Breast: Boneless and skinless chicken breasts, cut into bite-sized pieces cooks in just a matter of minutes! However, feel free to use any piece/cut of chicken you’d like. Or, if you’re feeling adventurous, replace the chicken with salmon or tofu – the possibilities are endless!

Ginger: Fresh, grated ginger adds tons of delicious fresh flavor to our healthy teriyaki chicken. I usually purchase a bunch of fresh ginger (it’s pretty cheap!) and store it in my freezer until I need to use it. But if you can’t find fresh ginger, feel free to use just 1 teaspoon of dried ground ginger in its place.

Tamari: What is tamari? Tamari is simply gluten-free soy sauce. It tastes exactly the same as soy sauce, but is 100% gluten-free. It’s safe for people who suffer from celiac disease or a gluten intolerance! However, if you’re fine with gluten, go ahead and use soy sauce in this recipe instead.

Honey: A refined sugar-free sweetener to help balance this teriyaki sauce! You won’t notice the difference between this honey-sweetened sauce and the sauce you’d order at a restaurant.

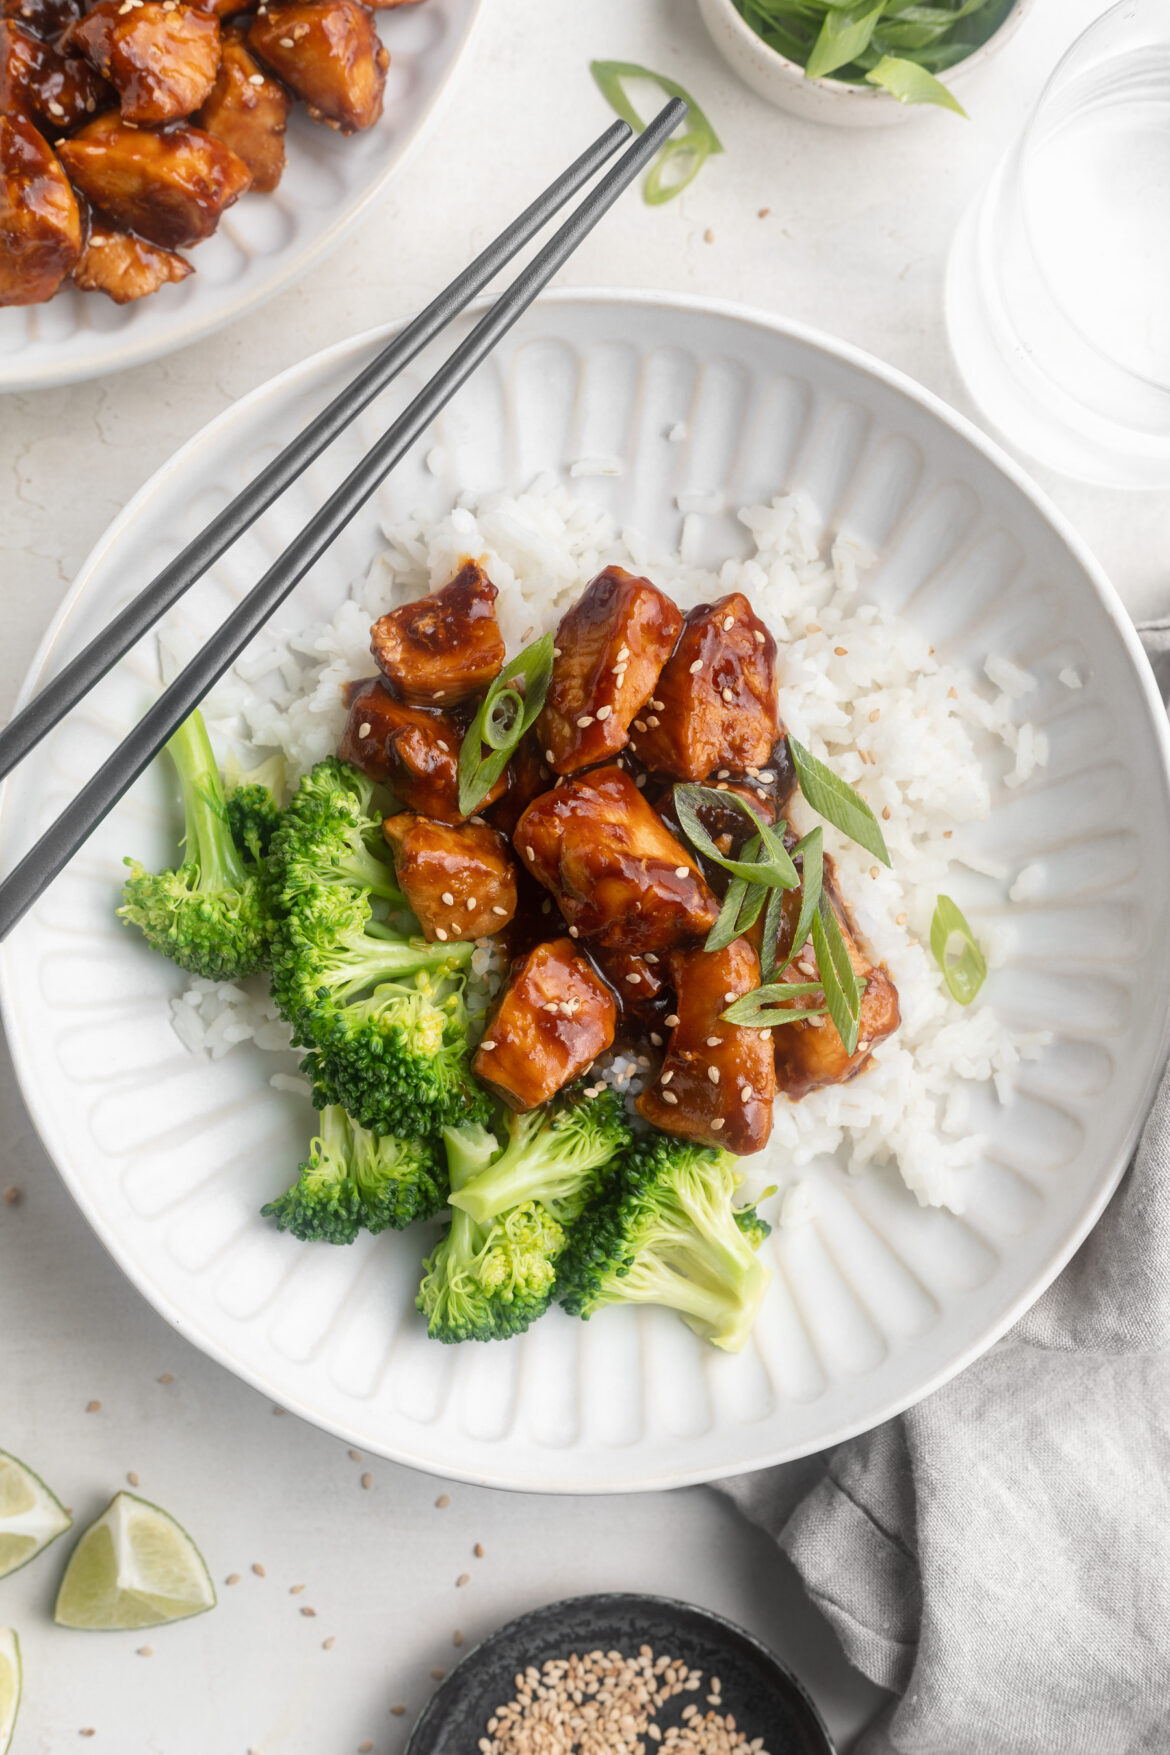
healthy teriyaki chicken rice bowls with sliced green onion on top.

Tips and Tricks

  • I served my healthy teriyaki chicken over white rice with a side of steamed broccoli, but feel free to serve yours with whatever you’d like! Brown rice, quinoa, or even cauliflower rice make a great base to these bowls. Also, any steamed veggie will pair perfectly with this meal!
  • The chicken cooks pretty quickly in this recipe, thanks to it being cut into such small pieces. Therefore, keep an eye on it and be careful not to overcook the chicken. It should only take a few minutes to cook through!

Adjust This Recipe to Your Dietary Needs

  • Make it Gluten-Free: Use tamari instead of soy sauce, which is 100% gluten-free.
  • Make it Vegan/Vegetarian: Replace the chicken with pressed and cubed tofu, and the honey with maple syrup!
  • Make it Paleo: To make a paleo teriyaki chicken, simply replace the honey with maple syrup and use coconut aminos instead of soy sauce – it’s that easy! Also, serve over cauliflower rice or with extra steamed veggies, instead of white rice.
overhead image of healthy teriyaki chicken rice bowls with rice and broccoli.
4.41 from 20 votes

Healthy Teriyaki Chicken Rice Bowls

These healthy teriyaki chicken rice bowls come together in under 20 minutes! Fresh ginger, garlic, tamari to make it gluten-free, and honey to naturally sweeten things up. Ditch the takeout this week, and make this healthier recipe instead!
Print Pin Rate
Prep Time: 5 minutes
Cook Time: 15 minutes
Total Time: 20 minutes
Servings: 4 servings

Ingredients

  • 1 pound chicken breast, cut into 1-inch pieces
  • 1 tablespoons avocado oil
  • pinch of salt
  • 1-inch piece fresh ginger, peeled and grated
  • 3 garlic cloves, minced
  • 1/4 cup tamari, or soy sauce
  • 1 tablespoons lemon juice
  • 1 teaspoon sesame oil, optional
  • 2 tablespoons honey
  • 1 tablespoon corn starch
  • 3 tablespoons water

For serving:

  • 2 cups cooked rice
  • 1 crown broccoli, steamed
  • sliced green onions
  • sesame seeds

Instructions

  • Heat olive oil in a large pan over medium heat, add in the chicken and sprinkle with salt. Cook chicken for 2-3 minutes per side or until cooked through. Transfer to a bowl and set aside.
  • Reduce heat to low, add in the ginger and garlic, cook for 1 minute or until fragrant. Add in the tamari or soy sauce, lemon juice, sesame oil, and honey, mix together. 
  • In a separate bowl, whisk together the cornstarch and water until the cornstarch has dissolved. Transfer corn starch and water to the sauce along with the cooked chicken. 
  • Stir until sauce thickens, about 3-4 minutes. Divide between four bowls with rice and broccoli, then top with sliced green onions and sesame seeds.
Notes

  • Storage: Store the rice and vegetables in a separate container than the teriyaki chicken. Place them both in airtight containers in the fridge for up to 3 days. 
  • Nutrition

    Calories: 300kcal

    OTHER HEALTHY RECIPES YOU’LL LOVE

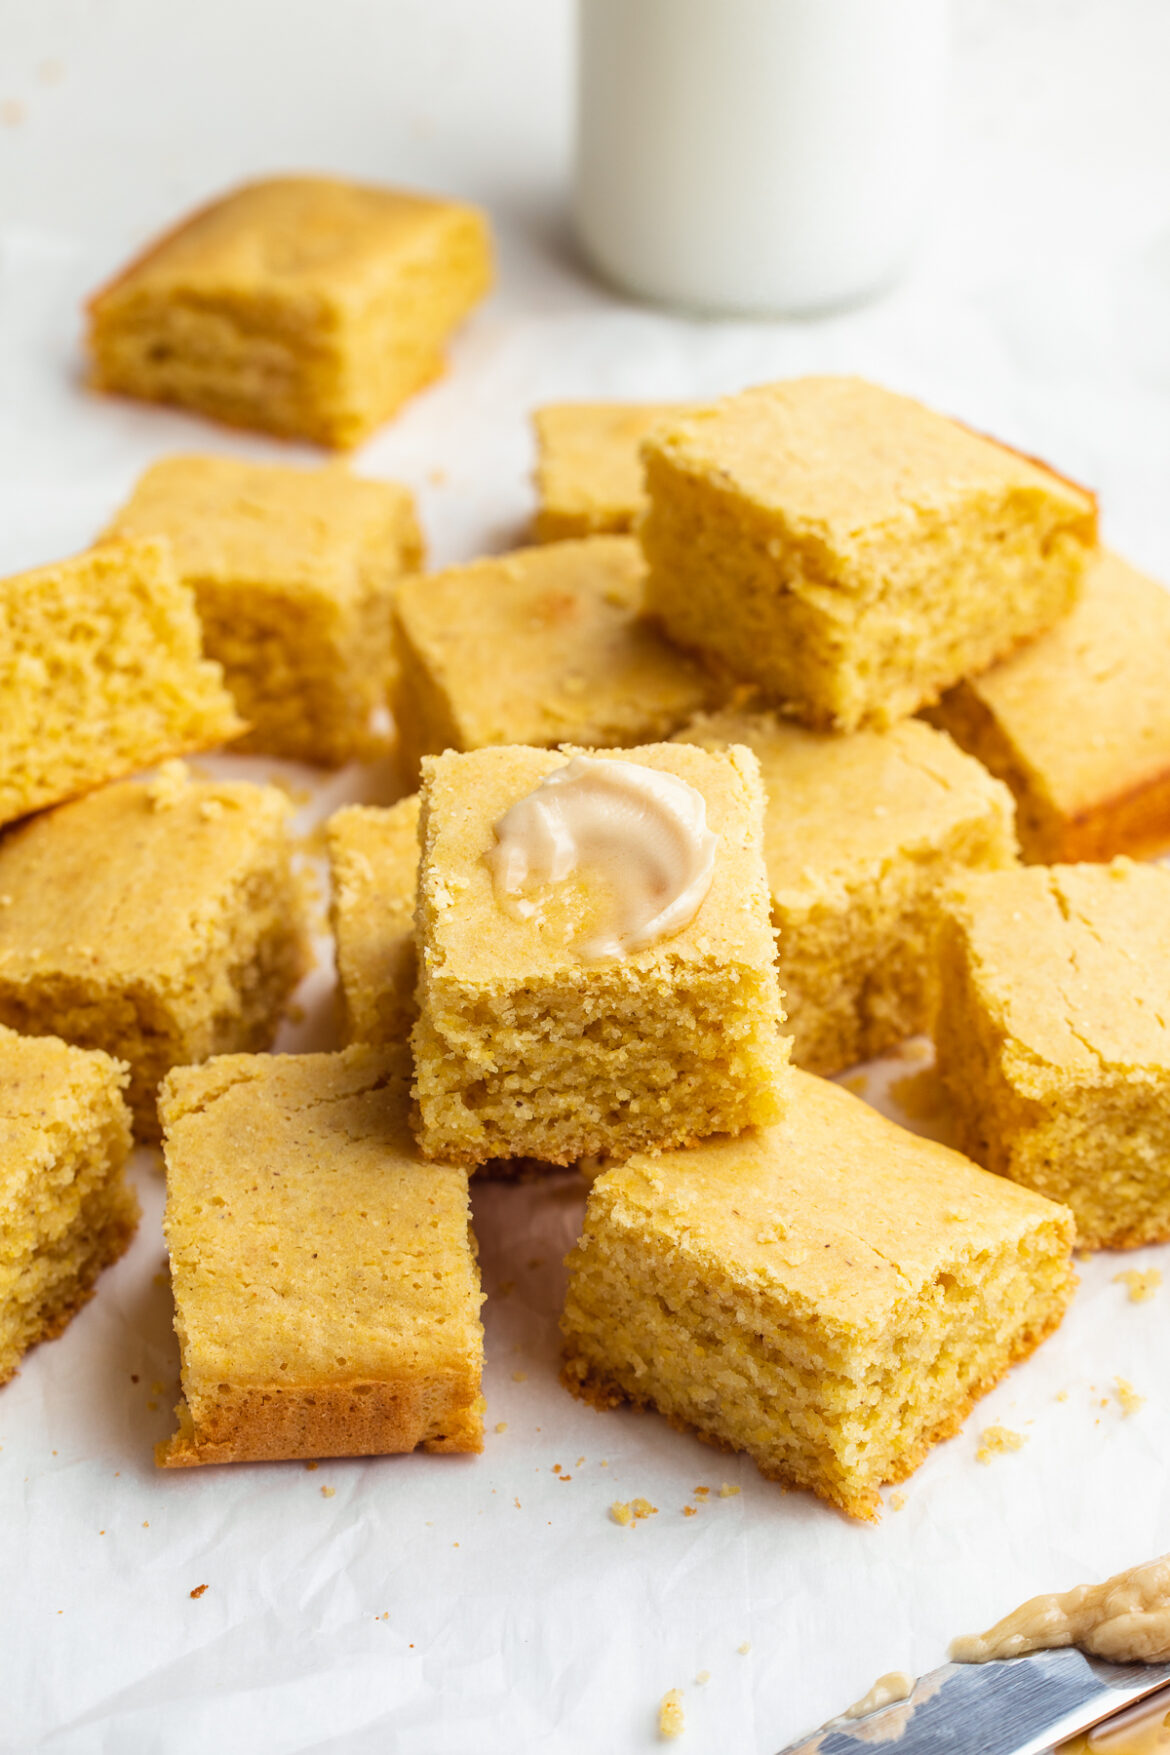
    This light and fluffy gluten-free cornbread is perfectly sweet and surprisingly simple to make! With just a few easy swaps, you’ll have a gluten-free and dairy-free version of a comforting classic. Slather some dairy-free honey butter on a slice of this gluten-free cornbread for a delicious snack or side dish!

    overhead image of gluten-free cornbread with honey butter on the side.

    One Mother’s Day I wrote my Mom a card that read “Happy Mother’s Day! I like your cornbread.” And that my friends, is a true story. My Mom always made the BEST cornbread. Not too sweet, perfectly crumbly, and always served with her own homemade honey butter. I’d dream about that stuff and request it for breakfast, lunch, or dinner any chance I got.

    While I wrote that Mother’s Day card many years ago, I’m still a huge fan of my Mom’s cornbread. Though her version has all of your “standard” ingredients – all purpose flour, milk, regular butter, etc. So when I set out to develop a gluten-free and dairy-free version of my Mom’s cornbread, I have to be honest, I didn’t have high hopes. But oh boy was I pleasantly surprised with how this recipe turned out! Nearly identical to the cornbread I grew up on, this gluten-free and dairy-free recipe does NOT disappoint. I was able to easily swap the all purpose flour for naturally gluten-free (and grain-free) flours, and the dairy for non-dairy counterparts. And if that hasn’t sold you on this cornbread – I was developed this recipe using just ONE BOWL. That’s right – easy baking and easy cleanup!

    honey being drizzled over stacked gluten-free cornbread

    What You Need To Make Gluten-Free Cornbread with Honey Butter

    Cornmeal – Made from ground corn, this coarse “flour”is the star of this recipe! Though be sure to use cornMEAL and not corn starch or corn flour, which are simply not the same. And if you’re gluten-intolerant, be sure to use a cornmeal that reads “gluten-free” somewhere on the label. While cornmeal is naturally gluten-free, some brands may still contain traces of gluten.

    Almond Flour – Not to be confused with almond meal, almond flour is a light, fluffy, and naturally gluten-free flour. Almond flour works in conjunction with tapioca flour to replace the all purpose flour in my Mom’s famous cornbread recipe. I’m not able to fully understand or explain the science of how these gluten-free flours work, but just trust me when I tell you, they WORK. Almond Flour and tapioca flour create a gluten-free cornbread that tastes just like any other cornbread!

    Non-Dairy Butter – I use and love Earth Balance Vegan Buttery sticks in my dairy-free honey butter. However, feel free to use your favorite non-dairy butter in this recipe! And if you’re not dairy-free, feel free to use regular butter instead.

    gluten-free cornbread with a bite taken out

    Adjust This Recipe To Your Diet

    • Make it Vegan: Replace the egg with a flax egg and use maple syrup instead of honey to make this recipe vegan!
    • Add Dairy: Use regular milk instead of non-dairy milk, melted butter instead of coconut oil, and regular butter in the honey butter if you’re not dairy-free.
    • Make it Refined Sugar-Free: SURPRISE – this recipe is already refined sugar-free!
    gluten-free cornbread with milk on the side.
    4.38 from 8 votes

    Gluten-Free Cornbread with Honey Butter

    This light and fluffy gluten-free cornbread is perfectly sweet and surprisingly simple to make! With just a few easy swaps, you’ll have a gluten-free and dairy-free version of a comforting classic. Slather some dairy-free honey butter on a slice of this gluten-free cornbread for a delicious snack or side dish!
    Print Pin Rate
    Prep Time: 5 minutes
    Cook Time: 20 minutes
    Total Time: 25 minutes
    Servings: 9 servings

    Ingredients

    For the cornbread:

    • 1 cup cornmeal
    • 1 cup almond flour
    • 1/2 cup tapioca flour
    • 1/4 cup coconut sugar
    • 2 teaspoons baking powder
    • 1 teaspoon salt
    • 1 cup non-dairy milk
    • 1 egg, see Notes
    • 1/4 cup coconut oil, melted

    For the honey butter:

    • 1/4 cup dairy-free butter, softened
    • 1/4 cup honey, see Notes

    Instructions

    • Preheat oven to 425° Fahrenheit and lightly grease an 8×8 baking dish.
    • Combine cornmeal, almond flour, tapioca flour, coconut sugar, baking powder, and salt in a large bowl.
    • Add in the almond milk, egg, and melted coconut oil then mix until well combined.
    • Transfer batter to the baking dish and bake for 20-25 minutes, then remove from the oven and transfer to a wire cooling rack.
    • While cornbread is cooling, mix together the softened butter and honey in a small bowl. Refrigerate the honey butter until ready to serve.

    Notes

  • Egg: You can substitute the egg in this recipe for a flax egg or your favorite egg substitute.
  • Honey: Feel free to use maple syrup instead of honey to turn this into a maple butter recipe.
  • Nutrition

    Calories: 300kcal

    More Gluten-Free Recipes You NEED To Make

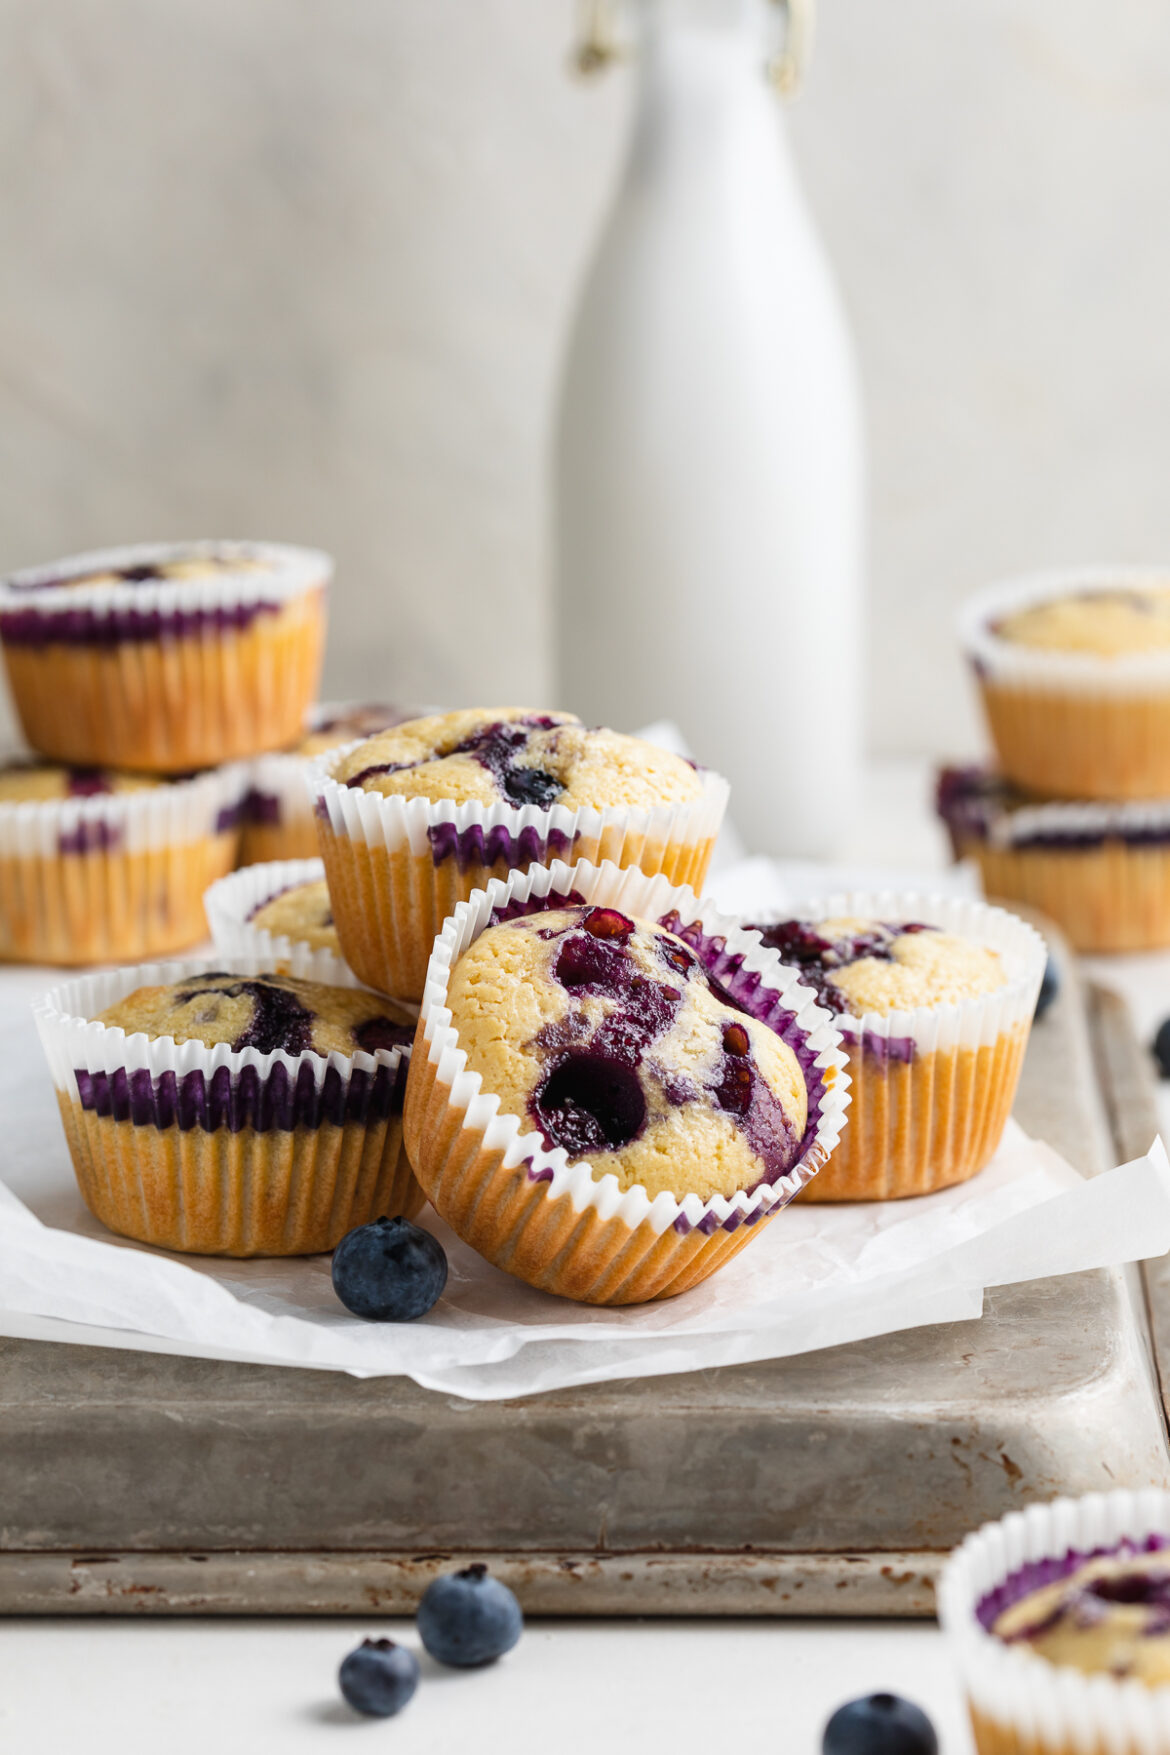
    Forget those box mixes! You can make these wholesome muffins from scratch with just basic grocery store ingredients. These gluten-free blueberry muffins are bursting with fresh blueberries and are deliciously soft on the inside. With only 11 ingredients and two bowls needed, this gluten-free blueberry muffin recipe is simple to follow with dairy-free and grain-free options.

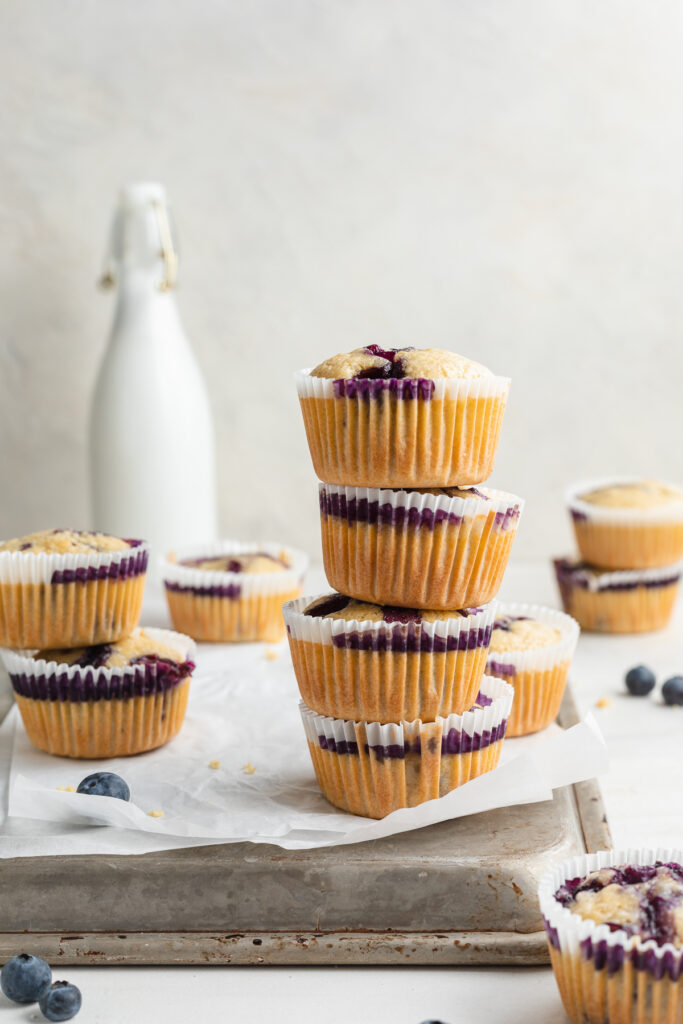
    stack of four gluten-free blueberry muffins.

    Blueberry muffins are a classic recipe, and while this version is gluten-free, grain-free and dairy-free, you won’t be disappointed! Super easy and quick to make, they taste just like they came from your favorite bakery!

    WHAT YOU NEED TO MAKE GLUTEN-FREE BLUEBERRY MUFFINS

    Blueberries – Whether fresh or frozen, the ultimate staple to this recipe is, of course, blueberries!

    Almond Flour â€“ This gluten and grain-free flour is a staple in my kitchen. Almond flour has a very mild taste and gives these blueberry muffins their irresistibly soft texture!

    Non-Dairy Milk – Although I used almond milk for this recipe, feel free to use other dairy-free products like oatmilk.

    Honey or Maple Syrup – Naturally sweeten these blueberry muffins with honey or maple syrup to add a subtle but delicious flavor. It’s also much healthier than any refined sugar!

    gluten-free blueberry muffins on a sheet of parchment paper

    ADJUST THIS GLUTEN-FREE BLUEBERRY MUFFIN RECIPE TO YOUR DIET

    • Vegan: Use 3 flax eggs. They won’t be as big and fluffy, but will still taste delicious!

    TIPS FOR MAKING GLUTEN-FREE BLUEBERRY MUFFINS

    • If you can’t find fresh blueberries, go ahead and use frozen.  

    • Use cupcake liners to keep the muffins from sticking to the pan.

    • To keep your muffins from getting “soggy bottoms,” allow the muffins to cool in the pan for a few minutes before placing on a cooling rack.
    stack of gluten-free sugar cookies
    No ratings yet

    Gluten-Free Blueberry Muffins (Dairy-Free, Grain-Free)

    Forget those box mixes! You can make these wholesome muffins from scratch with just basic grocery store ingredients. These gluten-free blueberry muffins are bursting with fresh blueberries and are deliciously soft on the inside. With only 11 ingredients and two bowls needed, this gluten-free blueberry muffin recipe is simple to follow with dairy-free and grain-free options.
    Print Pin Rate
    Prep Time: 5 minutes
    Cook Time: 25 minutes
    Total Time: 30 minutes
    Servings: 2 servings

    Ingredients

    • 1 ½ Cups Almond Flour
    • ½ Cup Tapioca Starch (corn or arrowroot starch might work, I haven’t tested it myself yet)
    • 1 Teaspoon Baking Powder
    • ¼ Teaspoon Salt
    • 3 Eggs 
    • ¼ Cup Coconut Oil, melted
    • ¼ Cup Honey or Maple Syrup
    • ¼ Cup Non-Dairy Milk
    • 1 Tablespoon Apple Cider Vinegar
    • 1 Teaspoon Vanilla Extract
    • 1 Cup Fresh Blueberries

    Instructions

    • Preheat the oven to 350F & grease or line a muffin pan.
    • Combine your dry ingredients – almond flour, tapioca starch, baking powder, & salt in a large bowl.
    • Add in your wet ingredients – eggs, coconut oil, honey or maple syrup, almond milk, vinegar, & vanilla extract and mix everything really well.
    • Fold in your fresh blueberries to your muffin batter until they’re incorporated.
    • Scoop out ¼-1/3 cup of batter into each muffin tin & bake for 20-25 minutes. These store best in the fridge – just pop in the toaster oven for a few minutes before enjoying.

    Notes

  • Use cupcake liners to keep the muffins from sticking to the pan.
  • Frozen blueberries are a bit more likely to tint the muffins as you mix them in, but the result won’t taste any less delicious!
  • To store, wait until the muffins get to room temperature before placing them in an airtight container in the freezer. 
  • Nutrition

    Calories: 300kcal

    OTHER HEALTHY BREAKFAST/DESSERT RECIPES

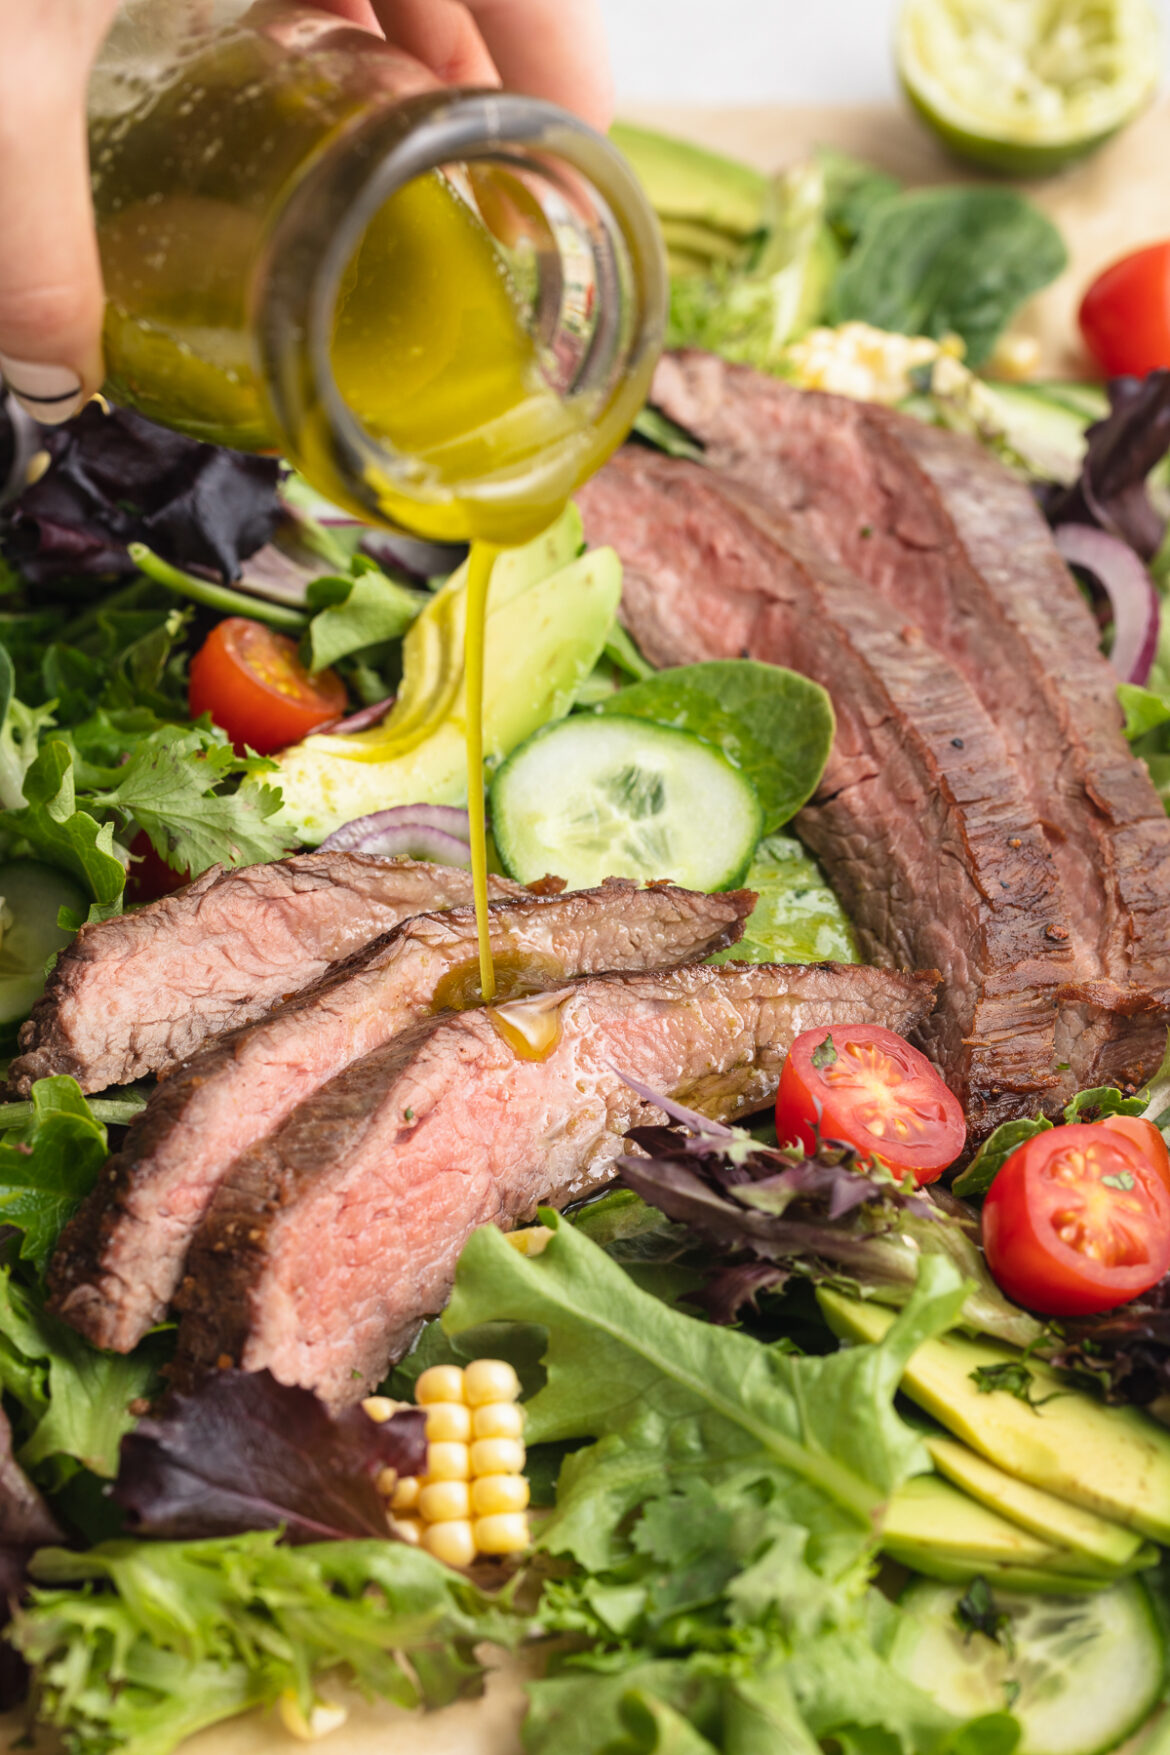
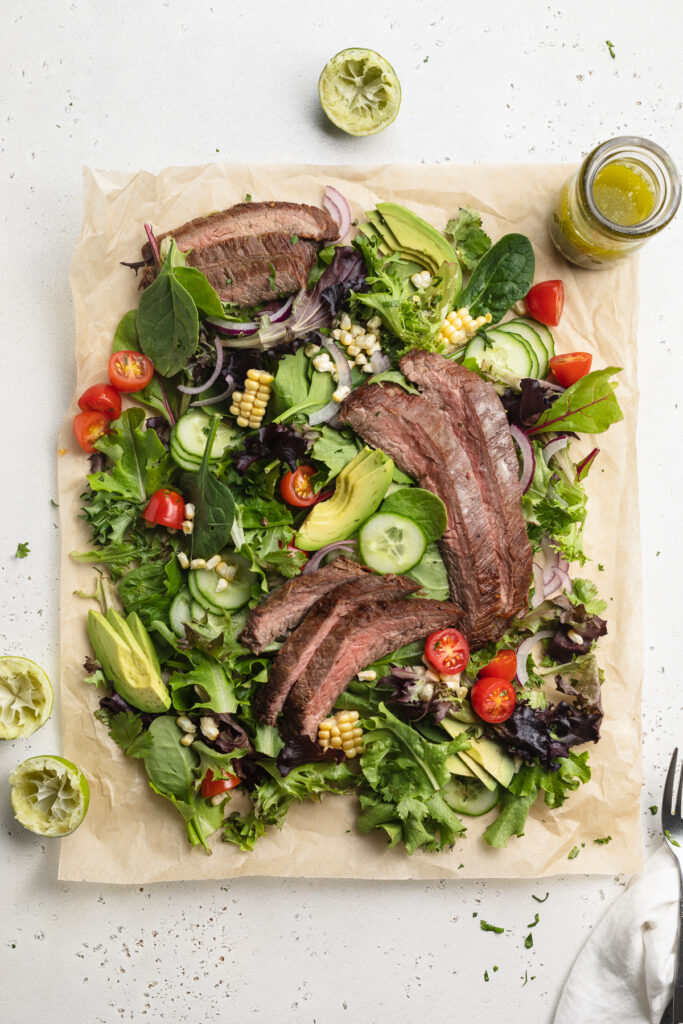
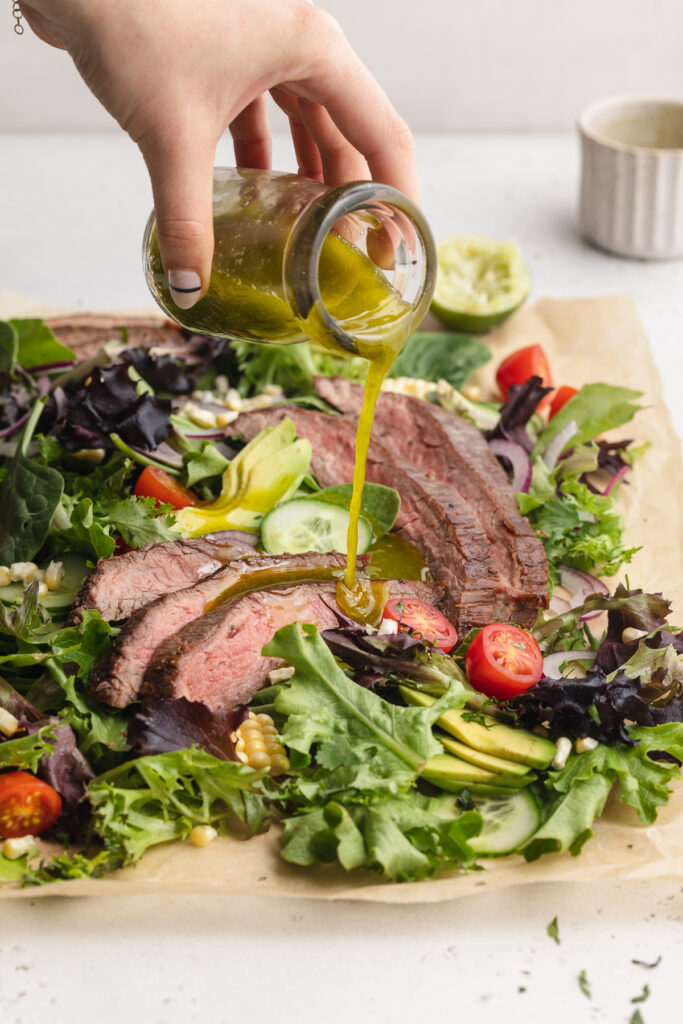
    Perfectly pan-seared steak atop a bed of fresh greens, finished off with a drizzle of tangy cilantro-lime vinaigrette! Super quick and easy, this steak salad comes together in under 15 minutes.

    Overhead image of steak salad on parchment paper with cilantro lime dressing on the side.

    What You’ll Need To Make This Steak Salad Recipe

    Flank Steak – Flank steak is a thin, lean cut of beef, and takes just a few minutes to cook. I love pan-searing flank steak, which gives it this incredible brown crust. We also keep the seasoning on the steak simple, since the rest of our salad is loaded with flavor. A generous sprinkling of salt and black pepper is all you’ll need, followed by a drizzle of avocado oil for cooking.

    Mixed Salad Greens – Feel free to use any type of salad greens you’d like! I love a good spring mix for my steak salad, but really any bed of greens would taste delicious. I’ve made this recipe with fresh arugula, chopped kale, and baby spinach – all of which turned out perfect!

    Cilantro – I’m one of those people who looooves cilantro. It’s perfectly fresh and flavorful. However, if you don’t like cilantro, you can use fresh parsley in its place. And whichever herb you use, make sure to reserve a little extra to top off your finished salad.

    cilantro lime dressing being poured over steak salad.

    Tips and Tricks

    • Have fun with this healthy lunch or dinner recipe! Add or remove any fresh herbs and/or veggies you’d like. This is also a great meal to use up any leftover produce you have lying around …before it goes bad!
    • Add this steak salad to your weekly meal prep! The best way to prep this recipe is to cook the steak and assemble your salads, then store them separately from your dressing. When ready to eat, toss in the cilantro lime vinaigrette and enjoy!
    • If marinated steak is more your thing, then marinate the flank steak in half of the cilantro lime vinaigrette for 30 minutes before cooking. If you have the time, this extra step truly takes this recipe to the next level!
    close-up image of steak salad.

    Adjust This Recipe To Your Dietary Needs

    Make it Vegan/Vegetarian: Replace the flank steak with either cauliflower steaks or tofu steaks for an easy, healthy vegan meal.

    Add Cheese: If not dairy-free, sprinkle a small handful of crumbled queso fresco, or herby goat cheese into this steak salad!

    No ratings yet

    Steak Salad with Cilantro Lime Vinaigrette

    Perfectly pan-seared steak atop a bed of fresh greens, finished off with a drizzle of tangy cilantro-lime vinaigrette! Super quick and easy, this steak salad comes together in under 15 minutes.
    Print Rate
    Prep Time: 10 minutes
    Cook Time: 5 minutes
    Total Time: 15 minutes
    Servings: 4 servings

    Ingredients

    For the steak:

    • 1 pound flank steak
    • 1 teaspoon salt
    • 1/2 teaspoon black pepper
    • 2 tablespoons avocado oil, or any high-heat oil

    For the salad:

    • 6 cups mixed salad greens
    • 1 ear sweet corn, sliced off the cob
    • 1 cup grape tomatoes, halved
    • 1 avocado, sliced
    • 1/2 English cucumber, chopped
    • 1/2 red onion, thinly sliced
    • small handful fresh cilantro, chopped

    For the cilantro-lime vinaigrette:

    • 1 cup fresh cilantro leaves
    • 1/2 cup olive oil
    • 2 limes, juiced
    • 1 tablespoon honey or maple syrup
    • 1 garlic clove, peeled
    • 1/2 teaspoon salt

    Instructions

    • Pat steak dry with a paper towel and season on both sides with salt and pepper, then drizzle steak in avocado oil.
    • Place steak in a hot pan, and cook about 5 minutes per side for medium-rare steak.
    • Remove steak from pan and let rest on a cutting board for at least 10 minutes, before thinly slicing against the grain.
    • Make the cilantro lime dressing by adding all ingredients to a blender or food processor and blend until smooth.
    • Make the cilantro lime dressing by adding all ingredients to a blender or food processor and blend until smooth.

    Video

    Nutrition

    Calories: 300kcal

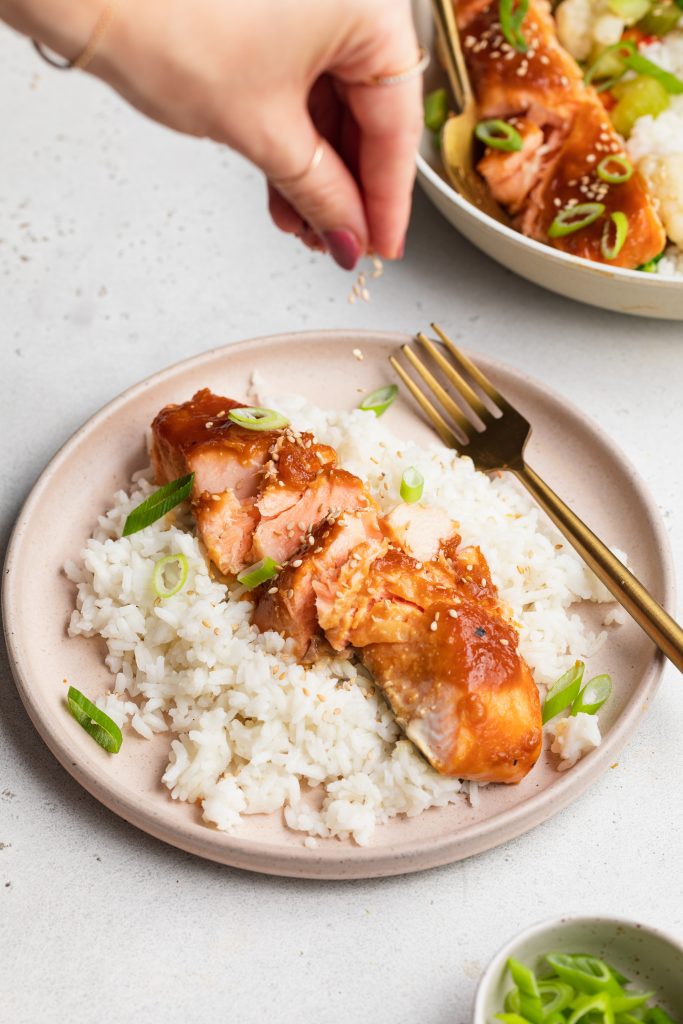
    Miso-Glazed Salmon with Coconut Rice is a delicious gluten-free seafood dish filled with healthy nutrients and packed with savory flavors. You’ll be amazed at how easy and quick it is to make (under 30 minutes)!

    Miso-Glazed Salmon with Coconut Rice

    MAIN INGREDIENTS NEEDED TO MAKE Miso-Glazed Salmon with Coconut Rice

    • Miso Paste

    • Soy Sauce – Use tamari for gluten-free.

    • Rice Vinegar

    • Honey

    • Salmon Fillets – With the skin on.

    • Rice – Jasmine or long grain white rice.

    • Coconut Milk

    • Water – Plain or coconut water.

    • Salt

    Tips on Making Miso-Glazed Salmon with Coconut Rice

    • The Miso Glaze – To make the glaze you’ll need miso paste, some soy sauce, honey and a bit of rice vinegar. Miso paste (fermented soy bean paste) is very savory and salty. The thing to keep in mind here is that miso paste comes in all sorts of colors (white, yellow, red). Generally, the darker the paste, the stronger the flavor, so choose based on your taste preferences.

    • Rice Vinegar – You can use lemon juice, lime juice, or white vinegar in place of the rice wine vinegar in this recipe.

    • Make it Paleo – For paleo, use coconut aminos instead of soy sauce, and omit the honey since coconut aminos contain a bit of sweetness.

    Miso-Glazed Salmon with Coconut Rice

    4 from 4 votes
    Recipe by Samantha Course: MainCuisine: AmericanDifficulty: Easy
    Servings

    4

    servings
    Prep time

    20

    minutes
    Cooking time

    25

    minutes
    Total time

    45

    minutes

    Miso-Glazed Salmon with Coconut Rice is a delicious gluten-free seafood dish filled with healthy nutrients and packed with savory flavors. You’ll be amazed at how easy and quick it is to make (under 30 minutes)!

    Ingredients

    • For the Miso Salmon:
    • 2 Tablespoons Miso Paste

    • 2 Tablespoons Soy Sauce (or tamari)

    • 1 Tablespoon Rice Vinegar

    • 1 Tablespoon Honey

    • 4 Whole Salmon Fillets (Skin-On)

    • For the Coconut Rice:
    • 2 Cups Jasmine or Long Grain White Rice

    • 1 Can Coconut Milk

    • 1 1/4th Cups Coconut Water or Plain Water

    • 1 Pinch Salt

    Directions

    • Mix together the miso paste, soy sauce, rice vinegar, and honey in a small bowl.
    • Pat salmon dry with a paper towel, place on a baking sheet then pour miso mixture over top of each fillet. Let salmon marinate at room temperature for 20 minutes.
    • Place salmon in the oven at high broil for for 4-5 minutes, or until a thermometer inserted into the thickest part of the salmon reads 125° Fahrenheit.
    • Make the coconut rice by adding all ingredients to a saucepan over medium heat, bring to a boil before reducing to a gentle simmer and covering with lid. Cook for 15-20 minutes or until all liquid has been absorbed, remove from heat and fluff rice with a fork before serving.

    Recipe Video

    Notes

    • Add in cooked veggies for an even healthier meal!
    • Storage: Properly stored, cooked salmon will last for 3 to 4 days in the refrigerator. Use an airtight container.
    • To Reheat: Put the fish on a rimmed baking sheet and warm it a 275°F oven for about 15 minutes, until it reaches an internal temperature of 125°F to 130°F. 

    Did you make this recipe?

    Share it and tag @samdoesherbest on Instagram!

    Like this recipe?

    Follow us @samdoesherbest on Pinterest

    MORE HEALTHY RECIPES