Tag

snacks

Browsing

Why You’ll Love These Cookie Dough Date Bites

  • They taste like your favorite cookie dough but are healthy and made with better-for-you ingredients!
  • Made in under 10 minutes with minimal prep – perfect for meal prep.
  • Naturally gluten-free, dairy-free, vegan, and refined-sugar-free!
  • Ideal for lunchbox treats, post-workout energy, or whenever you’re craving a little something sweet.
Cookie dough date bites in a bowl with milk and chocolate chips on the side.

What Makes This Recipe Healthy?

  • Medjool dates provide natural sweetness, fiber, and potassium without added sugar!
  • Rolled oats and peanut butter add sustained energy through complex carbs, healthy fats, and protein.
  • This recipe is naturally gluten-free, dairy-free, and refined sugar-free – yet taste like dessert!

Recipe Variations and Substitutions

  • Nut-Free: Swap in unsweetened sunflower or tahini instead of peanut butter.
  • Lower-Sugar: Use dark or sugar-free mini chocolate chips, or omit them entirely.
  • Flavor Swaps: Stir in cinnamon, cocoa powder, or shredded coconut for added depth.
One cookie dough date bite with a bite taken out.

Frequently Asked Questions

Can I use almond flour instead of oats?
Yes! Almond flour—or any nut flour—works for a richer, low-carb version.

Will these hold together without rolling?
They’ll firm up in the fridge or freezer, but rolling helps ensure they stay bite-sized.

How long do they last?
Keep them refrigerated up to 2 weeks or freeze for up to 3 months for easy snacking!

Two cookie dough dates bites stacked on top of each other.
5 from 2 votes

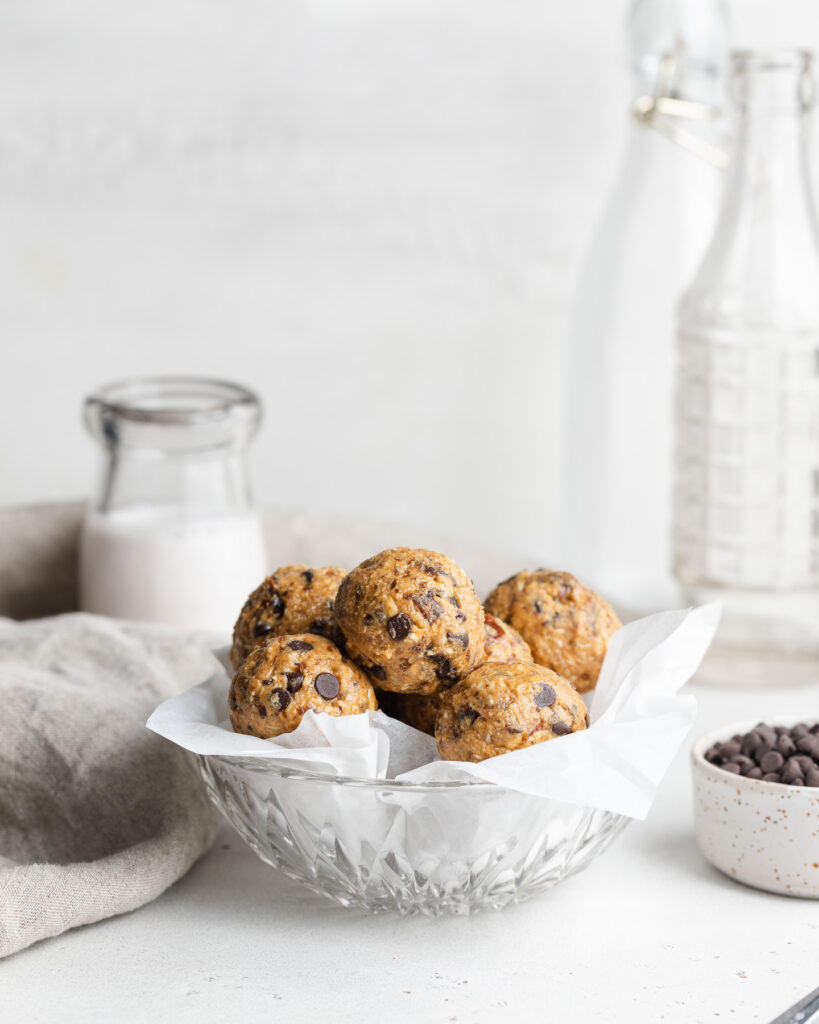
5-Ingredient Healthy Cookie Dough Date Bites

Healthy 5-ingredient cookie dough date bites! They’re vegan, gluten-free, sugar-free, and totally delicious. Whip up a batch of these healthy snacks in just a few minutes!
Print Pin Rate
Prep Time: 5 minutes
Total Time: 5 minutes
Servings: 12 bites

Ingredients

  • 1 cup medjool dates, pitted
  • 1/2 cup rolled oats
  • 1/2 cup peanut butter, unsweetened
  • 1 teaspoon vanilla extract
  • pinch of salt
  • 1/4 cup chocolate chips (I recommend mini chocolate chips!)

Instructions

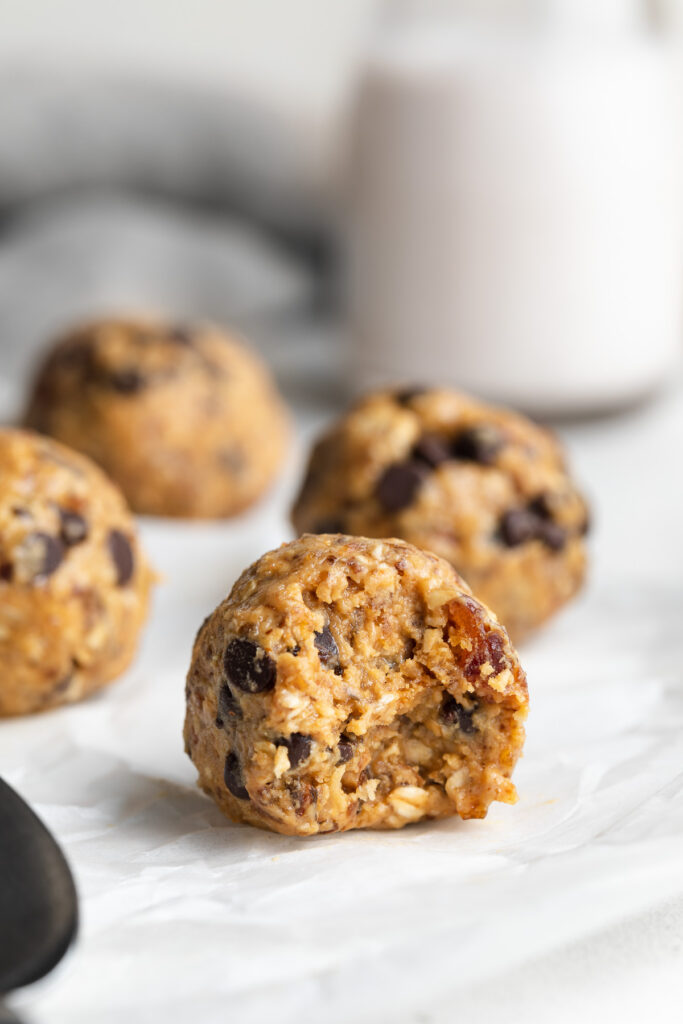
  • Add all ingredients except chocolate chips to a food processor and pulse until a dough forms. All ingredients should be very finely chopped, and mixture will appear crumbly but should stick together when pressed between your fingers.
  • Add in chocolate chips and give just 2 or 3 pulses to incorporate.
  • Use a cookie scoop to scoop mixture, then roll between your palms into balls. Place on a parchment-lined plate and refrigerate for 2 weeks or freeze for up to 3 months.

Nutrition

Serving: 1bite | Calories: 100kcal | Carbohydrates: 11g | Protein: 3g | Fat: 6g | Fiber: 2g | Sugar: 6g

It’s no secret I love s’mores. S’mores rice crispy treats were one of the first recipes I ever published, followed shortly by my healthier gluten-free s’mores bars. So when I was deciding on the flavor for this high protein dip recipe, I immediately knew I wanted to make it s’mores flavor! A chocolatey Greek yogurt protein dip with mini marshmallows and chocolate chips swirled in. Great for dipping or. if you’re like me, eating by the spoonful!

overhead image of high protein s'mores dip in a bowl.

Why You’ll Love This High Protein S’mores Dip

This high protein s’mores dip is a nostalgic, sweet treat with a nutritious twist. Made with just 4 simple ingredients, it packs over 30 grams of protein per serving thanks to creamy Greek yogurt and rich chocolate protein powder. It’s perfect as a post-workout snack, healthy dessert, or fun dip for fruit, crackers, or cookies.

Key Ingredients

  • Greek Yogurt: Thick, creamy, and protein-packed, Greek yogurt is the base of this dip. It adds richness and tang while delivering gut-friendly probiotics and muscle-building protein.
  • Chocolate Protein Powder: For that classic chocolatey s’mores flavor and a major protein boost. Use your favorite whey or plant-based chocolate protein—just make sure it blends smoothly.
  • Mini Marshmallows: The essential s’mores element! A small amount goes a long way, adding sweetness and fun texture. Swap in sugar-free marshmallows to reduce added sugar.
  • Mini Chocolate Chips: Extra chocolatey goodness in every bite. Use extra dark or sugar-free chips for an even healthier version.
high protein s'mores dip in a bowl with graham crackers and strawberries on the side.

Sam’s Recipe Tips

  • Chill before serving: Let the dip sit in the fridge for 20–30 minutes for the best flavor and texture.
  • Use sugar-free or low-sugar swaps: Opt for sugar-free marshmallows and stevia-sweetened chocolate chips to reduce total sugar without sacrificing taste.
  • Serve with dippers: Apple slices, graham crackers, strawberries, or pretzels make this dip even more fun and satisfying.

More High Protein Recipes You’ll LOVE

graham cracker being dipped into high protein s'mores dip.
No ratings yet

High Protein S’mores Dip (30g protein!)

This high protein s’mores dip is a quick and easy 4-ingredient recipe with over 30 grams of protein per serving! Made with Greek yogurt, chocolate protein powder, mini marshmallows, and chocolate chips – it’s a healthier way to satisfy your sweet tooth. Perfect as a post-workout snack, party dip, or high protein dessert!
Print Pin Rate
Prep Time: 5 minutes
Total Time: 5 minutes
Servings: 2 servings

Equipment

  • 1 small bowl

Ingredients

  • 1 cup Greek yogurt
  • 2 scoops chocolate protein powder
  • 1/4 cup mini marshmallows
  • 1/4 cup chocolate chips

Instructions

  • Mix together the Greek yogurt and chocolate protein powder in a bowl, then stir in the mini marshmallows and chocolate chips. Enjoy right away or store in the fridge for up to 2 days!

Nutrition

Serving: 1serving | Calories: 310kcal | Carbohydrates: 24g | Protein: 31g | Fat: 8g | Sugar: 18g

Breakfast has quickly become my favorite meal of the day! Between my 3 ingredient protein pancakes, gluten-free bagel bites, and now these healthy breakfast muffins – I now have so many delicious breakfast options to choose from. Over are the days where all I’d eat were boring scrambled eggs, or a bland bowl of cereal! These healthy breakfast muffins are perfectly sweet, totally satisfying, and the perfect fuel to get me through busy mornings. OH, and they’re great for meal prep too!

Why You’ll Love These Healthy Breakfast Muffins

These breakfast muffins are a game-changer for busy mornings. Made in just one bowl with wholesome ingredients, they’re moist, fluffy, and naturally sweetened. Whether you choose Greek yogurt, mashed banana, or applesauce, each variation offers a light and fluffy texture. Plus, they’re gluten-free and customizable with your favorite fruit or mix-ins!

overhead image of healthy oat breakfast muffins with a bite taken out.

What Makes These Muffins Healthy

  • Whole Grains: Oat flour and rolled oats provide fiber and energy to keep you fueled all morning long!
  • Natural Sweeteners: Maple syrup adds sweetness without refined sugars.
  • Healthy Fats: Olive oil contributes heart-healthy monounsaturated fats (& makes these seed oil-free!).
  • Protein-Rich: Greek yogurt and eggs boost the protein content, keeping you feeling full longer.

Frequently Asked Questions

Can I make these egg-free?

Yes! Substitute each egg with a flax egg (1 tablespoon ground flaxseed mixed with 3 tablespoons water) or use a store-bought egg replacer.

How do I store these healthy breakfast muffins?

Store them in an airtight container at room temperature for up to 3 days or refrigerate for up to a week. They also freeze well for up to 3 months.

What can I use instead of Greek yogurt?

You can use mashed banana or unsweetened applesauce as a 1:1 substitute for Greek yogurt. This not only changes the flavor profile but also caters to different dietary needs!

Can I use all-purpose flour?

Absolutely. While oat flour keeps them gluten-free, all-purpose flour can be used if gluten isn’t a concern.

healthy oat breakfast muffins on a white towel with blueberries.

Sam’s Recipe Tips

  • Customize Your Mix-Ins: Feel free to fold in nuts, seeds, or different fruits to suit your taste.
  • Don’t Overmix: Mix until just combined to keep the muffins tender.
  • Use an Ice Cream Scoop: For evenly sized muffins, use a scoop to portion the batter.
  • Check for Doneness: Insert a toothpick into the center; if it comes out clean, they’re ready.
two healthy breakfast muffins with chocolate chips stacked on top of each other.
No ratings yet

Healthy Oat Breakfast Muffins (3 ways!)

These healthy oat breakfast muffins are easy to make, gluten-free, and perfect for busy mornings! Made in one bowl with simple, wholesome ingredients, they come together in just minutes and are packed with flavor. Try all three variations for a nutritious, customizable breakfast the whole family will LOVE!
Print Pin Rate
Prep Time: 5 minutes
Cook Time: 20 minutes
Total Time: 25 minutes
Servings: 12 muffins

Equipment

  • 1 large bowl
  • 1 muffin pan

Ingredients

  • 1 cup Greek yogurt or 1 cup mashed banana, or 1 cup applesauce
  • 1/2 cup milk
  • 1/4 cup olive oil
  • 1/4 cup maple syrup
  • 2 large eggs
  • 1 teaspoon vanilla extract
  • 1 1/2 cups oat flour
  • 1 cup rolled oats
  • 2 teaspoons baking powder
  • 1/2 teaspoon baking soda
  • 1 cup fresh or frozen fruit I used blueberries, strawberries, and chocolate chips

Instructions

  • Preheat oven to 375° Fahrenheit and line a muffin tin with muffin liners.
  • In a large bowl, mix together the Greek yogurt, milk, olive oil, maple syrup, eggs, and vanilla extract.
  • Add in the oat flour, rolled oats, baking powder, and baking soda and mix until fully combined and the batter is smooth.
  • Fold in any fruit or chocolate chips you're using until it’s evenly distributed throughout the batter.
  • Then, scoop ¼ cup of batter into each muffin liner and bake muffins for 20-25 minutes, or until a toothpick inserted down the center of a muffin comes out clean. Remove the muffins from the oven and let them cool before serving or storing.

Nutrition

Serving: 1serving | Calories: 180kcal | Carbohydrates: 20g | Protein: 6g | Fat: 9g | Fiber: 3g | Sugar: 6g

Pregnancy cravings are something I take very seriously. And this week’s cravings?? Cheez its! Or really just anything with cheese – ha! (I’ve also been obsessed with my 3-ingredient gluten free bagel bites slathered with tons of cream cheese – YUM!) Though because classic Cheeze-Its are not gluten-free, I decided to make this entirely gluten-free version with just 3 ingredients. They’re crispy, salty, extra cheesy, and honestly much better than the real thing.

overhead image of a bowl of gluten free cheez its crackers.

Why You’ll Love These Gluten-Free Cheez-Its

  • Simple Ingredients: Only three main ingredients needed!
  • Gluten-Free Goodness: Perfect for those with gluten sensitivities, or looking for a healthier version of their favorite cracker.
  • Deliciously Cheesy: These gluten free cheez its are packed with REAL cheddar cheese, for even better flavor!

Frequently Asked Questions

Are Cheez-Its gluten-free?

Traditional Cheez-Its contain wheat and are not gluten-free. This homemade version uses gluten-free flour, making them suitable for those avoiding gluten.​

Do I need to use a food processor?

While a food processor makes the process easier, you can also use a pastry cutter, a fork, or your hands to combine the ingredients.​

How do I store these gluten-free crackers?

Store the cooled crackers in an airtight container at room temperature for up to a week.​

Can I make these dairy-free?

Yes, you can substitute the cheddar cheese with a dairy-free cheese alternative and use plant-based butter. Keep in mind that the flavor and texture may vary slightly.​

gluten free cheez its on a table with flaky sea salt.

Sam’s Recipe Tips

  • Cheese Choice: Use freshly shredded sharp cheddar for the best flavor and texture.
  • Rolling the Dough: Rolling the dough between parchment paper prevents sticking and makes for easier cleanup!
  • Uniform Size: Cutting the crackers into uniform sizes ensures even baking. You can cut these crackers into whatever shape you’d like though.
overhead image of a bowl of gluten free cheez its crackers.
5 from 1 vote

3-Ingredient Gluten Free Cheez-Its

These homemade gluten free cheez its are crispy, cheesy, and made with just 3 simple ingredients. They're the perfect easy snack that’s gluten-free, kid-friendly, and way better than store-bought. Whip up a batch in under 30 minutes for a satisfying, cheesy crunch everyone will love!
Print Pin Rate
Prep Time: 10 minutes
Cook Time: 15 minutes
Total Time: 25 minutes
Servings: 8 servings

Equipment

  • 1 food processor
  • 2 sheets parchment paper
  • 1 large baking sheet

Ingredients

  • 1 cup all purpose gluten-free flour
  • 6 ounces shredded cheddar cheese
  • 3 tablespoons cold butter cut into cubes
  • 4-5 tablespoons cold water
  • pinch of salt

Instructions

  • Preheat oven to 350° Fahrenheit.
  • Add the all purpose gluten-free flour, shredded cheddar cheese, cold butter, and a pinch of salt to a food processor. Pulse until a dry and crumbly mixture comes together (it should resemble breadcrumbs).
  • Pour in 3 tablespoons of cold water, then pulse a few more times until the dough comes together in the ball. If the dough still seems too dry, add in the remaining 1-2 tablespoons of cold water.
  • Transfer the dough to a large sheet of parchment paper and place another sheet of parchment paper on top of the dough. Roll out the dough between the parchment paper until it’s about 1/8-inch thick.
  • Remove the top sheet of parchment paper and cut the dough into 1-inch crackers. Poke a small hole into the center of each cracker and sprinkled the crackers with crackers with flaky sea salt.
  • Then, transfer the dough (still on top of the parchment paper) to a large baking sheet and bake for 12-15 minutes, or until the crackers are lightly golden brown. Allow the crackers to cool completely before serving or storing.

Nutrition

Serving: 1serving | Calories: 180kcal | Carbohydrates: 12g | Protein: 6g | Fat: 11g

Some of my most requested recipes are for healthy high-protein snacks! And while I have quite a few already – high protein snack boxes, single serve protein cookie, and 5 healthy protein smoothies – I, too, am always looking for more. I actually started making this chia seed protein pudding for my husband who was tired of our same old protein snacks and loved that this tasted like dessert, but in healthier high-protein form!

I love topping my chia pudding with a scoop of peanut butter, a sprinkling of my homemade granola, and whatever fresh or frozen fruit we have on-hand. It’s such a quick and easy grab-and-go protein snack, easily made dairy-free and packed with over 30 grams of protein. OH! And it’s delicious, too. 😉

Why You’ll Love This Chia Protein Pudding

  • High-Protein: With over 30g of protein per serving, it’s a satisfying and energizing option to start your day of get you through that afternoon slump!
  • Minimal Ingredients: You only need 4 (or 5 if you want it a little sweet!) ingredients, most of which you probably already have at home.
  • Meal Prep Friendly: Make it once and enjoy it all week! It stays fresh in the fridge for up to 3 days.
close up image of chia seed protein pudding in a jar with granola and fresh berries on top.

Ingredients You’ll Need

  • Chia Seeds: These tiny super seeds expand in liquid to create that signature pudding texture. They’re also packed with fiber and omega-3s.
  • Vanilla Protein Powder: Adds a delicious flavor boost and turns this pudding into a protein powerhouse. Unsweetened works best so you can control the sweetness in this recipe!
  • Greek Yogurt (or Dairy-Free Yogurt): Adds creaminess, thickness, a boost of probiotics, and extra protein. Use non-dairy yogurt to keep it dairy-free and vegan!
  • Milk (or Non-Dairy Milk): Any milk will work here – almond, oat, coconut, or regular dairy milk. Choose what fits your dietary preferences.
  • Maple Syrup (Optional): Just a touch adds natural sweetness without overwhelming the flavor.

How to Make Chia Seed Protein Pudding

  1. Add all ingredients to an 8-ounce jar or container and stir to combine.
  2. Secure the lid and refrigerate for at least 2 hours (or overnight).
  3. Before serving, stir again to ensure everything is evenly mixed. Add your favorite toppings and enjoy!
overhead image of chia seed protein pudding with granola and fresh berries on top.

Flavor Variations

  • Chocolate Chia Protein Pudding: Use chocolate protein powder and top with cacao nibs.
  • Very Berry: Stir in a handful of mashed berries or layer with a berry compote.
  • Peanut Butter Banana: Add 1 tablespoon peanut butter and a few banana slices on top. YUM!

Topping Ideas

Top your protein pudding with:

  • Fresh fruit (berries, banana, mango)
  • Nut butters
  • Granola (I topped mine with my homemade granola!)
  • Coconut flakes
  • Cacao nibs or dark chocolate shavings

Adjust This Recipe to Your Dietary Needs

  • Make it Dairy-Free: Use plant-based yogurt and non-dairy milk like almond, oat, or coconut.
  • Make it Vegan: Use dairy-free yogurt and a vegan protein powder.

Storage Instructions

Store chia protein pudding in an airtight jar or container in the fridge for up to 3 days. Stir before serving, and top with fresh ingredients right before eating for best texture and flavor.

chia seed protein pudding in a glass jar with fresh blueberries and homemade granola on top.
No ratings yet

4-Ingredient Chia Seed Protein Pudding

This easy chia seed protein pudding is the perfect make-ahead breakfast or snack packed with over 30 grams of protein per serving! Made with just 4 simple ingredients and ready in minutes, it’s creamy, customizable, and keeps you full for hours. Whether you’re fueling post-workout or starting your morning strong, this chia pudding will quickly become a staple in your healthy routine.
Print Pin Rate
Prep Time: 5 minutes
Chill Time: 2 hours
Total Time: 2 hours 5 minutes
Servings: 1 serving

Equipment

  • 1 8 ounce jar

Ingredients

  • 2 tablespoons chia seeds
  • 1 scoop (25 grams) vanilla protein powder
  • 1/2 tablespoon maple syrup or honey (optional)
  • 1/4 cup Greek yogurt or non-dairy yogurt
  • 1/2 cup milk or non-dairy milk

Instructions

  • Add all ingredients to an 8-ounce jar or container and stir to combine, then secure with a lid. Place the chia pudding in the fridge for at least 2 hours and up to 3 days, then remove from the fridge and give it another stir before serving. Top with whatever you’d like!

Notes

Nutrition info may vary depending on the brand of ingredients used. The above nutrition info was calculated without the maple syrup and toppings.

Nutrition

Serving: 1serving | Calories: 295kcal | Carbohydrates: 21g | Protein: 30g | Fat: 11g | Sugar: 3g