Tag

sugar

Browsing

These gluten-free Christmas sugar cookies with baked-in sprinkles are so delicious that everyone will want a bite! With only a handful of pantry ingredients needed, baking these gluten-free Christmas cookies will surely get you into the holiday spirit. Perfect for gifts, parties, platters or all for yourself. Don’t forget to leave some for Santa!

Overhead image of a gluten-free Christmas cookie with red, green, and white sprinkles with a bite taken out.

What’s Christmas without festive sugar cookies to bring to parties, give as gifts, and leave out for Santa?! This homemade recipe is beyond any gluten-free Christmas cookie you’d find at the store. And baking them just really gets me into the holiday spirit! Bake these with your kids, friends, or partner while listening to Christmas music – it’s truly so much fun

Why You’ll Love This Gluten-Free Christmas Cookie Recipe

  • Fun For The Family: This is a great way to kick of your holiday season! Whether you’re measuring the sugar or your little ones are helping with the sprinkles, there’s room for everyone!
  • Easy and Quick: With a simple batter these cookies are ready for the oven and baked within 12 minutes.
  • Versatile and Customizable: Feel free to add chocolate chips, nuts, or crushed peppermint to the top of your cookies for a fun twist!

What You’ll Need To Make Gluten-Free Christmas Sugar Cookies

  • Butter: I used non-dairy butter to make these cookies dairy-free. Though whatever butter you use, make sure to soften it ahead of time!
  • Sugar: granulated sugar will work great for this recipe!
  • Eggs: These help bind the batter together, creating a soft classic christmas sugar cookie texture that will leave you wanting more!
  • Gluten-Free All Purpose Baking Flour: I use and love Bob’s Red Mill Gluten-Free Baking Flour for all my gluten-free baking recipes. Your gluten-free flour must contain xanthan gum. If it doesn’t, then add 1 teaspoon xanthan gum in with the dry ingredients.
  • Salt: This will help to bring the cookies together by providing a balance to the sweetness.
  • Christmas Sprinkles: If you don’t celebrate Christmas, feel free to use your favorite holiday sprinkles instead!
Close-up of a gluten-free Christmas cookie with a bite taken out.

How To Make The Best Gluten-Free Christmas Sugar Cookies

  • 1. Prepare Your Cookie Batter: Beat together your butter and sugar until light and creamy. Add your egg, and vanilla extract until well combined.
  • 2. Bake The Cookies: Scoop 2 tablespoons-sized balls of cookie dough and place them 2 inches apart on a baking sheet. Bake for 10-12 minutes.
  • 3. Remove and Cool: Remove cookies from the oven and let them cool on a cookie sheet for 5 minutes before transferring them to a wire rack to cool completely.

Tips, Tricks, and Storage

  • Making the Dough: It’s easier if you use a stand mixer or handheld mixer. But, if you want, I think it’s fun to do it by hand, just might take some extra elbow grease!
  • Make it Vegan: Okay, so usually I would swap the egg with a flax egg (1 tablespoon of ground flax meal mixed with warm water), but Bob’s Red Mill’s Egg Replacer might be the better option here. I haven’t tried this yet, but if you do, let me know in the comments!
  • Storage: Store the gluten-free Christmas cookies in an air tight container at room temperature for up to 5 days!

Additional Gluten- Free Holiday Favorites

overhead image of gluten-free christmas cookies
5 from 1 vote

Gluten-Free Christmas Sugar Cookies With Sprinkles

These gluten-free Christmas sugar cookies with baked-in sprinkles are soo delicious, everyone is going to want a bite! With only a handful of pantry ingredients needed, baking these Christmas cookies will surely get you into the holiday spirit. Perfect for gifts, parties, platters or all for yourself. Don't forget to leave some out for Santa!
Print Pin Rate
Prep Time: 10 minutes
Cook Time: 12 minutes
Total Time: 22 minutes
Servings: 16 cookies

Ingredients

  • 6 Tablespoons Softened Butter (Dairy or Non-Dairy)
  • 3/4 Cup Sugar
  • 1 Egg
  • 1 Teaspoon Vanilla Extract
  • 1 1/2 Cups Gluten-Free All Purpose Baking Flour, see Notes
  • 1 1/2 Teaspoons Baking Powder
  • 1/4 Teaspoon Salt
  • 1/2 Cup Sprinkles

Instructions

  • Preheat oven to 350° Fahrenheit and line a cookie sheet with parchment paper.
  • Beat the butter and sugar with either a hand or stand mixer until light and fluffy. Add in egg and vanilla extract, beat again to combine.
  • Add in the flour, baking powder, and salt. Beat together until a dough forms, then gently mix in the sprinkles until the sprinkles are evenly distributed throughout the dough.
  • Scoop 2 tablespoon-sized balls of cookie dough and place them about 2-inches apart on cookie sheet. Press down on each cookie to slightly flatten (they should be about 1-inch thick). Bake 10-12 minutes or until lightly golden around the edges.
  • Remove cookies from oven and let cool on cookie sheet for 5 minutes before transferring to a wire rack to cool completely.

Notes

Gluten-Free All Purpose Flour:Your gluten-free flour must contain xanthan gum. If it doesn’t, then add 1 teaspoon xanthan gum in with the dry ingredients.

Nutrition

Serving: 1cookie | Calories: 137kcal | Carbohydrates: 21g | Protein: 1.2g | Fat: 4.8g | Sugar: 12g

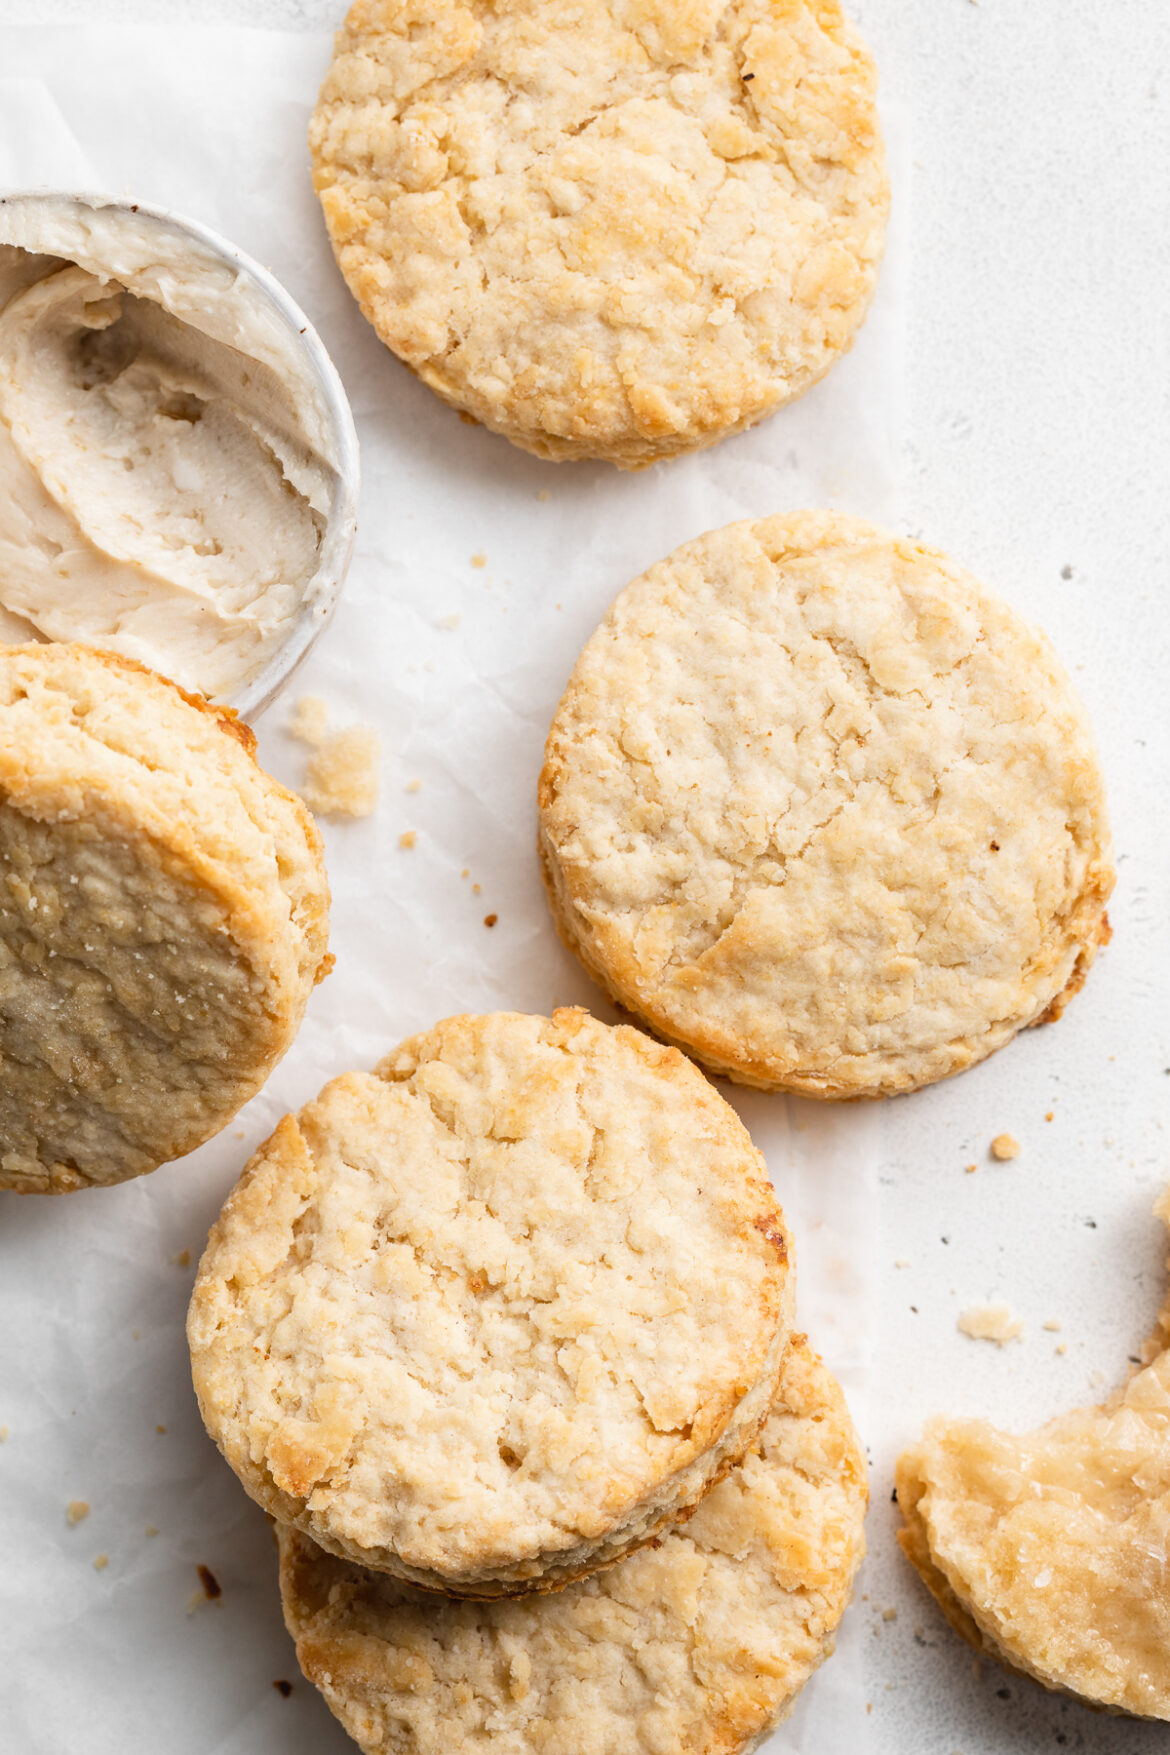
Irresistibly soft and flaky vegan biscuits! They’re chock-full of gorgeous layers and surprisingly easy to make in under 30 minutes. Top these flawless vegan biscuits off with a simple two-ingredient vegan maple butter for a perfectly sweet touch.

vegan biscuits on parchment paper with maple butter on the side

What You’ll Need To Make Vegan Biscuits

Non-Dairy Milk – Any non-dairy milk will work in this plant-based bread recipe! I used almond milk, but you can definitely use soy, hemp, cashew, or even coconut milk if you’d like.

Apple Cider Vinegar – Ever notice that tiny bit of tanginess found in most biscuits? Well, that’s the buttermilk speaking. And since we obviously can’t use regular ole’ buttermilk in these vegan biscuits, we make our own vegan version instead. By mixing apple cider vinegar into cold non-dairy milk, then leaving it to sit for a few minutes, we make vegan buttermilk – yup, it’s that easy!

All Purpose Flour – We wouldn’t have biscuits without flour. Specifically, all purpose flour, which bakes up the best biscuits. I’ve pretty much grown up on the King Arthur Organic Unbleached All Purpose Flour. It’s been a staple in my kitchen for years and has seriously never ever failed me. However, you can definitely replace the all purpose flour for gluten-free 1:1 baking flour if you’d like.

Vegan Butter – I use and love the Earth Balance Vegan Buttery Sticks for all my vegan baking needs. Unlike most baking recipes which call for softened butter, we actually want super cold butter for these biscuits. Therefore, leave your vegan butter in the fridge until the second you need to use it. You can even pop it in the freezer for a couple minutes to get it extra cold!

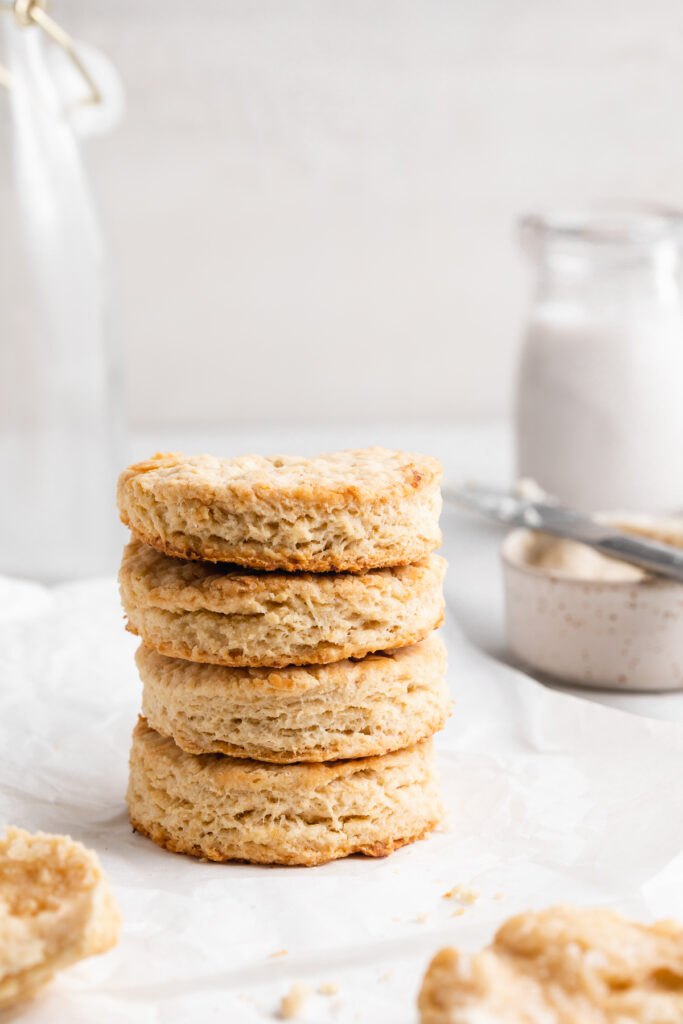
a stack of vegan biscuits on a table

Tips and Tricks

  • Don’t overmix the dough! An overmixed dough will bake up tough and chewy, instead of soft and flaky. So once all ingredients are incorporated, stop mixing and move on to shaping.
  • No biscuit cutter? No problem! I used a metal cocktail shaker in place of a biscuit cutter for this bakery-style recipe. Really any round object will work to cut biscuits.
  • If not a maple butter fan, top these vegan biscuits with any spread you’d like. Some homemade jam, vegan butter, and/or vegan cream cheese would all taste just as delicious!
vegan biscuits with maple butter on top and a butter knife

Adjust This Recipe To Your Dietary Needs

Make it Gluten-Free: For gluten-free vegan biscuits, replace the all purpose flour with 1:1 gluten-free baking flour. I swear by the Bob’s Red Mill Gluten-Free Baking Flour for all my gluten-free baking needs!

Make it Nut-Free: To ensure these biscuits are completely nut-free, use a nut-free non-dairy milk such as soy or oat milk, and a non-dairy butter without any nuts in it.

Flawless Vegan Biscuits with Maple Butter

0 from 0 votes
Recipe by Samantha Course: SidesDifficulty: Intermediate
Servings

10

biscuits
Prep time

10

minutes
Cooking time

15

minutes
Total time

25

minutes

Irresistibly soft and flaky vegan biscuits! They’re chock-full of gorgeous layers and surprisingly easy to make in under 30 minutes. Top these flawless vegan biscuits off with a simple two-ingredient vegan maple butter for a perfectly sweet touch.

Ingredients

  • 1/2 cup non-dairy milk

  • 1 tablespoon apple cider vinegar

  • 2 cups all purpose flour

  • 1 tablespoon baking powder

  • 1 tablespoon sugar

  • 1 teaspoon salt

  • 1/2 cup vegan butter, very cold

  • For the maple butter:
  • 1/4 cup vegan butter, softened

  • 1 tablespoon maple syrup

Directions

  • Preheat oven to 425° Fahrenheit.
  • Whisk together the non-dairy milk and apple cider vinegar in a small bowl, set aside.
  • In a large bowl, mix together the all purpose flour, baking powder, sugar, and salt.
  • Add butter into flour mixture and use either a pastry cutter or fork to “cut” butter into flour until crumbly. (The mixture should resemble coarse sand)
  • Make a well in the center of the flour and slowly pour in the milk and vinegar. Gently stir until a sticky dough forms.
  • Transfer biscuit dough to a floured surface and roll into a 1-inch thick disc. Use a biscuit cutter or something similar to cut biscuits out of dough.
  • Place biscuits on a baking sheet then bake for 12-15 minutes or until slightly golden.
  • White the biscuits bake, make the maple butter by whisking both ingredients together in a small bowl until combined. Spread maple butter over warm vegan biscuits.

Recipe Video

Did you make this recipe?

Share it and tag @samdoesherbest on Instagram!

Like this recipe?

Follow us @samdoesherbest on Pinterest

These sugar cookies are SO delicious, no one will ever guess they’re gluten-free! Perfectly soft, sweet, and surprisingly easy to make. Cut these gluten-free sugar cookies into your favorite festive shapes, then decorate them any way you’d like!

cutting out gluten-free sugar cookie dough into heart shapes

What You’ll Need To Make Gluten-Free Sugar Cookies

Butter – I used non-dairy butter, to keep these sugar cookies both gluten-free and dairy-free. However, you can use regular butter instead if you’d like. Remember to remove your butter from the fridge at least 30 minutes before baking. The key to perfectly soft and light cookies is working with room temperature butter. Also, whip the butter and sugar together in the first step until super light and fluffy.

Sugar – Cane, white, or even coconut sugar will work in this gluten-free dessert recipe. Cane sugar and white sugar will blend best into the dough, resulting in a colorless cookies. Meanwhile, coconut sugar (or brown sugar, which I don’t recommend here) will turn these cookies light brown once baked. They’ll still taste good, though they’ll be a bit more grainy and won’t look the same!

Gluten-Free Flour – I used Nature’s Promise Gluten-Free Flour Blend in my sugar cookies and had amazing results! I also highly recommend the Bob’s Red Mill Gluten-Free Baking Flour for any and all gluten-free recipes. While those are the only two gluten-free flours I can personally vouch for, I’m sure there are plenty out there that will work just as well. Though the one recommendation I have when it comes to any gluten-free flour is to make sure that it contains xanthan gum. Xanthan gum is a stabilizer, and super important to keeping your baked goods together. Without it, these sugar cookies would quite literally fall apart. Therefore, if your gluten-free flour blend does not already contain xanthan gum, add 1/2 teaspoon to your dough for this recipe.

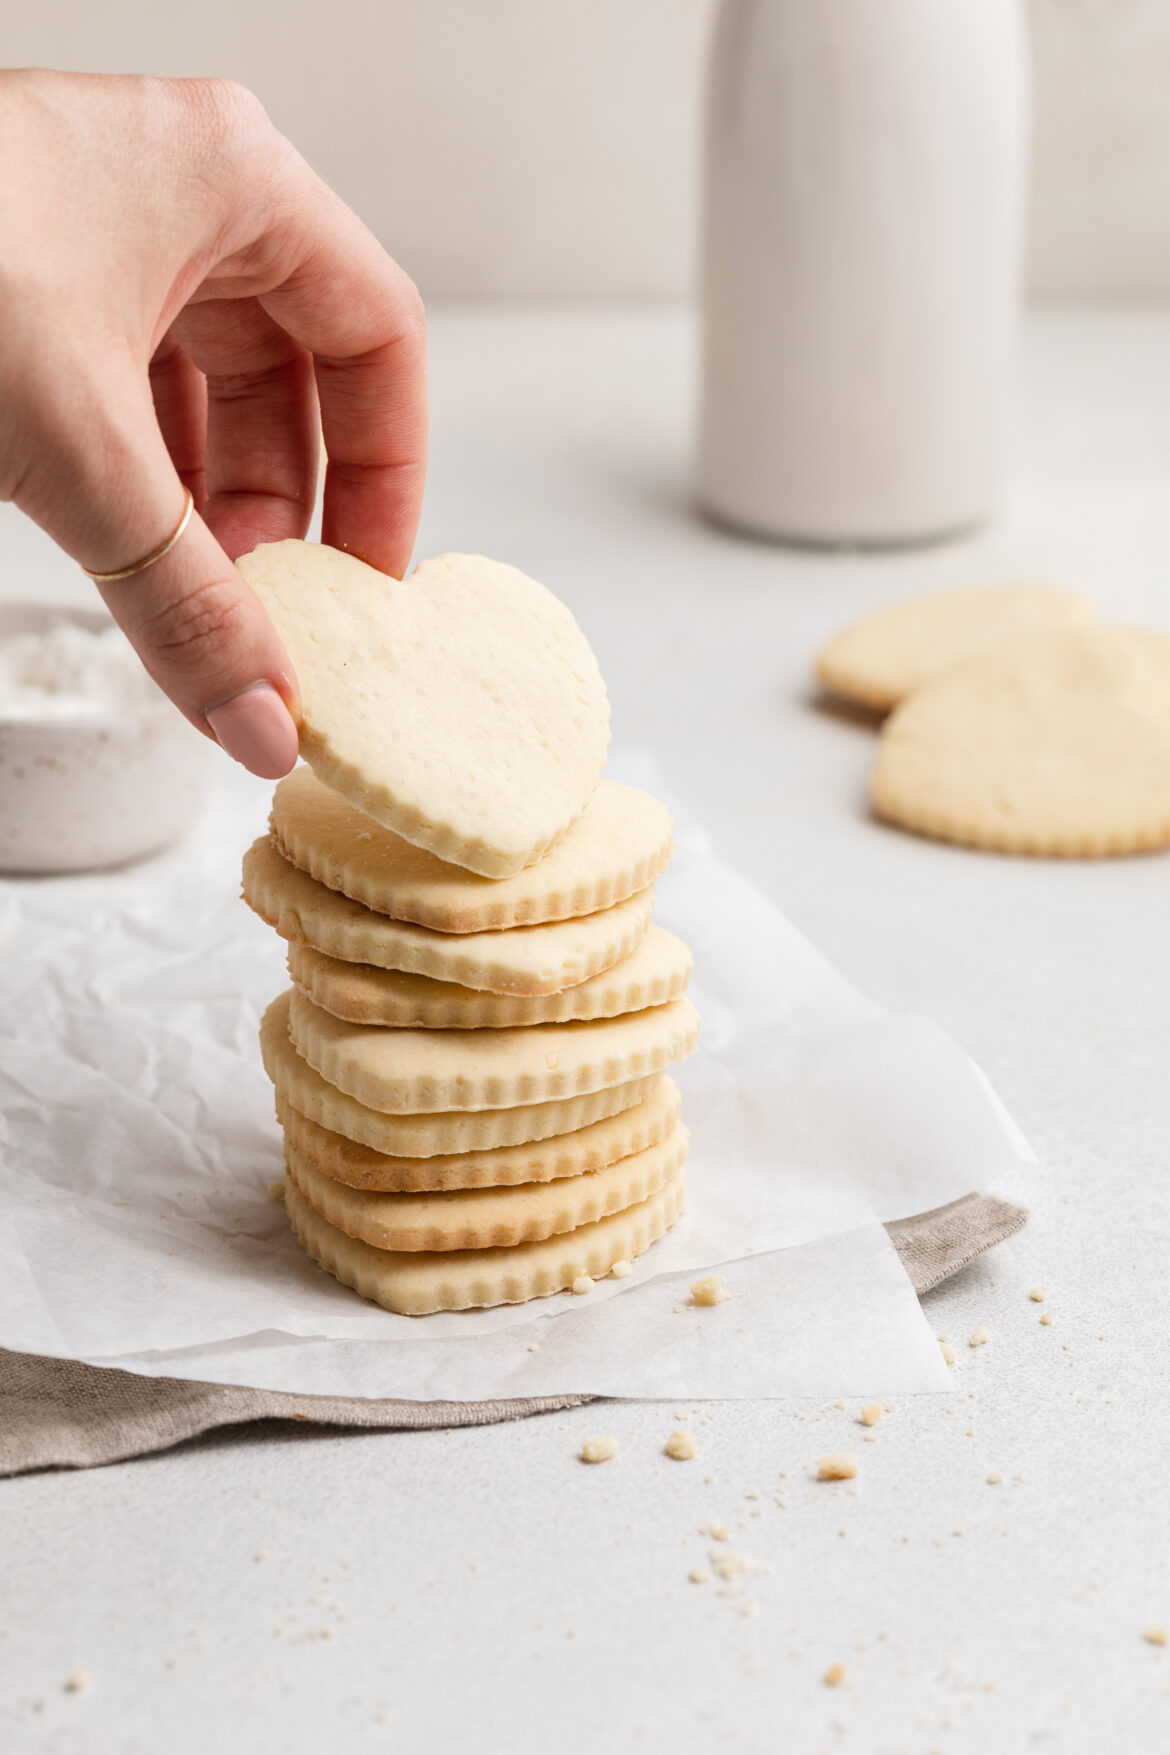
stack of gluten-free sugar cookies

Tips and Tricks

  • You don’t have to cut these cookies out if you don’t want to! Instead of rolling, then cutting the dough, simply remove your chilled cookie dough from the fridge and use a cookie scoop to shape them. Drop tablespoon-sized scoops of sugar cookie dough straight onto your baking sheet, then flatten each cookie out slightly with the palm of your hand. Last, but definitely not least, bake off those delicious little circular cookies just as you would a cut-out cookie!
  • Decorate these babies any way you’d like! A simple powdered sugar plus milk icing with a dash of food coloring is always a solid option. Or, melt some chocolate and drizzle that on top of each cooled cookie for a fun and delicious twist.
  • Prep this sugar cookie recipe days, or even months ahead of time if you’d like! Chilled sugar cookies dough will stay good in the fridge for up to 3 days and in the freezer for up to 4 months. If frozen, let it defrost at room temperature for a bit before attempting to roll or scoop the dough.

Adjust This Recipe To Your Dietary Needs

Make it Vegan: To make these vegan sugar cookies, be sure to use vegan butter and milk as well as your favorite egg substitute in place of the one egg in this recipe. I recommend the Bob’s Red Mill Egg Replacer, it’s both vegan and gluten-free, and works impressively well in most baking recipes.

Use Regular Flour: Feel free to replace the gluten-free flour with regular ole’ all purpose flour if you’d like!

Perfect Gluten-Free Sugar Cookies

5 from 1 vote
Recipe by Samantha Course: DessertDifficulty: Easy
Servings

24

cookies
Prep time

10

minutes
Cooking time

7

minutes
Chilling Time

1

hour

These sugar cookies are SO delicious, no one will ever guess they’re gluten-free! Perfectly soft, sweet, and surprisingly easy to make. Cut these gluten-free sugar cookies into your favorite festive shapes, then decorate them any way you’d like!

Ingredients

  • 1/2 cup butter, softened (I used non-dairy butter)

  • 1/2 cup sugar

  • 1 egg, at room temperature

  • 1 tablespoon milk (I used non-dairy)

  • 1 teaspoon vanilla extract

  • 2 cups gluten-free flour

  • 1/2 teaspoon baking powder

  • 1/4 teaspoon salt

Directions

  • Add butter and sugar to a bowl, beat together with either a hand or stand mixer until light and fluffy, about 3 minutes. Add in the egg, milk, and vanilla extract, beat to combine.
  • In a separate small bowl, mix together the gluten-free flour, baking powder, and salt.
  • Add the flour mixture into the butter mixture and mix until a dough forms. Cover dough with plastic wrap and chill in the fridge for at least 1 hour and up to overnight.
  • When ready to bake, preheat your oven to 375° Fahrenheit and remove dough from fridge. Roll the dough on a lightly floured surface to about ¼-inch thick, then use a cookie cutter to cut the dough into shapes.
  • Place cookies on a baking sheet and bake for 7-10 minutes. Remove from oven and transfer to a wire cooling rack to cool completely before decorating.

Recipe Video

Notes

  • For Icing: Mix together 1 cup of powdered sugar and 1 tablespoon milk in a small bowl for a quick and easy sugar cookie icing!

Did you make this recipe?

Share it and tag @samdoesherbest on Instagram!

Like this recipe?

Follow us @samdoesherbest on Pinterest

This peanut butter cookies recipe is super easy and quick to make requiring only 3 ingredients – peanut butter, egg and sugar! These flourless homemade pb cookies are gluten-free and dairy-free, so everyone can enjoy them!

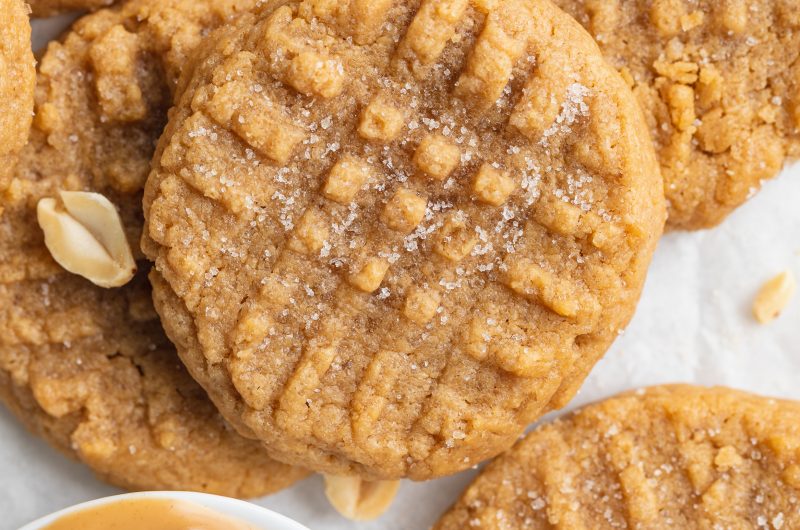
3 ingredient peanut butter cookies

Perfect for a last minute dessert idea for the upcoming holidays, these peanut butter cookies have a rich peanut butter taste and a chewy texture that’s crisp on the outside.

Only THREE Ingredients Needed For These Cookies!

  • Peanut Butter – Use smooth peanut butter for the best results.

  • Sugar – Granulated sugar not only adds sweetness, but it also helps the cookies brown as the sugar caramelizes.

  • Egg

Tips & Substitutions When Making These Peanut Butter Cookies

  • Customize to your liking! Add in some chocolate chips, ½ teaspoon of vanilla extract or an additional egg (for a softer cookie).

  • Avoid using crunchy peanut butter, unless you want your cookies to be crumbly.

  • Take a peek at the cookies after about 8 minutes or so. You’ll know they are done when they are firm to the touch and slightly browning at the edges.

  • To make it vegan, substitute the egg for a flax egg, which is made by mixing together 1 tablespoon flaxseed with 2 tablespoons water and letting it rest for 5 minutes.

3 Ingredient Peanut Butter Cookies (Gluten-Free & Dairy-Free)

5 from 1 vote
Recipe by Samantha Course: Desserts, SnacksCuisine: AmericanDifficulty: Easy
Servings

9

servings
Prep time

5

minutes
Cooking time

10

minutes
Total time

15

minutes

This peanut butter cookies recipe is super easy to make requiring only 3 ingredients – peanut butter, egg and sugar! These flourless homemade pb cookies are also gluten-free and dairy-free, so everyone can enjoy them!

Ingredients

  • 1 Cup Peanut Butter (no sugar added)

  • 1/2 Cup Sugar

  • 1 Whole Egg

Directions

  • Preheat oven to 350° Fahrenheit and line a baking sheet with parchment paper.
  • Add all ingredients to a bowl and mix until smooth.
  • Scoop tablespoon-sized balls onto the baking sheet, then flatten each ball with the back of a fork in a crisscross pattern.
  • Bake for 10 minutes, then leave to cool on baking sheet for a few minutes before transferring to a wire cooling rack to cool completely.

Recipe Video

Notes

  • Storage: Store them at room temperature in an airtight container for up to 5 days.
  • Freeze: You can freeze the baked cookies for up to 3 months.

Did you make this recipe?

Share it and tag @samdoesherbest on Instagram!

Like this recipe?

Follow us @samdoesherbest on Pinterest

More Delicious Desserts

Made with just a few simple ingredients, this quick and easy vegan kettle corn recipe is a deliciously sweet and salty snack, perfect for a night in with friends or family!

Forget the movie theatre popcorn! If you’ve never made popcorn at home on a stovetop before, you definitely need to try my sweet and salty vegan kettle corn recipe. It’s super easy and quick to make (only about 5 minutes!), it tastes better and is no doubt the healthier alternative. I personally prefer stovetop popcorn to other options because I think it tastes significantly better than air-popped popcorn or microwave popcorn.

Making popcorn at home on the stove can be intimidating if you’ve never done it before, but it’s really easy! You only need 3-4 pantry-staple ingredients to make this vegan kettle corn. And hey, if you mess up, no harm no foul. Doesn’t take long to make, so just try again if it ends up being a little too burnt for your taste.

MAIN INGREDIENTS NEEDED TO MAKE Vegan Kettle Corn

  • Popcorn kernels – Really any kernels will do the job, but organic popcorn, like the ones from Arrowhead Mills, is preferable!

  • Coconut Oil –  Acting as both cooking oil and flavor booster, this oil gives the popcorn a mildly sweet and almost nutty flavor. You can use vegetable oil, canola oil or avocado oil instead though.

  • Cane Sugar – This is what I prefer to use but you can opt for white sugar, coconut sugar or even brown sugar if you’re feeling something extra sweet!

  • Sea Salt – This is totally optional and can be added to your liking once it’s cooled off.

Kettle Corn Recipe (Vegan, Gluten-Free)

5 from 2 votes
Recipe by Samantha Course: SnacksCuisine: AmericanDifficulty: Easy
Servings

4

servings
Prep time

2

minutes
Cooking time

5

minutes
Calories

300

kcal
Total time

7

minutes

Made with just a few simple ingredients, this quick and easy vegan kettle corn recipe is a deliciously sweet and salty snack, perfect for a night in with friends or family!

Ingredients

  • 2 tablespoons vegetable or coconut oil

  • 1/4 cup corn kernels

  • 2-3 tablespoons sugar

  • Sea salt to taste

Directions

  • Heat vegetable oil in a large pot over medium heat. Once hot, add in the corn kernels and sugar.
  • Cover pot with lid and shake constantly until you hear a 2-3 second break in between pops. Remove from heat and allow to cool slightly before serving. Add sea salt to your preferred taste.

Recipe Video

Notes

  • Oil: I used coconut oil, but canola oil or avocado oil would work as well.
  • Sugar: I used cane sugar, but white sugar, coconut sugar, or even brown sugar would taste great.
  • To store homemade kettle corn (if you have any leftover!) you can simply place it in a large zip-lock bag and store it in your pantry until ready to enjoy.

Did you make this recipe?

Share it and tag @samdoesherbest on Instagram!

Like this recipe?

Follow us @samdoesherbest on Pinterest

OTHER EASY Snack & DESSERT RECIPES