Tag

lemon juice

Browsing

The quickest and easiest way to make your own green juice in a blender – no juicer necessary! A refreshing blend of green veggies, a touch of ginger, and a hint of green apple make this homemade juice not only palatable, but actually delicious. No fancy equipment or juicer is needed for this simple and super healthy recipe!

green blender juice being poured into a glass, garnished with a lemon slice

What You’ll Need For This Recipe

Blender – I used my for this green juice recipe. It’s certainly an investment, but my gosh is it powerful! The is a total work horse and if you ask me, worth EVERY penny. I even purchased mine “reconditioned,” which is just a fancy way of saying “used,” and it’s so far lasted me four years and three moves! However, if you don’t have a Vitamix and don’t feel like investing in one at the moment (I get it), you can simply use whatever blender you have. And if your blender isn’t large enough to fit all the fruit and veggies at once, simply split the recipe up into two batches.

Nut Milk Bag or Fine Mesh Strainer – I purchased my very inexpensive nut milk strainer bag off Amazon 5+ years ago. If you don’t own a nut milk bag, you have two options. You can either buy one, which happens to be my recommended option, since it’s also an important tool in my dairy-free coffee creamer recipe! Or, you can use a fine mesh metal strainer instead. Though beware, a metal strainer won’t catch nearly as much pulp as a nut milk bag will, resulting in a grainier green juice.

Fresh Vegetables – Any and all fresh vegetables are welcome to this green blender juice party! The specific ones we use are cucumber, celery, kale, fresh ginger, lemon, and some green apple for a hint of sweetness. I highly recommend purchasing organic produce for this recipe, since there’s no cooking involved to kill off any gnarly chemicals. Also, since everything’s being blended together – simply give the vegetables a couple quick chops, nothing too precise.

Top Tips

  • Store the fresh fruits and vegetables in the fridge before making your juice. This’ll ensure it blends up extra cold and refreshing! Warm green juice is OK, but definitely not nearly as enjoyable as cold green juice.

  • Get innovative with the pulp from your green blender juice! Add it to smoothies, popsicles, or I’ve even seen people use it in baked goods. It’s always a goal of mine to be as low-waste as possible in the kitchen, so if all else fails, I’ll simply add my leftover pulp to the compost pile.

  • Any fresh, homemade juice is best enjoyed immediately after making! This is when the most vitamins and minerals are available, leading to more nutrients to fuel your body and leave you feeling amazing. However, you can store any leftover green juice in an airtight container in the fridge for up to two days.

Other Tasty Additions

Feel free to add or substitute your favorite fruits or veggies, such as:

  • Carrots
  • Beets
  • Oranges
  • Pineapple
  • Lime Juice
  • Strawberries
  • Blueberries
  • Pears
  • Turmeric

Green Blender Juice (How to Make Juice Without a Juicer)

0 from 0 votes
Recipe by Samantha Course: DrinksDifficulty: Easy
Servings

2

servings
Prep time

5

minutes
Total time

10

minutes

The quickest and easiest way to make your own green juice in a blender – no juicer necessary! A refreshing blend of green veggies, a touch of ginger, and a hint of green apple make this homemade juice not only palatable, but actually delicious. No fancy equipment or juicer is needed for this simple and super healthy recipe!

Ingredients

  • 1 large cucumber, chopped

  • 1 bunch celery, chopped

  • 2 green apples, chopped

  • 1 bunch kale, chopped

  • 1-inch piece ginger, peeled

  • 1 lemon, juiced

  • 1 cup water

Directions

  • Add all ingredients to blender and blend until smooth.
  • Place a nut milk bag or fine mesh strainer over a large bowl and pour juice through bag or strainer. Squeeze out as much juice as possible and discard pulp.
  • Store in an airtight container in the fridge for up to 2 days.

Recipe Video

Notes

  • No need to remove any seeds or stems from your fresh fruits and vegetables! Simply run a knife through everything, making it just small enough to blend.

Did you make this recipe?

Share it and tag @samdoesherbest on Instagram!

Like this recipe?

Follow us @samdoesherbest on Pinterest

More Super Healthy Recipes to Feel Your Best

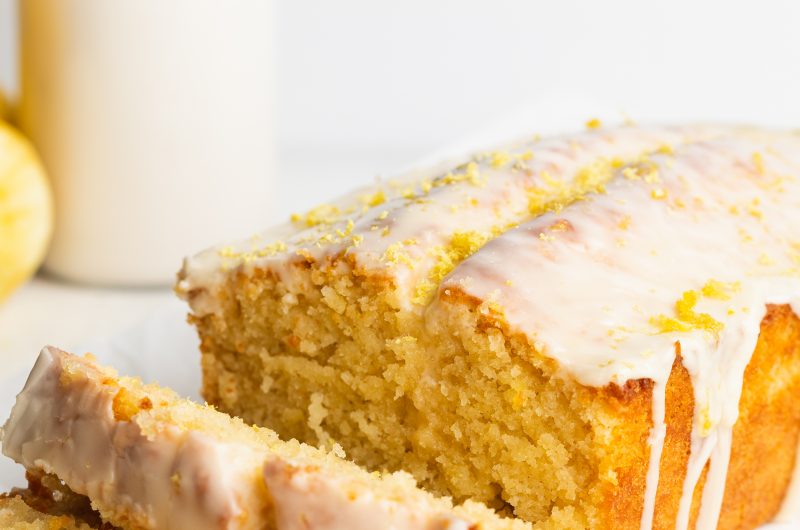
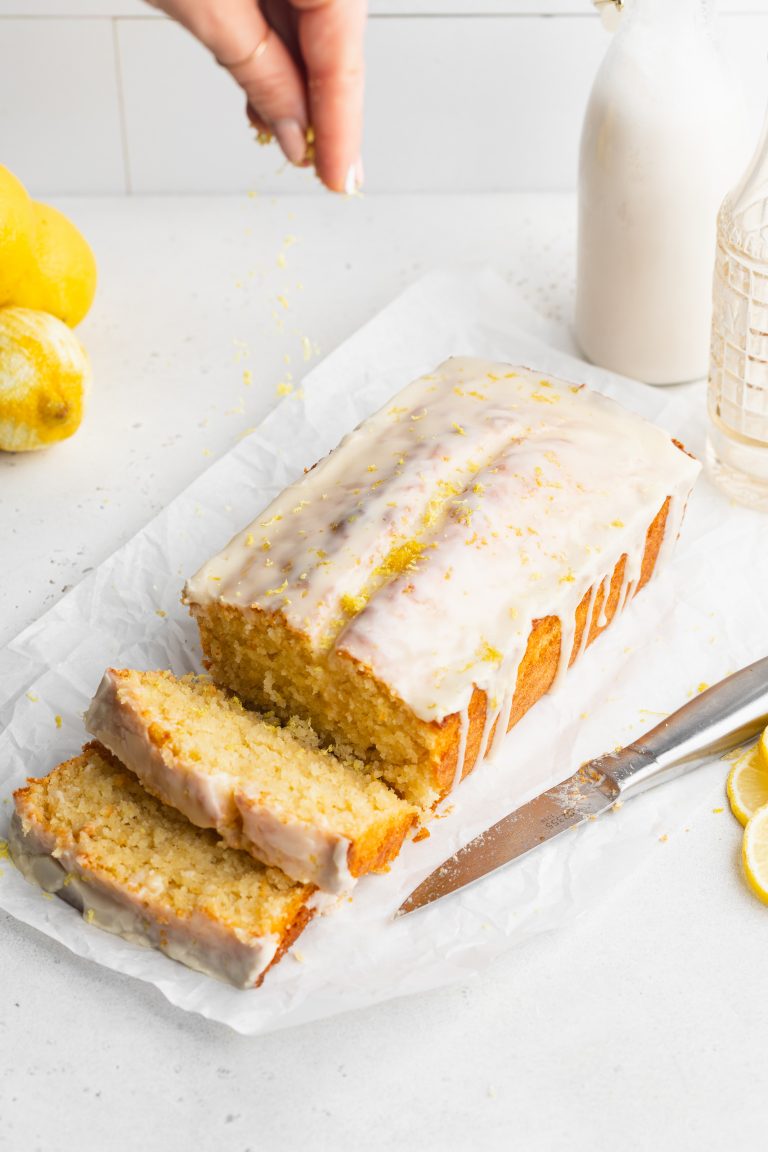
With a delicious burst of tart lemon flavor and a moist and delicate crumb, this Gluten-Free Lemon Drizzle Cake recipe is a classic dessert that can be enjoyed for any occasion.

Gluten-Free Lemon Drizzle Cake

Main Ingredients For Gluten-Free Lemon Drizzle Cake

  • Sugar

  • Lemon Zest

  • Softened Butter – I used non-dairy.

  • Eggs

  • All Purpose Flour – I use Bob’s Red Mill’s gluten-free all purpose flour.

  • Almond Flour – adds protein and moisture to the cake. 

  • Baking Powder

  • Salt

  • For the lemon drizzle you’ll need powdered sugar and lemon juice

Tips When Making Lemon Drizzle Cake

  • Add poppy seeds: Mix in 1 tablespoon of poppy seeds to the batter just after mixing in the dry ingredients. 

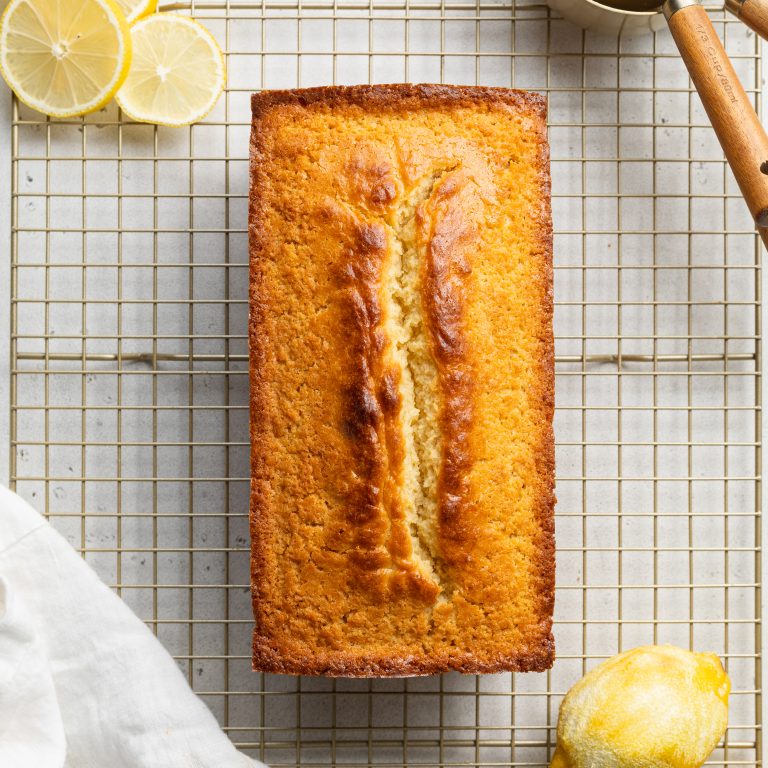
  • How do I know when the lemon drizzle cake is done? The cake should be golden brown on the outside. Insert a toothpick into the center and it should come out clean or with just a few crumbs.

  • How do I store the lemon drizzle cake if there are leftovers? Store the cake in an airtight container at room temperature for up to 3 days.

Gluten-Free Lemon Drizzle Cake

4 from 5 votes
Recipe by Samantha Course: DessertsCuisine: BritishDifficulty: Medium
Servings

8

servings
Prep time

10

minutes
Cooking time

1

hour 
Total time

1

hour 

10

minutes

With a delicious burst of tart lemon flavor and a moist and delicate crumb, this Gluten-Free Lemon Drizzle Cake recipe is a classic dessert that can be enjoyed for any occasion.

Ingredients

  • 1 Cup Sugar

  • 2 Tablespoons Lemon Zest

  • 1 Cup Softened Butter (non-dairy)

  • 4 Large Eggs

  • 1/4 Cup Milk (or non-dairy milk)

  • 3 Tablespoons Lemon Juice

  • 1 3/4 Cups Gluten-Free All Purpose Flour

  • 1/2 Cup Almond Flour

  • 2 Teaspoons Baking Powder

  • 1/4 Teaspoon Salt

  • For the lemon drizzle:
  • 1 Cup Powdered Sugar

  • 1/4 Teaspoon Lemon Juice

Directions

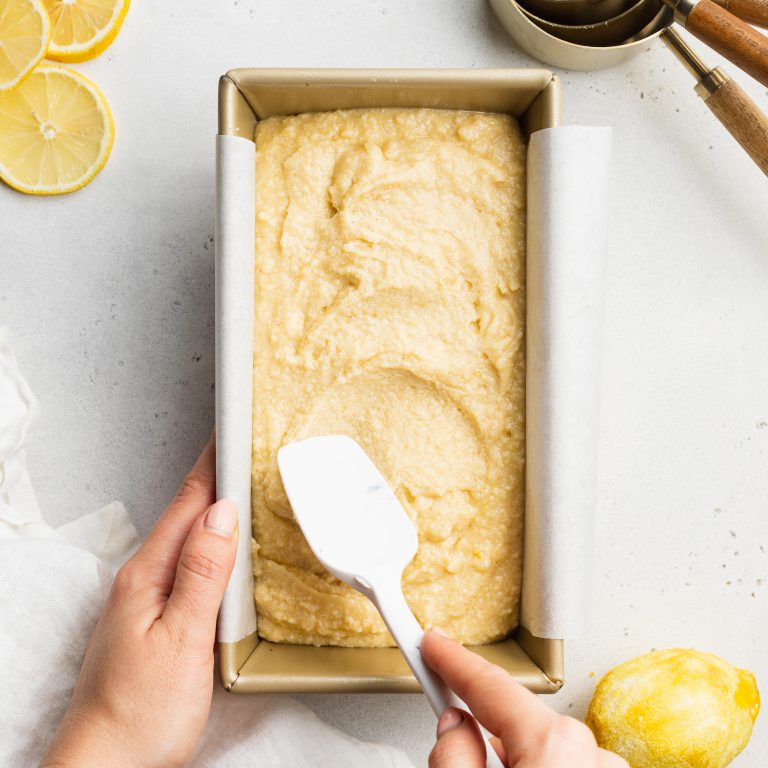
  • Preheat oven to 350° Fahrenheit and line a loaf pan with parchment paper.
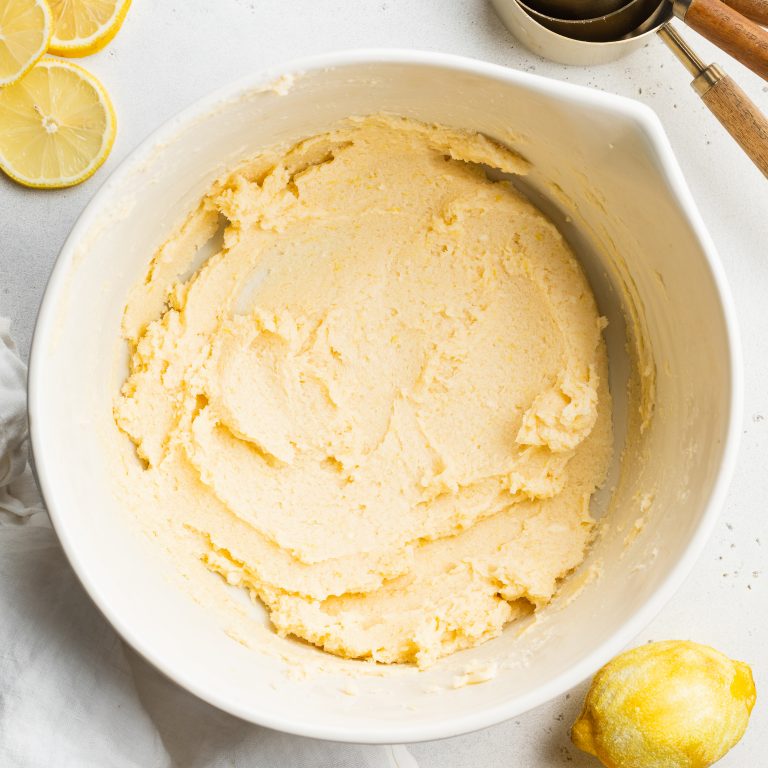
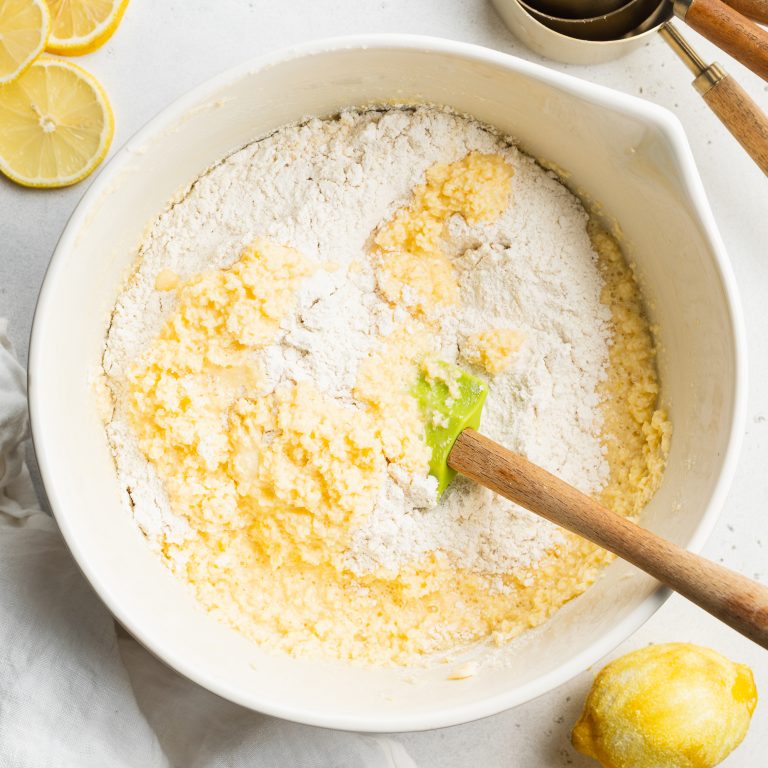
  • Mix together the sugar and lemon zest in a large bowl. Add in the butter and use either a hand or stand mixer to beat until pale yellow.
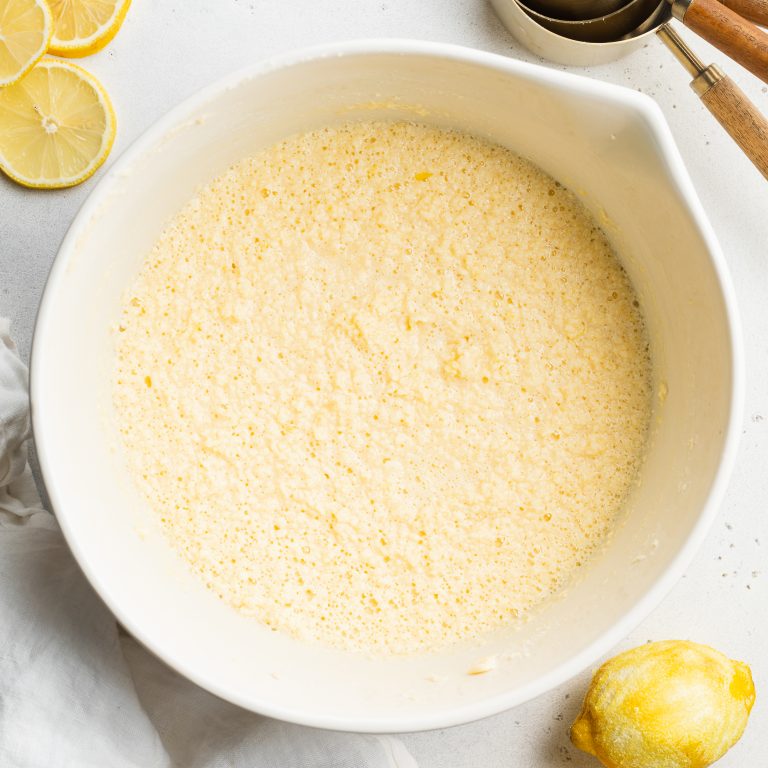
  • Beat in one egg at a time, before adding in the milk and lemon juice. Mix until combined.
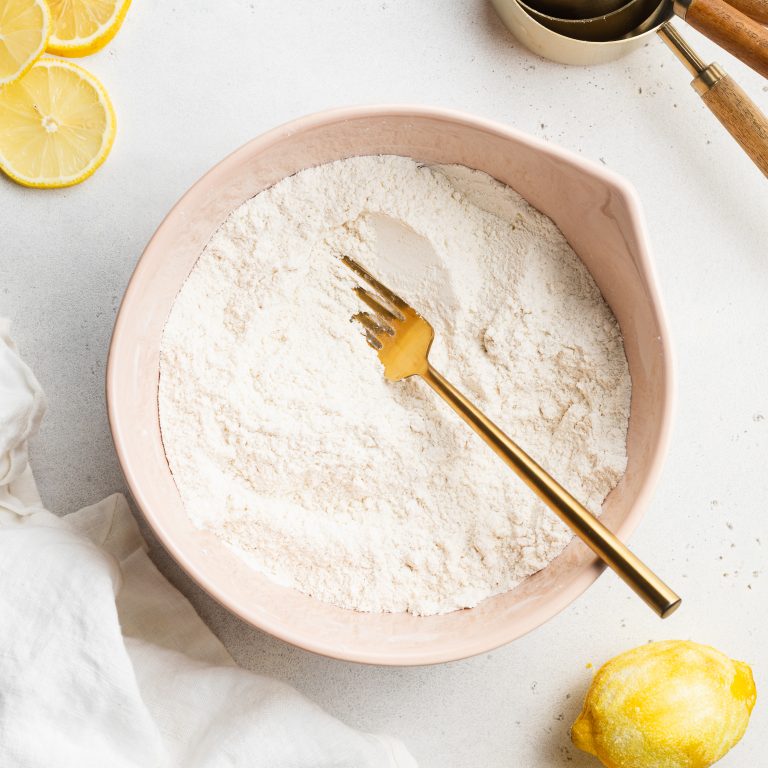
  • In a separate bowl, mix together the gluten-free all purpose flour, almond flour, baking powder, and salt.
  • Slowly fold flour mixture into butter mixture until just combined, do not overmix.
  • Transfer batter to prepared loaf pan and bake for 1 hour, or until a toothpick inserted down the center comes out clean. Let cool in pan for 10 minutes before removing and placing on a wire rack to cool the rest of the way.
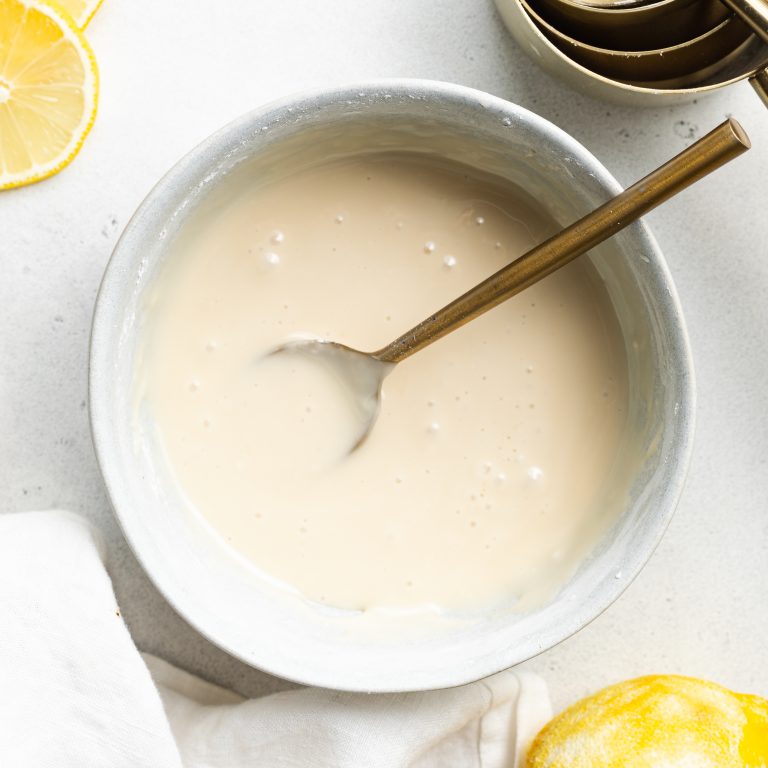
  • While the lemon cake cools, make the drizzle by whisking together all ingredients in a small bowl.
  • Once cake has cooled completely, spoon lemon drizzle over top. Leave drizzle to set for about 10-15 minutes before slicing and enjoying.

Did you make this recipe?

Share it and tag @samdoesherbest on Instagram!

Like this recipe?

Follow us @samdoesherbest on Pinterest

More Dessert Recipes

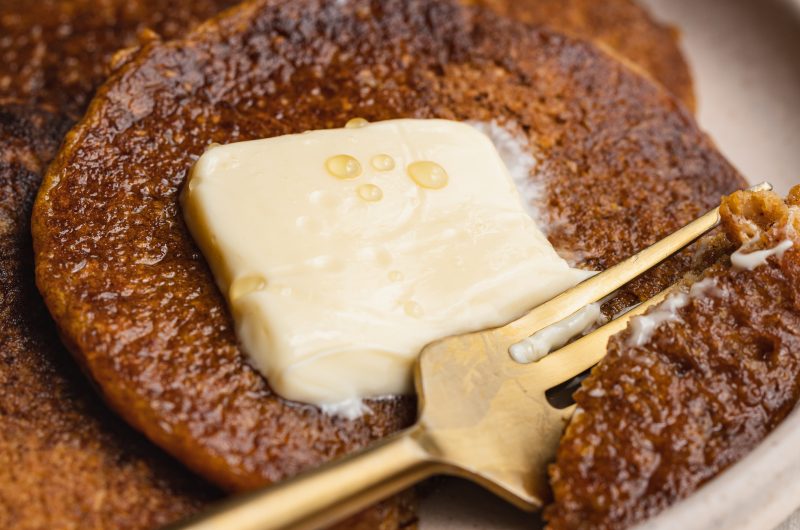
These gluten-free pumpkin pancakes taste like Fall thanks to its warm pumpkin spices. They’re easy to make, fluffy, and perfect for a quick morning breakfast. Drizzle with maple syrup or use some of my suggested toppings for even tastier pumpkin pancakes!

Gluten-Free Pumpkin Pancakes

Pancakes are seriously one of my fav breakfast foods, and since Fall season is underway, I felt like it was appropriate to share my gluten-free pumpkin pancake recipe with you all! They are fluffy, sweet, warm, and especially delicious with maple syrup drizzled on top. What’s not to love?!

MAIN INGREDIENTS NEEDED TO MAKE Pumpkin Pancakes

  • Oat Flour or Gluten-Free Flour: The choice is yours, but I like to use Bob’s Red Mill Gluten-Free 1:1 Baking Flour. If you do not have a gluten sensitivity, you can use regular flour.

  • Brown or Coconut Sugar: Just a bit of brown sugar provides the perfect level of sweetness to the pancakes! You can also use coconut sugar for an even healthier option.

  • Baking Powder & Baking Soda: The baking powder is what helps to make these pancakes super fluffy! 

  • Pumpkin Spice: If you do not have pumpkin spice you can try making your own pumpkin spice by blending nutmeg, allspice, cinnamon, and ginger. 

  • Pumpkin Puree

  • Milk: I use almond milk, but you can use whichever non-dairy or dairy milk you prefer.

  • Egg

  • Coconut Oil

  • Lemon Juice

  • Cinnamon

  • Salt

What Toppings Go Best With These Gluten-Free Pumpkin Pancakes?

  • Maple Syrup (you could add chopped bacon bits to this, too)

  • Chocolate Chips

  • Coconut Whipped Cream

  • Nutella

  • Cinnamon-Spiced Apples

Gluten-Free Pumpkin Pancakes (Dairy-Free Option)

5 from 1 vote
Recipe by Samantha Course: BreakfastCuisine: AmericanDifficulty: Easy
Servings

4

servings
Prep time

10

minutes
Cooking time

5

minutes
Total time

15

minutes

These gluten-free pumpkin pancakes taste like Fall thanks to its warm pumpkin spices. They’re easy to make, fluffy, and perfect for a quick morning breakfast. Drizzle with maple syrup or use some of my suggested toppings for even tastier pumpkin pancakes!

Ingredients

  • 1/2 Cup Pumpkin Puree

  • 1 Cup Almond Milk (or regular)

  • 1 Whole Egg

  • 2 Tablespoons Coconut Oil (melted)

  • 1 Tablespoon Lemon Juice

  • 1 Cup Oat Flour or Gluten-Free All-Purpose Flour

  • 3 Tablespoons Coconut Sugar or Brown Sugar

  • 1 Teaspoon Baking Powder

  • 1 Teaspoon Pumpkin Pie Spice

  • 1/2 Teaspoon Baking Soda

  • 1/2 Teaspoon Cinnamon

  • 1/4 Teaspoon Salt

Directions

  • Whisk together the pumpkin puree, milk, egg, coconut oil, and lemon juice in a large bowl.
  • In a separate bowl, mix together the flour, sugar, pumpkin pie spice, baking powder, baking soda, cinnamon, and salt.
  • Add the flour mixture into the pumpkin mixture and stir until fully combined.
  • Heat griddle or skillet with a drop of coconut oil. 
  • Pour ¼ cup batter into skillet and cook until puffy and bubbling around the edges, around 2 minutes. Flip pancake and cook for another 30 seconds or until cooked through.
  • Continue cooking process with remaining batter, keep cooked pancakes warm in the oven then serve immediately.

Recipe Video

Notes

  • Storage: Store any leftover pancakes in an airtight container. You can store them in the fridge for up to 3 days, or in the freezer for up to 3 months. 

Did you make this recipe?

Share it and tag @samdoesherbest on Instagram!

Like this recipe?

Follow us @samdoesherbest on Pinterest

More Breakfast Recipes

This vegan baked mac and cheese recipe is made with a dairy-free “cheese” sauce and topped with a delicious panko breadcrumb topping that is perfect for a comforting weeknight dinner.

MMM, mac and cheese is one of my favorite comfort meals. Even though this isn’t the classic Kraft mac and cheese dish you might have had growing up, it sure is healthier and tastes even better! If you’re searching for last-minute dinner inspiration, this vegan mac and cheese dish is a perfect option.

MAIN Ingredients Needed TO MAKE This Baked Mac and Cheese Recipe

  • Macaroni – Make sure to get 12 ounces. If you’re following this vegan recipe, use gluten-free noodles.

  • For the “Cheese” Sauce – you’ll need to grab a whole bunch of different ingredients to create a “cheese-like” sauce:
    • Olive oil
    • Yellow Onion
    • Russet Potatoes – make sure you peel and chop them!
    • Carrots
    • Garlic Cloves
    • Onion Powder
    • Vegetable Broth
    • Milk (non-dairy) – Use any plant based milk variety of your choice.
    • Nutritional Yeast (see tips) – This is an amazing ingredient for adding a cheesy flavor to the sauce!
    • Dijon Mustard
    • Lemon Juice
  • Breadcrumbs – My usual go-to is Panko breadcrumbs.

TIPS ON MAKING Vegan Baked Mac and Cheese

  • If you are not dairy-free, you can sub ½ cup of cheddar cheese (or any cheese you’d like) in place of nutritional yeast for a lightened up/veggie-packed mac & cheese. If using cheese, do not incorporate in the blender, instead add it into a pot with the sauce over low heat until the cheese melts, turn off the heat and add in your cooked pasta.

Vegan Baked Mac and Cheese (Gluten-Free)

0 from 0 votes
Recipe by Samantha Course: MainCuisine: AmericanDifficulty: Medium
Servings

6

servings
Prep time

15

minutes
Cooking time

45

minutes
Calories

300

kcal
Total time

1

hour 

This vegan baked mac and cheese recipe is made with a dairy-free “cheese” sauce and topped with a delicious panko breadcrumb topping that is perfect for a comforting weeknight dinner.

Ingredients

  • 12 Ounces Macaroni, I used gluten-free

  • For the “cheese” sauce:
  • 2 Tablespoons Olive Oil

  • 1 Cup Yellow Onion, diced

  • 1 Cup Russet Potatoes, peeled & chopped

  • 1 Cup Carrots, chopped

  • 3 Cloves of Garlic, minced

  • 1 Teaspoon Salt

  • ½ Teaspoon Garlic Powder

  • ½ Teaspoon Onion Powder

  • ½ Cup Vegetable Broth

  • ½ Cup Non-Dairy Milk

  • ½ Cup Nutritional Yeast, see Notes

  • 1 Teaspoon Dijon Mustard

  • 1 Tablespoon Lemon Juice (about ½ lemon)

  • For the breadcrumb topping:
  • 1 cup Panko breadcrumbs, I used gluten-free

  • 2 tablespoons olive oil

Directions

  • Preheat oven to 400° Fahrenheit and cook macaroni in a pot of salted boiling water until al dente, then drain and set aside.
  • Heat the olive oil in a large saucepan over medium heat, add in the diced onion and cook until translucent, about 5 minutes.
  • Add in the potatoes, carrots, garlic, salt, garlic powder, and onion powder – cook for another 2-3 minutes.
  • Now add in the vegetable broth, cover with a lid, reduce heat to a simmer, and cook for about 10 minutes or until the vegetables are soft.
  • Once cooked, remove from the heat and let cool for 10-15 minutes before transferring to a blender along with the dairy-free milk, nutritional yeast, Dijon mustard, and lemon juice. Blend everything until completely smooth.
  • Toss vegan “cheese” sauce with pasta then transfer to a 9×13-inch baking dish.
  • Mix together breadcrumbs and olive oil in a bowl then sprinkle over top of pasta and bake for 15-20 minutes or until golden brown and bubbly.

Recipe Video

Notes

  • Nutritional Yeast: If you are not dairy-free, you can sub ½ cup of cheddar cheese (or any cheese you’d like) in place of nutritional yeast for a lightened up/veggie-packed mac & cheese. If using cheese, do not incorporate in the blender, instead add it into a pot with the sauce over low heat until the cheese melts, turn off the heat and add in your cooked pasta.

Did you make this recipe?

Share it and tag @samdoesherbest on Instagram!

Like this recipe?

Follow us @samdoesherbest on Pinterest

MORE HEALTHY DINNER RECIPES

Drizzled with creamy maple tahini dressing, this vegan and gluten-free autumn harvest bowl uses in-season produce like apples, sweet potatoes, dried cranberries, kale and pumpkin seeds. This makes it the perfect Fall meal for when you want something fresh and delicious that can be made under 30 minutes.

Don’t you just love Fall produce? I know I do, and I try to make the most of it while it’s still in-season. This healthy vegan salad features all the best Fall ingredients. Topped with maple tahini dressing, it’s a standout salad that’s always a hit!

MAIN INGREDIENTS NEEDED TO MAKE AUTUMN HARVEST BOWL

  • Sweet Potato – High in fiber and antioxidants, it’s one of my favorite Fall root veggies.

  • Apples – Any variety works but I recommend something nice and crisp like Fiji or Honeycrisp.

  • Chickpeas – This will give you some major protein to help keep your energy levels up.

  • Kale – This is one of the most nutrient-dense foods and a key ingredient to this dish. Any variety works!

  • Dried Cranberries -Adds a tart, natural taste to the bowl. When cranberries are dried, they lose most of their vitamins, but they hold on to other nutrients such as potassium and calcium.

  • Tahini -If you’re unfamiliar with what Tahini is, it’s a smooth paste made by grinding sesame seeds. It kinda looks like peanut butter, but it’s not as sweet. The nutty flavor is strong and earthy, and can be a little bitter.

  • Maple Syrup – Maple has a distinctly sweet flavor which helps balance the earthy flavor of the tahini.

ADJUST THIS RECIPE TO YOUR DIET

  • Nut option: Replace the pumpkin seeds with walnuts.

  • Gluten: You can sub the quinoa for something like freekeh (it has notably more fiber than brown rice and even quinoa!) 

TIPS FOR MAKING THIS VEGAN AUTUMN HARVEST BOWL

  • You could use any fruits and vegetables that you have one hand – be creative!

  • Store leftovers in the fridge in a sealed container for up to 3 days.

Autumn Harvest Bowl with Maple Tahini Dressing (Vegan, Gluten-Free)

0 from 0 votes
Recipe by Samantha Course: LunchCuisine: AmericanDifficulty: Easy
Servings

1

servings
Prep time

10

minutes
Cooking time

20

minutes
Calories

300

kcal
Total time

30

minutes

Drizzled with creamy maple tahini dressing, this vegan and gluten-free autumn harvest bowl uses in-season produce like apples, sweet potatoes, dried cranberries, kale and pumpkin seeds. This makes it the perfect Fall meal for when you want something fresh and delicious that can be made under 30 minutes.

Ingredients

  • For the bowl:
  • 1 sweet potato, peeled and cut into 1-inch cubes

  • ¼ cup chickpeas, drained and rinsed

  • 2 tablespoons avocado oil

  • Salt and pepper, to taste

  • 2 cups kale, chopped

  • ½ cup quinoa, cooked

  • ½ apple, sliced

  • 2 tablespoons dried cranberries

  • 2 tablespoons pumpkin seeds, raw or roasted

  • For the tahini dressing:
  • ¼ cup tahini

  • 2 tablespoons maple syrup

  • 1 tablespoon lemon juice

  • ¼ teaspoon salt

Directions

  • Preheat oven to 425° Fahrenheit and line a baking sheet with parchment paper.
  • Place sweet potatoes and chickpeas on baking sheet then drizzle with avocado oil and sprinkle with salt and black pepper. Toss potatoes and chickpeas to coat, then roast for 20 minutes, tossing halfway through.
  • While chickpeas and potatoes roast, add all tahini dressing ingredients to a bowl and whisk together until combined.
  • Place kale in a bowl and pour in half of the tahini dressing. Toss and massage the dressing into the kale with your hands.
  • Once chickpeas and potatoes are done, assemble harvest bowl by adding remaining ingredients to the bowl with the kale then drizzling with remaining tahini dressing.

Recipe Video

Notes

  • Storage: Store leftovers in the fridge in a sealed container for up to 3 days.
  • You could use any fruits and vegetables that you have one hand – be creative!

Did you make this recipe?

Share it and tag @samdoesherbest on Instagram!

Like this recipe?

Follow us @samdoesherbest on Pinterest

OTHER EASY SALAD RECIPES YOU’LL LOVE