
With a sweet tooth like mine, it’s no surprise I love a candy bar! And I’ve certainly made it my mission to make healthier versions of all of my favorites. It started with healthy twix bars, then healthy butterfingers, healthy peanut butter cups, date caramels, and now healthy snickers! These homemade candy bars are made with just 6 simple ingredients, lightly sweetened with maple syrup, and shockingly easy to make. They’re perfect to store in the fridge or freezer whenever your sweet cravings strike (which… if you’re anything like me, they strike daily)!
What Makes This Recipe Healthy?
- Naturally sweetened with maple syrup
- Made with nutrient-dense almond flour
- No refined sugar
- Gluten-free, dairy-free, and vegan
- Healthier fats from nuts and coconut oil
- Homemade alternative to processed candy
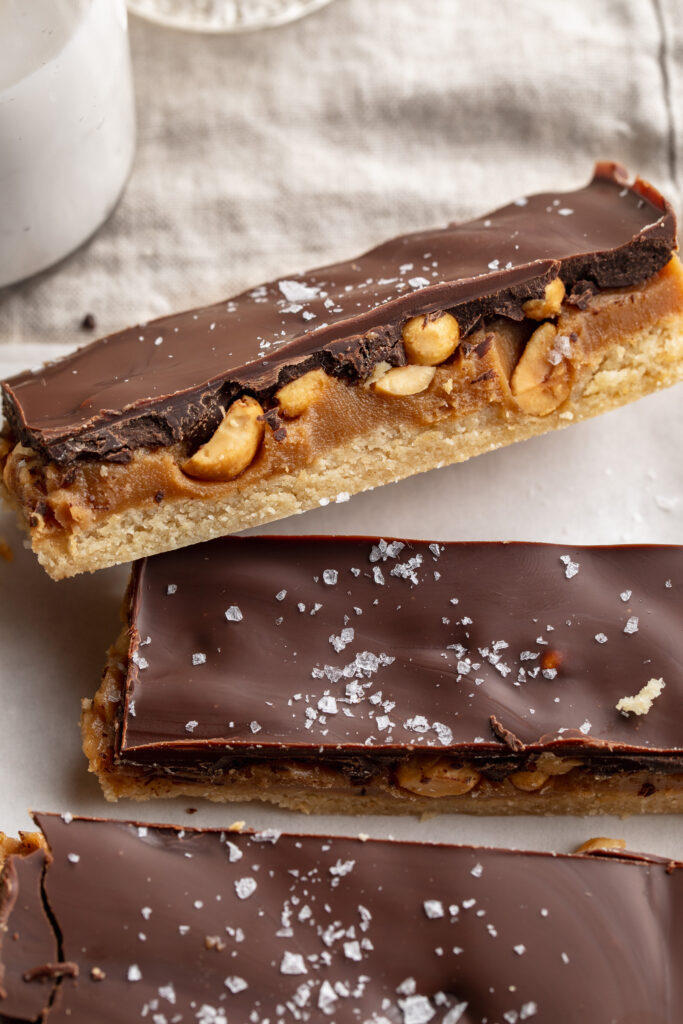
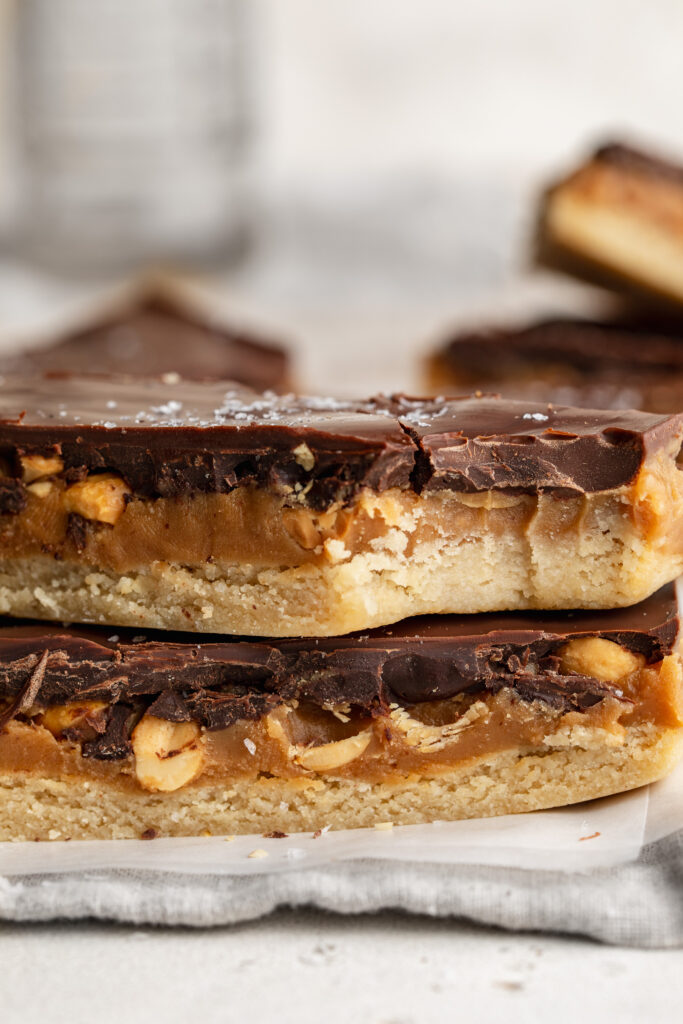
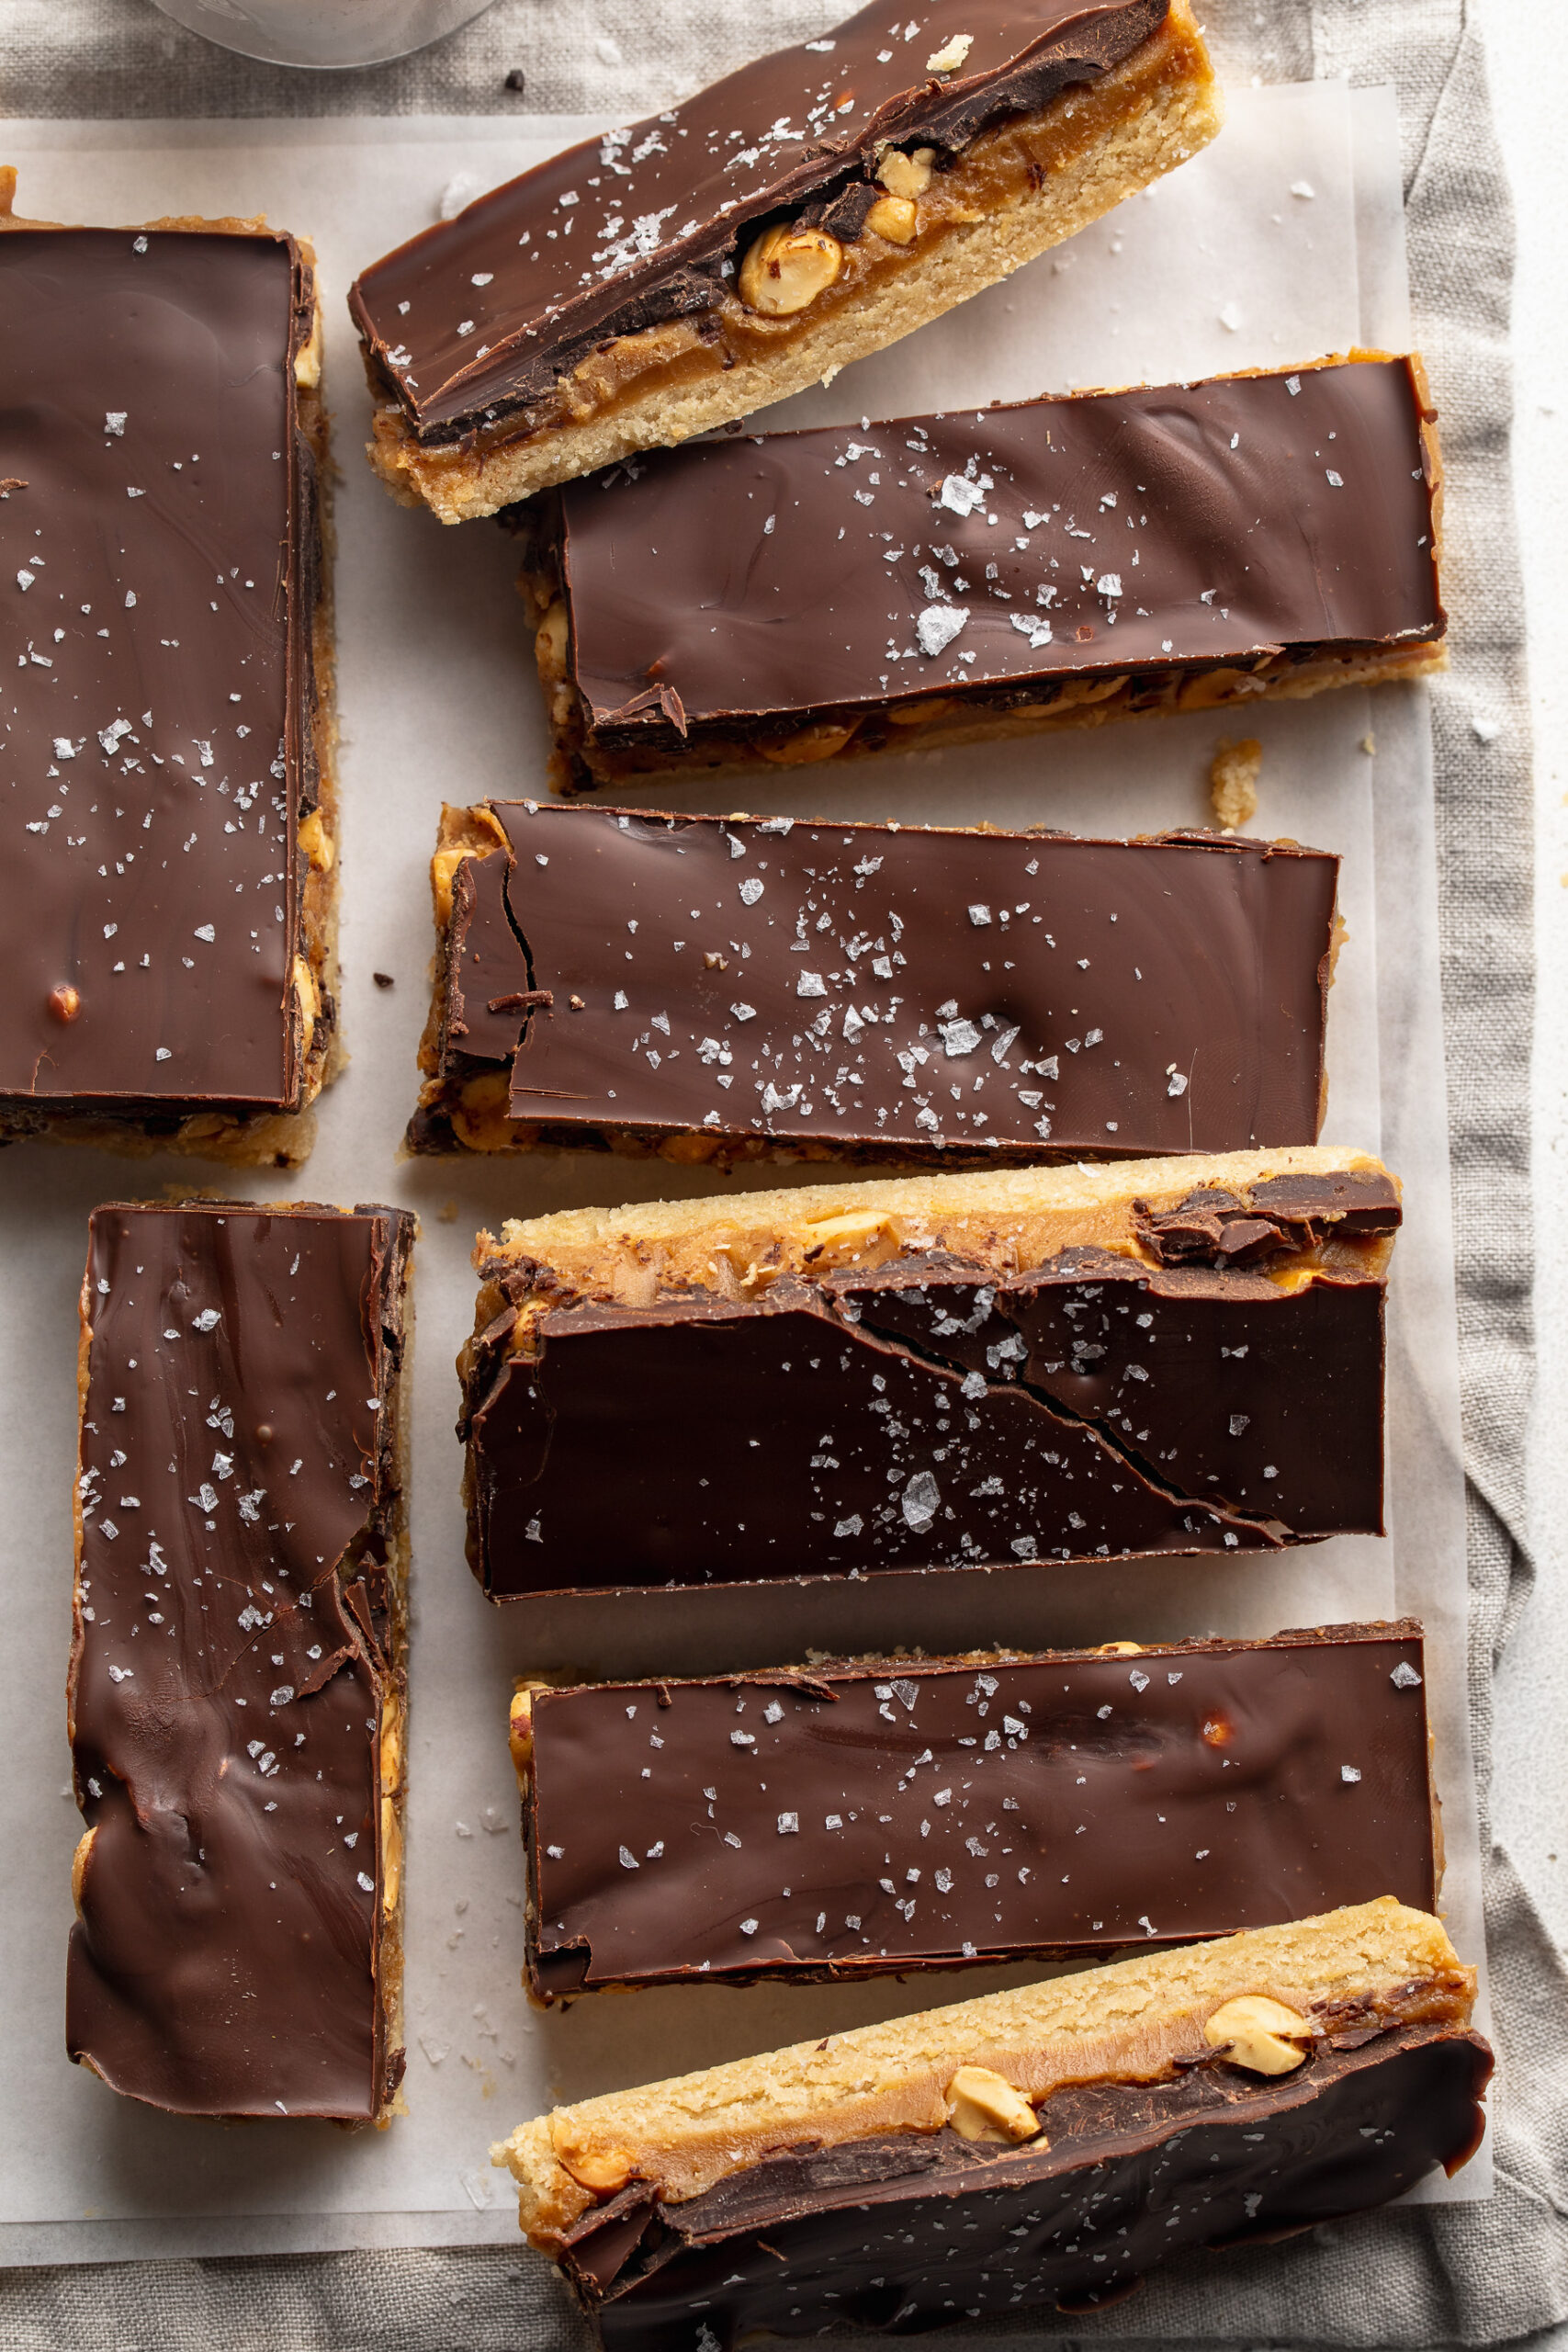
These bars give you the same layered texture and flavor as a traditional snickers, but with better ingredients!
Why You’ll Love These Healthy Snickers
These healthy snickers bars have everything you want in a dessert: sweet, salty, crunchy, and chocolatey layers that taste nostalgic but are made with better-for-you ingredients! They’re surprisingly easy to make, require no complicated baking skills, and are perfect for prepping ahead so you always have a sweet treat in the fridge or freezer. With just 6 simple ingredients, they deliver the classic candy bar experience while being gluten-free, dairy-free, vegan, and healthier than store-bought versions!
Storage Tips
Store the bars in an airtight container in the refrigerator for up to 1 week. For longer storage, freeze for up to 2 months. These bars taste amazing straight from the fridge or slightly thawed from frozen!
6-Ingredient Healthy Snickers
Equipment
- 1 large bowl
- 1 9×9-inch baking pan
- 1 small saucepan
Ingredients
For the shortbread layer:
- 2 cups almond flour
- 1/4 cup melted coconut oil
- 1/4 cup maple syrup
- 1 teaspoon vanilla extract optional
For the caramel layer:
- 3/4 cup creamy peanut butter unsweetened (cashew butter or almond butter work too!)
- 1/4 cup coconut oil
- 1/4 cup maple syrup
- 1 teaspoon vanilla extract optional
For the filling:
- 1/2 cup roasted peanuts
For the chocolate layer:
- 1 cup chocolate chips
- 1 tablespoon coconut oil
- flaky salt for topping (optional)
Instructions
- Preheat oven to 350° Fahrenheit and line a 9×9-inch baking pan with parchment paper.
- Add all shortbread ingredients to a large bowl and mix to combine. Then, transfer the crust to your prepared baking pan and press the crust down into an even layer over the base of the pan. Bake for 10minutes or until lightly golden brown around the edges. Leave the shortbread to cool for at least 10 minutes before adding the caramel.
- Make the caramel layer by adding all caramel ingredients to a small saucepan over medium-low heat. Whisk the mixture together, and continue whisking as it heats up and starts to gently bubble.After 2 minutes, remove the caramel from the heat and pour over the cooled shortbread crust, then evenly sprinkle the peanuts over the caramel.
- Transfer the baking pan to the fridge to allow the caramel to set for at least 30 minutes and up to one hour. Once the caramel is completely set and firm to the touch, make the chocolate layer.
- To make the chocolate layer, melt together the chocolate chips and coconut oil in either the microwave or over a double boiler until completely smooth. Pour the melted chocolate over the caramel and gently spread into an even layer.
- Transfer the pan back to the fridge to set one last time for about 30 minutes or until the chocolate has hardened. Remove the snickers bars from the fridge, then remove them from the pan and cut into 16 “full size”bars or 32 “mini” bars.
")


")


")


